(Deleted the same thing repeated twice.) Tag: Visual edit |
(Removing speculation, restoring the introductional paragraph to the established pattern.) |
||
| Line 16: | Line 16: | ||
|Template:Infobox = John Kramer}} |
|Template:Infobox = John Kramer}} |
||
{{Quote|Those who don't appreciate life do not deserve life.|John explains his moral beliefs to Eric Matthews|Saw II}} |
{{Quote|Those who don't appreciate life do not deserve life.|John explains his moral beliefs to Eric Matthews|Saw II}} |
||
| − | '''John Kramer''', also known as '''The Jigsaw Killer''' or simply '''Jigsaw''', was a fictional character from the [[Saw (franchise)|''Saw'' franchise]] as well as the main antagonist of the series |
+ | '''John Kramer''', also known as '''The Jigsaw Killer''' or simply '''Jigsaw''', was a fictional character from the [[Saw (franchise)|''Saw'' franchise]] as well as the main antagonist of the series. |
He was portrayed by [[Tobin Bell]] in the movies and video games and voiced by [[George Williams]] in ''[[Saw: Rebirth]]''. |
He was portrayed by [[Tobin Bell]] in the movies and video games and voiced by [[George Williams]] in ''[[Saw: Rebirth]]''. |
||
| Line 77: | Line 77: | ||
===Recruitment of Logan Nelson=== |
===Recruitment of Logan Nelson=== |
||
| − | After Logan, the only survivor of the massacre, recovered from his injuries, John convinced him to join him in his mission. Since Logan was mentally unstable due to severe PTSD caused by military operation in Fallujah and because he felt responsible for the careless mistake at the hospital, he agreed to John's offer. Furthermore, John revealed that Logan had taught him that their action must never come from anger or vengeance. |
+ | After Logan, the only survivor of the massacre, recovered from his injuries, John convinced him to join him in his mission. Since Logan was mentally unstable due to severe PTSD caused by military operation in Fallujah and because he felt responsible for the careless mistake at the hospital, he agreed to John's offer. Furthermore, John revealed that Logan had taught him that their action must never come from anger or vengeance. He promised him that they'd bring justice to those who wrongfully harmed others, telling Logan that "we'll speak for the dead", unaware of the effect this would have on Logan in years to come. (''[[Jigsaw]]'') |
===Recruitment of Mark Hoffman=== |
===Recruitment of Mark Hoffman=== |
||
| − | + | With Logan's help, John continued his deadly games and was given the nickname "Jigsaw" by the press and police, due to the puzzle piece he cut from the bodies of his victims to symbolize their failure. Shortly afterwards, someone else used his modus operandi. One of the detectives working on the Jigsaw Case was [[Mark Hoffman]], whose sister, [[Angelina Acomb]], had been murdered by her boyfriend, [[Seth Baxter]], during a domestic dispute five years earlier. Even though Seth received a life sentence, he was released from prison after five years due to a procedural error. The next month, Hoffman abducted him and put him in a self-built [[Pendulum Trap|trap]], without giving him any chance to escape. After Seth's inevitable death, Hoffman cut a puzzle piece from his skin to throw suspicion on Jigsaw. |
|
John, however, had observed Hoffman over the course of the investigation and knew that he had been responsible for the murder of Seth. Therefore, he gathered evidence against Hoffman and sent an anonymous [[Hoffman's Stalker Notes|letter]] with the message "I know who you are." to his office at the police station. When Hoffman returned to his apartment house shortly afterwards, John was already waiting for him in one of the elevators. When both of them rode the elevator, Hoffman noticed that only his own floor had been selected on the panel. Furthermore, he realized that John was holding something in his hand. However, when he slowly reached for his gun, John suddenly attacked him and injected him with an anesthetic, which caused him to pass out. Afterwards, he took the unconscious detective to his workshop, strapped him to a [[Shotgun Chair|chair]] and positioned a shotgun in front of him. The trigger of this gun was connected to his arm restraints by a cord. |
John, however, had observed Hoffman over the course of the investigation and knew that he had been responsible for the murder of Seth. Therefore, he gathered evidence against Hoffman and sent an anonymous [[Hoffman's Stalker Notes|letter]] with the message "I know who you are." to his office at the police station. When Hoffman returned to his apartment house shortly afterwards, John was already waiting for him in one of the elevators. When both of them rode the elevator, Hoffman noticed that only his own floor had been selected on the panel. Furthermore, he realized that John was holding something in his hand. However, when he slowly reached for his gun, John suddenly attacked him and injected him with an anesthetic, which caused him to pass out. Afterwards, he took the unconscious detective to his workshop, strapped him to a [[Shotgun Chair|chair]] and positioned a shotgun in front of him. The trigger of this gun was connected to his arm restraints by a cord. |
||
| Line 231: | Line 231: | ||
After the events at the Gideon Meatpacking Plant, the forensic pathologist in charge, [[Adam Heffner|Dr. Adam Heffner]], performed the autopsy on John's corpse. Upon further examination of his stomach, he found the wax-coated tape, which John had swallowed after his surgery, and called Detective Hoffman. When the latter arrived at the morgue and played the tape, it turned out to be a warning for him. John announced that the games would continue after his death and that Hoffman himself wouldn't get away untested. These threats soon came true, when Hoffman continued the work of his mentor shortly afterwards. Despite the new games and the continuously increasing casualty figures, John Kramer remained the central figure of the Jigsaw Story published by the media. (''[[Saw IV]]'', ''[[Saw V]]'', ''[[Saw VI]]'') |
After the events at the Gideon Meatpacking Plant, the forensic pathologist in charge, [[Adam Heffner|Dr. Adam Heffner]], performed the autopsy on John's corpse. Upon further examination of his stomach, he found the wax-coated tape, which John had swallowed after his surgery, and called Detective Hoffman. When the latter arrived at the morgue and played the tape, it turned out to be a warning for him. John announced that the games would continue after his death and that Hoffman himself wouldn't get away untested. These threats soon came true, when Hoffman continued the work of his mentor shortly afterwards. Despite the new games and the continuously increasing casualty figures, John Kramer remained the central figure of the Jigsaw Story published by the media. (''[[Saw IV]]'', ''[[Saw V]]'', ''[[Saw VI]]'') |
||
| − | Following his autopsy, John's body was buried in a local cemetery. Even though the murders ended a few months later. |
+ | Following his autopsy, John's body was buried in a local cemetery. Even though the murders ended a few months later. Ten years after John's death and Hoffman's disappearance, Dr. Logan Nelson eventually decided to continue John's work ten years after the latter's death. In order to confuse the police and the public and make them doubt John's death, he dug up his grave and replaced his corpse with the dead body of a murderer named [[Edgar Munsen]]. Afterwards, he buried the coffin again and took John's body with him. (''[[Jigsaw]]'') |
| − | |||
| − | Ten years after John's death and Hoffman's disappearance, Dr. Logan Nelson eventually decided to continue John's work ten years after the latter's death. In order to confuse the police and the public and make them doubt John's death, he dug up his grave and replaced his corpse with the dead body of a murderer named [[Edgar Munsen]]. Afterwards, he buried the coffin again and took John's body with him. (''[[Jigsaw]]'') |
||
==In other Media== |
==In other Media== |
||
| Line 296: | Line 294: | ||
*John's car is a 1977 Oldsmobile Ninety-Eight Luxury. |
*John's car is a 1977 Oldsmobile Ninety-Eight Luxury. |
||
*The main antagonist of the video game ''Heavy Rain'', the Origami Killer, has a similar modus operandi. He forces his victims to participate in gruesome trials, during which they have to risk their own lives and, in one instance, mutilate themselves, to save the lives of their loved ones. Furthermore, the characters Gordi and Charles Kramer share their last name with John. |
*The main antagonist of the video game ''Heavy Rain'', the Origami Killer, has a similar modus operandi. He forces his victims to participate in gruesome trials, during which they have to risk their own lives and, in one instance, mutilate themselves, to save the lives of their loved ones. Furthermore, the characters Gordi and Charles Kramer share their last name with John. |
||
| + | *Considering Logan's absence in the first seven films and the lack of information about his and John's relationship, it is likely that the two of them parted ways at some point. |
||
==Appearances and References== |
==Appearances and References== |
||
Revision as of 23:22, 15 August 2019
| “ | Those who don't appreciate life do not deserve life. | ” |
— John explains his moral beliefs to Eric Matthews[src]
| ||
John Kramer, also known as The Jigsaw Killer or simply Jigsaw, was a fictional character from the Saw franchise as well as the main antagonist of the series.
He was portrayed by Tobin Bell in the movies and video games and voiced by George Williams in Saw: Rebirth.
Biography
Early Life
John becomes acquainted with William
John Kramer was a successful civil engineer. Along with his friend and lawyer, Art Blank, he founded the Urban Renewal Group, a foundation dedicated to property development for needy people under the motto "Four walls build a home." His first building was the Gideon Meatpacking Plant at 11235 Blake Drive. At one point in his life, he married a woman named Jill Tuck and encouraged her to open the Homeward Bound Clinic, an ambulant recovery clinic for addicts under the motto "Cherish your Life." During a party at the clinic, John became acquainted with William Easton, a manager of the Umbrella Health insurance company, who sponsored the event. As they talked about their work, William presented him a mathematical formula he had developed to decide which people would get insured by Umbrella. While William was visibly proud of it, John questioned this business policy because it put William in a position where he basically decided about the life and death of his clients while ignoring their will to live, which, according to John, was the most essential human element of all. However, despite their disagreements, John himself eventually became a client of Umbrella. (Saw IV, Saw VI)
Gideon Kramer
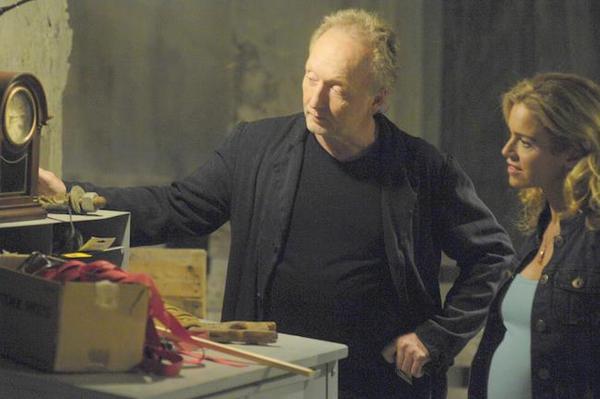
John shows the clock to Jill
Besides his professional career, Johns private life also took a happy turn when Jill got pregnant by him. John, who had already meticulously planned that their son should be born during the Chinese year of the pig, also gave him his name, Gideon, which was inspired by his first building. Sometime later, John obtained a workshop, which he proudly presented to Jill. On this occasion, he also showed her an old clock, which was a part of an important deal he had made. The clock greatly fascinated him because the clockwork still worked, even though it was almost 300 years old. As a surprise for Jill, he also presented her two homemade gifts for their son, a child's bed and a wooden ventriloquist puppet.
Despite their happiness, John soon started to worry about the safety of his wife, who continued to work at the clinic even during the late months of her pregnancy. During an incident at the clinic, John had to interrupt a brawl between two of the patients, Cecil Adams and Gus Colyard. After having been separated from each other, Cecil pulled a knife from his pocket. Therefore, John tried to calm him down. When Cecil angrily asked him for the reason of his intervention, John merely answered that Cecil would soon become a problem for everyone around him due to his reckless behavior. Even though Cecil finally put the knife away, John's worries about Jill's safety would soon turn out to be justified. (Saw IV)
Family Tragedy

John and Jill at the hospital
One night, John sat in his car and waited for Jill outside the clinic, when he became acquainted with Addison Corday, a young prostitute, who offered him her company. John, however, declined her offer and told her to go home as a beautiful girl like her shouldn't do such work. Shortly afterwards, he suddenly noticed how Cecil stormed out of the clinic and ran away after he had tried to rob Jill. John immediately entered the building, where he found Jill squatting on the floor after Cecil had accidentally slammed a doorknob into her stomach. Even though he took Jill to the Angel of Mercy Hospital, where one of the nurses, Deborah, immediately took care of them, the doctors weren't able to save the life of their unborn child. One of them, Dr. Steve, eventually delivered John the sad news. While John sat at Jill's bed and held her hand, she told him that she only wanted to help the people at her clinic. John, however, bitterly answered that they could only safe themselves. (Saw IV)
Professional Dispute

John in his workshop
After Gideon's death, John suffered from severe depression, which ultimately caused him to withdraw from his wife as well as the Urban Renewal Group. When Art Blank asked Jill about John's whereabouts, she helped him to look for her husband until they finally found him in his workshop. As she saw him sitting on a chair in a corner, she asked him not to get angry for bringing Art to the workshop. Art asked him about his condition and offered his condolences to him. However, he also tried to convince John to continue his work for the Urban Renewal Group because 40 needy families were already waiting to move into the houses they were working on. John, who was angry about his visit, told him to leave. After initially hesitating, Art left the workshop and asked John to call him once he felt better. Moments later, Jill left as well and reminded John that she suffered from the loss of Gideon just as much as he did. His blunted affect eventually led to his divorce from Jill. Furthermore, he asked her not to come back to him again. (Saw IV)
Terminal Diagnosis
Shortly afterwards, John's physical condition worsened dramatically. When he went to the Angel of Mercy Hospital, the oncologist Dr. Lawrence Gordon diagnosed him with colon cancer and a frontal lobe tumor. However, during an earlier visit at the hospital, one of the residents, Dr. Logan Nelson made a careless mistake and inadvertently mixed up John's x-rays with those of another patient, Alex Rubinstein. Therefore, his cancer had further evolved and was no longer treatable at the time of its diagnosis. Nonetheless, John underwent a chemotherapy, an external beam radiation therapy and further examination by Dr. Gordon and Dr. Lynn Denlon. During this time, he received broad support from his helpful neighbors, Anna and Matthew. However, as expected, the treatments and therapies remained unsuccessful and John's health further declined. (Saw, Saw III, Jigsaw)


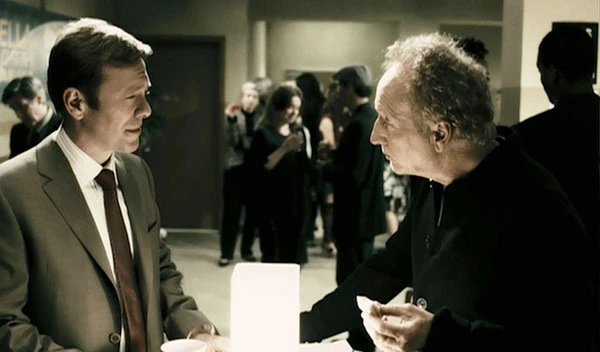
John argues with William
Despite the bleak prospects, John eventually learned about an experimental genetic therapy developed by a doctor in Norway, who believed that John was a promising candidate for a new test series. However, when John asked his insurance company, Umbrella Health, to bear the treatment cost, all of his requests were repeatedly declined. Therefore, he went to William Easton's office to talk to him in person, hoping for the latter's understanding. While William initially had a sympathetic ear for him, he didn't change his decision and made it abundantly clear that it wasn't financially feasible for Umbrella to accept his motion, mainly due to his age and the small chances of recovery. Furthermore, he explained to him that he'd lose his insurance protection entirely if he decided for the experimental therapy nonetheless. Angered by this, John asked him if he thought that the living would have the ultimate judgment over him as the dead would have no claim over his soul, and indirectly threatened him by stating that he may be mistaken in that regard. Then, he threw the printout of his request in the garbage can and left William's office. (Saw VI)
Becoming Jigsaw
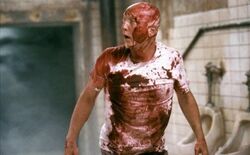
Utterly depressed, John ultimately tried to end his life by driving his car off a cliff. Contrary to his expectations, he survived the crash. At this moment, he decided that he wanted to live. Severely injured, he crawled out of the wreck and pulled a jagged piece of metal out of his body. Thereby, he realized that he had only learned to actually cherish his life when his death had been imminent. Because of this, he decided to spent the remaining time of his life on testing other peoples' will to live, in order to convince them, to value their lives and the lives of those around them. However, his newly discovered will to live wasn't able to bind him and Jill together again and therefore, he continued to ignore her attempts to contact him. (Saw II, Saw VI)
The First Game


John abducts Cecil Adams
At this time, John began to intensively focus on the lives of other people and chose Cecil Adams as his first test subject. After he observed him for some time and thereby discovered that Cecil hadn't changed his reckless behavior in the slightest way, John felt vindicated in his plan. He spent much time on the observation of Cecil and emotionally prepared himself for the first part of his self-imposed mission. When the time had come, he followed Cecil to a Chinese street festival in celebration of the year of the pig. Upon doing so, he witnessed how Cecil talked to a saleswoman. After distracting her, he quickly stole one of the small terracotta figures from her booth and went away. Meanwhile, John grabbed a pig mask to cover his face as well a second mask, which he filled with a cloth drenched in chloroform. Then, he pursued Cecil and sedated him in the crowd without anyone noticing him. After that, he took him to his workshop and strapped him to a chair. Thereby, two blades, which were attached to the ends of the armrests, impaled his wrists.

John reveals the knives to Cecil
When Cecil woke up and saw the blades, he immediately panicked. As he recognized John, he begged him to let him go and asked for forgiveness for Gideon's death. John claimed that he had already forgiven him and only put him in this situation in order to help him to change his life. After a brief discussion, he revealed a vicious device to his prisoner, which consisted of eight sharp knives. When Cecil asked him what it was, John explained that it was a tool, which could save his life. After that, he bolted it to the chair, so the eight horizontally arranged knives were positioned right in front of his face. While doing so, he confronted Cecil with his crimes and further explained that he had to press his face into the knives in order to free himself from his arm and leg restraints, as otherwise, he'd simply bleed to death. Cecil insulted him and desperately screamed for help. However, when John showed no mercy, he pressed his face into the blades while screaming in agony. In the end, the chair suddenly collapsed and allowed him to escape. He immediately approached John and tried to strike him dead with a broken off piece of the chair. John, however, evaded his attack effortlessly, which caused Cecil to fall into a cage filled with razor wire, where he ultimately bled to death. After his death, John cut a jigsaw piece from his skin to symbolize Cecil's lacking survival instinct. Furthermore, he took the stolen soldier figure from his and kept it as a memento. Afterwards, he disposed of Cecil's corpse.

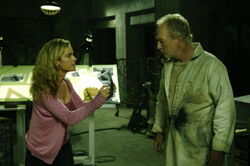
Jill confronts John with Cecil's photos
Soon afterwards, the body was discovered by the homicide division of the Metropolitan Police Department. When Jill learned of Cecil's death from a newspaper, she feared that John might have had something to do with it and went to his workshop to call him out on her suspicion. As she believed to be alone, she searched the rooms and thereby found numerous photos of Cecil on a table. In the back part of the workshop, she also discovered a large, elongated construction, which was hidden under a large cloth. As she was about to pull it away to take a look at the construction, John suddenly appeared. He angrily grabbed her arm and tried to drag her out of the room, yelling at her for coming back to the workshop. Jill, however, broke free and confronted him with the photos and the newspaper article about Cecil's death. When she asked him what he had done to him, John told her that he had taught Cecil not to take his life for granted. Shocked by the fact that John was indeed responsible for his death, she asked him what had happened to him. Therefore, he grabbed a crowbar and angrily smashed the ancient clock, before he managed to calm down again. Afterwards, he told her once more to leave, which she subsequently did. (Saw IV)
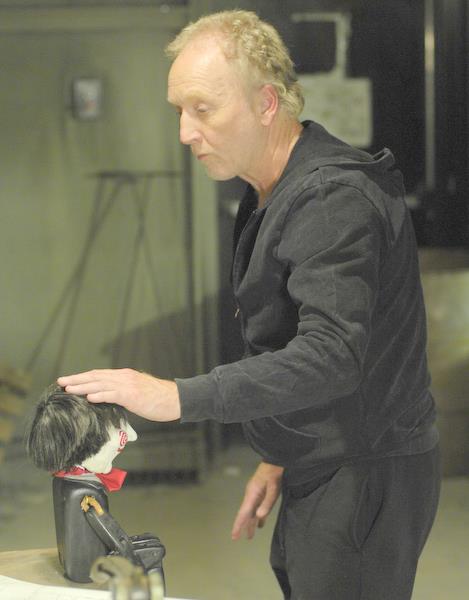
The Barn
Still believing in his mission, John planned more games and therefore created a bigger, sinister, mechanical version of the puppet, which he originally built as a gift for Gideon. He wanted to use it to speak to his test subjects and to deliver them the instructions for their games. While he was looking for new test subjects, he soon realized how the relationship between his neighbor, Anna, and her husband, Matthew, went sour, especially after the birth of their child. One night, while John worked in his house, he heard Anna next door, as she desperately yelled at her crying baby. Later that night, Matthew was arrested by the police after he supposedly rolled over his baby while sleeping and thereby accidentally suffocated his child. As he blamed himself for his child's death, he was committed to a psychiatric facility, where he eventually hung himself in his cell. John, however, soon realized that Anna had smothered her baby in a fit of rage and then put her dead child next to her sleeping husband in order divert suspicion from herself.
Therefore, he chose Anna as a test subject for his next game. Besides her, four other people were forced to participate in this test. The first one of them was Logan Nelson, who was responsible for the late diagnosis of John's cancer. Another participant of the game was Carly, a thief, who had inadvertently caused the death of an asthmatic woman by stealing her purse, which contained her inhaler. The next test subject was Mitch, a young man, who once sold a motorcycle with faulty brakes to John's nephew, which caused the latter's death in a car accident. The last victim was a man named Ryan. In his youth, his reckless behavior had caused a fatal car accident, which resulted in the death of two of his friends as well as the driver of another car. After that, Ryan had put the blame on his deceased best friend. Their game took place in a barn located on a Tuck's Pig Farm, which belonged to Jill's family, but had been closed down after an outbreak of Aujeszky's disease.
After finishing all of his preparations, John abducted his five victims and took them to a room inside the barn, where the game was supposed to begin. Inside the room, he fettered each of them with a metallic neck shackle, which were attached to long chains leading to five doors on the other side of the room. Additionally, he put buckets with eye slits on their heads, which were attached to their shackled by two laterally attached metal pins. Finally, he injected Carly with a deadly poison, before he left the room through a secret door.

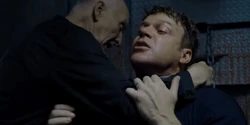
John saves Logan Nelson
Shortly afterwards, the prisoners were awakened by an audible alarm and the lights, which turned on around them. They immediately started to panic, screamed for help and tried to remove their shackles. These attempts, however, were interrupted by John, who spoke to them over a loudspeaker. He accused all of them of having harmed other people with their lies and demanded that they had to confess their sins in order to save themselves. Furthermore, he explained that they all had to offer a sacrifice of blood if they wanted to get out of the room alive. After his speech, the chains were tightened and the prisoners were dragged towards the five doors. Attached to each of these doors were several rotating circular saw blades in various sizes. After they initially tried to fight back by brute force, Anna finally realized that each of them had to sacrifice a small amount of blood and therefore reluctantly cut her arm on one of the blades. Thereby, she only suffered a superficial slash wound and was able to take the bucket from her head. The others emulated her deeds and cut saved themselves. After that, the doors were opened and they were dragged to the next room by their chains. Logan, however, who only woke up near the end of the game, couldn't react fast enough and was pulled into the blades on his back. As he didn't want to let him die due to an error, John deactivated the blades and left his hideout. Unnoticed by the other prisoners, he removed Logan's bucket and freed him from his shackle. While the others faced their test, John heaved Logan's unconscious body on a gurney, treated the severe cuts on his back and sutured his wounds.

John prevents Anna's escape
Meanwhile, the game went on and claimed the lives of Carly and Mitch, while Ryan lost his right light in another trap. Eventually, Anna, who was still mostly unharmed, decided to leave Ryan behind and broke the rules by trying to escape through a door marked with the inscription "No Exit." However, as she crawled through the narrow crack of the door, John was already waiting for her outside. While covering his face with a pig mask, he injected her with an anesthetic. Afterwards, he also sedated Ryan and took the two of them to a milking room. There, he chained them by their legs to metal bars on the opposite sides of the room. After doing so, he gave his attention to a construction in the middle of the room, which he used to correctly adjust a mechanical mounting device, which was going to be a part of Anna and Ryan's final test.

John prepares the final test
When the two of them woke up shortly afterwards, Anna was shocked to see John. She and Ryan begged for their lives, whereas John only berated them for their sins, which had brought them in this situation. While he confronted Ryan with the deadly car crash and Anna with the murder of her baby, he finished his work on the contraption in the middle of the room and told his prisoners that they did things "backwards." Now, he'd give them the chance to "turn it all around." Afterwards, he took out a shotgun and showed them a shell, which he described as their "key to freedom." After loading the gun, he placed it on the mounting device and left the room along with his pig mask and the adjusting machine, before he closed the door and left the two of them in the milking room.
Soon afterwards, he returned and saw that Anna and Ryan had failed their test and died in the process. As she was convinced that she had to kill Ryan in order to save herself, Anna had tried to shoot him. However, the shotgun had been manipulated, causing it to shoot backwards and kill Anna in the process. Thereby, the keys to their shackles, which had been hidden inside the shell, were destroyed. Without any hope of survival, Ryan eventually succumbed to the severe loss of blood caused by the amputation of his leg. When the game was over, John put their corpses next to each other on the floor and left them in the room. (Jigsaw)
Recruitment of Logan Nelson
After Logan, the only survivor of the massacre, recovered from his injuries, John convinced him to join him in his mission. Since Logan was mentally unstable due to severe PTSD caused by military operation in Fallujah and because he felt responsible for the careless mistake at the hospital, he agreed to John's offer. Furthermore, John revealed that Logan had taught him that their action must never come from anger or vengeance. He promised him that they'd bring justice to those who wrongfully harmed others, telling Logan that "we'll speak for the dead", unaware of the effect this would have on Logan in years to come. (Jigsaw)
Recruitment of Mark Hoffman
With Logan's help, John continued his deadly games and was given the nickname "Jigsaw" by the press and police, due to the puzzle piece he cut from the bodies of his victims to symbolize their failure. Shortly afterwards, someone else used his modus operandi. One of the detectives working on the Jigsaw Case was Mark Hoffman, whose sister, Angelina Acomb, had been murdered by her boyfriend, Seth Baxter, during a domestic dispute five years earlier. Even though Seth received a life sentence, he was released from prison after five years due to a procedural error. The next month, Hoffman abducted him and put him in a self-built trap, without giving him any chance to escape. After Seth's inevitable death, Hoffman cut a puzzle piece from his skin to throw suspicion on Jigsaw.
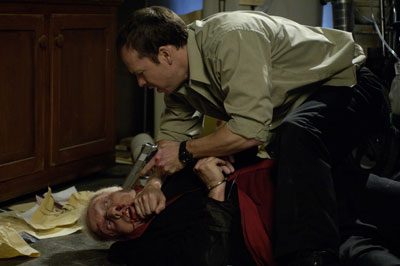
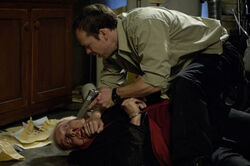
John, however, had observed Hoffman over the course of the investigation and knew that he had been responsible for the murder of Seth. Therefore, he gathered evidence against Hoffman and sent an anonymous letter with the message "I know who you are." to his office at the police station. When Hoffman returned to his apartment house shortly afterwards, John was already waiting for him in one of the elevators. When both of them rode the elevator, Hoffman noticed that only his own floor had been selected on the panel. Furthermore, he realized that John was holding something in his hand. However, when he slowly reached for his gun, John suddenly attacked him and injected him with an anesthetic, which caused him to pass out. Afterwards, he took the unconscious detective to his workshop, strapped him to a chair and positioned a shotgun in front of him. The trigger of this gun was connected to his arm restraints by a cord.
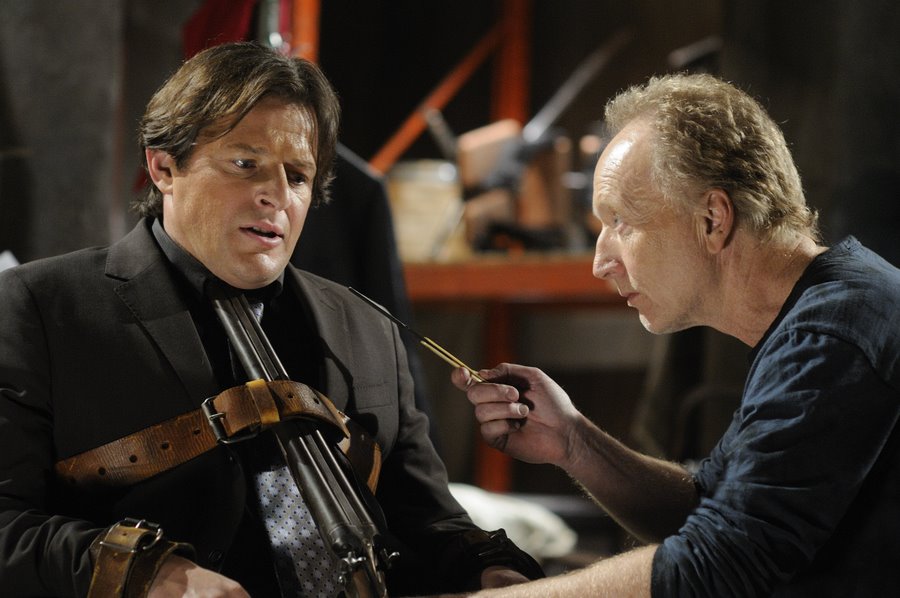

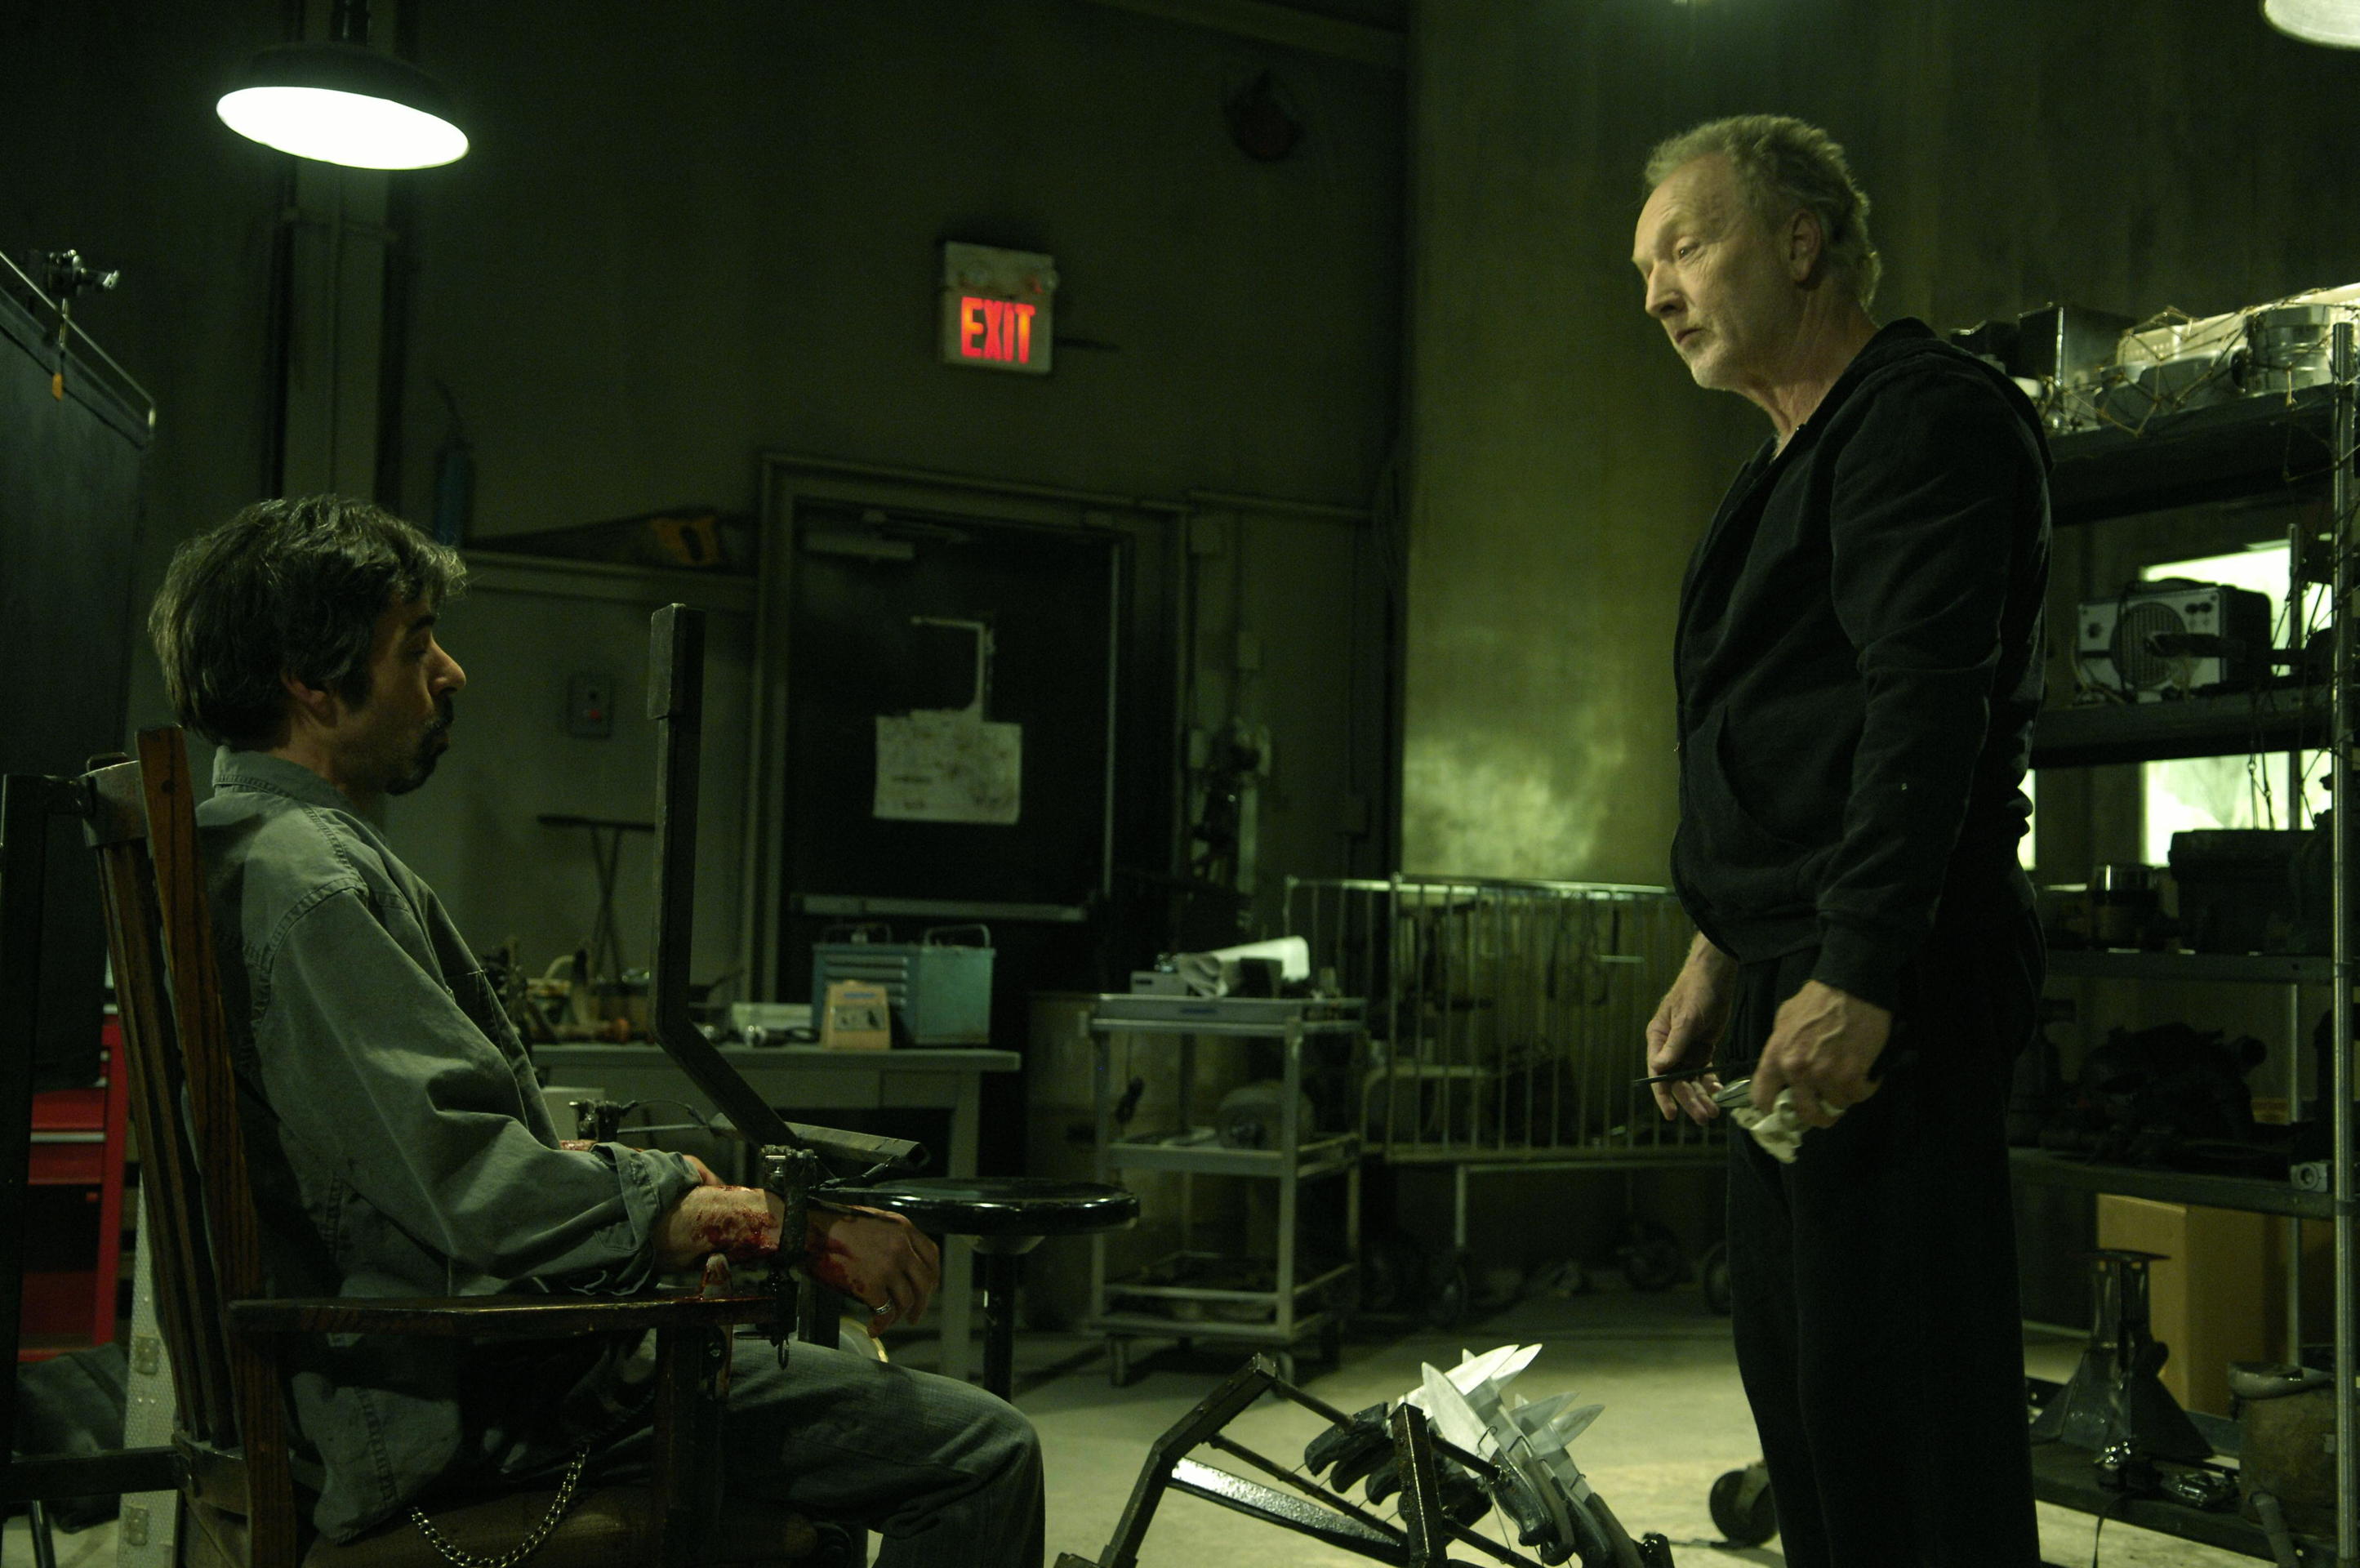
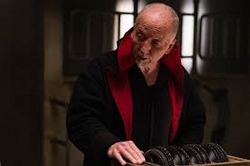
John gives Hoffman his ultimatum
When Hoffman woke up, John immediately confronted him with a newspaper article, which accused Jigsaw of being responsible for the murder of Seth Baxter, which John described as a distasteful imitation and thereby revealed himself as the actual Jigsaw Killer. Hoffman tried to free himself, but stopped when John put a mirror in front of him and showed him the cord connected to the trigger. During a discussion, John spoke about the death of Hoffman's sister, his drinking problem caused by his depression and his revenge on Seth. Hoffman insisted that Seth didn't deserve a chance to live, which angered John, who saw the act of killing as something horrible and distasteful and therefore claimed that he always gave his test subjects a chance. Then, he put his finger on the trigger and Hoffman prepared to die. However, when John finally pulled the trigger, he realized that the gun was empty. Moments later, John freed him from his restraints and made him an offer. Hoffman could either help him to set up his future games and thereby learn his philosophy of justice or John would publish the evidence for his murder of Seth. Hoffman answered that he could also kill him as nobody would believe John more than him. John, however, remained unimpressed and asked him if he really wanted to take the risk of ruining his own life in order to protect the legal system, which had caused Seth's release from prison. Thereby, he finally managed to convince him to become his accomplice. (Saw V)
Paul Leahy's Test
Their first test subject was Paul Leahy, a patient at the Homeward Bound Clinic, who unsuccessfully tried to kill himself by cutting his wrists. The next month, his game was set to play out. Therefore, John and Hoffman prepared a deadly scenario in a basement. Within two hours, Paul had to find a way from the back part of the room to the exit door on the other side, while almost the entire room was filled with sharp razor wire. When they found Paul at night, he sat in his car and once again tried to kill himself by cutting his wrists with a shard from a broken bottle. However, they stopped him from doing so and attacked him, while covering their faces with pig masks. After a brutal fight, during which they were almost defeated by Paul, John finally managed to sedate him with an anesthetic. (Saw, Saw IV, Saw V)
Hoffman warns John of Detective Tapp
Afterwards, they took him to the basement where they had set up the game. After Hoffman undressed him and took him to the back part of the razor wire cage, John started the timer for the game. Then, they went into hiding next door. Through a peephole in the door they were able to observe the game. On this occasion, Hoffman admitted that he didn't expect the feeling of remorse. John answered that it was important and essential to abandon all of their personal emotions for the sake of their work. While Paul fought for his life, Hoffman warned John of one of his colleagues, Detective David Tapp, who was getting closer to arrest him. Therefore, John, who already knew about Tapp, gave him a penlight, which he had stolen from Dr. Gordon, and told Hoffman to throw suspicion on the doctor. When Paul's game was over and he had succumbed to his injuries caused by the razor wire, John cut a jigsaw piece from his skin and then left the basement along with his accomplice. (Saw, Saw V)
Amanda Young's Test


John prepares Amanda's game
A few weeks later, Hoffman prepared another game, while he was in his new hideout, an abandoned mannequin factory at 213 Stygian Street. Two more patients of the Homeward Bound Clinic, Amanda Young and Donnie Greco, were in the focus of this new game. After abducting them, he took both of them to an abandoned warehouse. There, he strapped Amanda to a chair and put a mechanical contraption on her head, which he had previously built on the pig farm with Logan's assistance. This device, which was equipped with a timer, was hooked into Amanda's upper and lower jaw. Once the game began, she had 60 seconds to find the key for the padlock securing the trap. Otherwise, the device would tear her face apart when the time was over and kill her in the process. The key was in the stomach of Donnie, who was almost completely paralyzed by John with an opiate overdose. As a final clue, he painted a black question mark on Donnie's stomach and then left the hall. When Amanda finally woke up, she received her instructions from a video, which showed John's mechanical puppet. Despite her panic and the small time limit, Amanda killed Donnie and managed to save herself in time. (Saw, Saw III, Saw IV)
Recruitment of Amanda Young


John discipulizes Amanda
Shortly afterwards, Hoffman set up another game to test a man named Mark Wilson, who claimed to be seriously sick, while in fact he was perfectly healthy. After Mark burned alive during his game, Hoffman left Dr. Gordon's penlight at the crime scene. Meanwhile, John returned to the Angel of Mercy Hospital for a routine examination.
The day after Mark's death, Lawrence introduced him to his students, including Carla, but was interrupted by Zep Hindle, one of the orderlies, who reminded him that John was a very interesting person, because Lawrence continuously only called him "the patient." Obviously annoyed by this interruption, Lawrence sarcastically thanked Zep for the information. As Zep left and Lawrence was about to continue his medical round, he was once again interrupted and called to his office, where Detective Tapp and Detective Steven Sing were waiting for him. After Mark's body had been found and the fingerprints on the penlight had been identified as those of Lawrence Gordon, they took him to the police station for further interrogation. At the same time, John left the hospital and broke into the apartment of Amanda, who made her testimony the same day. When she returned home, John told her not to be afraid of him and that her game had just begun. As she was convinced that John had actually helped her, she agreed to become his accomplice. During a form of baptism ceremony, John converted her to his beliefs and gave her an envelope, which contained the instructions for their first game. (Saw, Saw III, Saw V)
Afterwards, he visited his ex-wife, Jill, at her clinic to talk about her work. As before, he tried to convince her that her work was all in vain because patients only used her and her good nature in order to avoid their prison sentences. In fact, he also thought that he methadone therapy was pointless as it didn't make a difference whether her patients were addicted to their own drugs or the methadone from the clinic. As Jill tried to explain him that recovery was a difficult process, John angrily yelled at her and told her that nobody actually valued their lives until they were confronted with their own impending death. However, he managed to calm down and tried to convince her that he was doing the right thing by presenting her the seemingly purified Amanda. He hugged her and reminded her of how she had given up on Amanda and called her a "lost soul." Despite this, Amanda had overcome her drug addiction and claimed that this wouldn't have been possible without John's help. (Saw VI)
Evading Apprehension
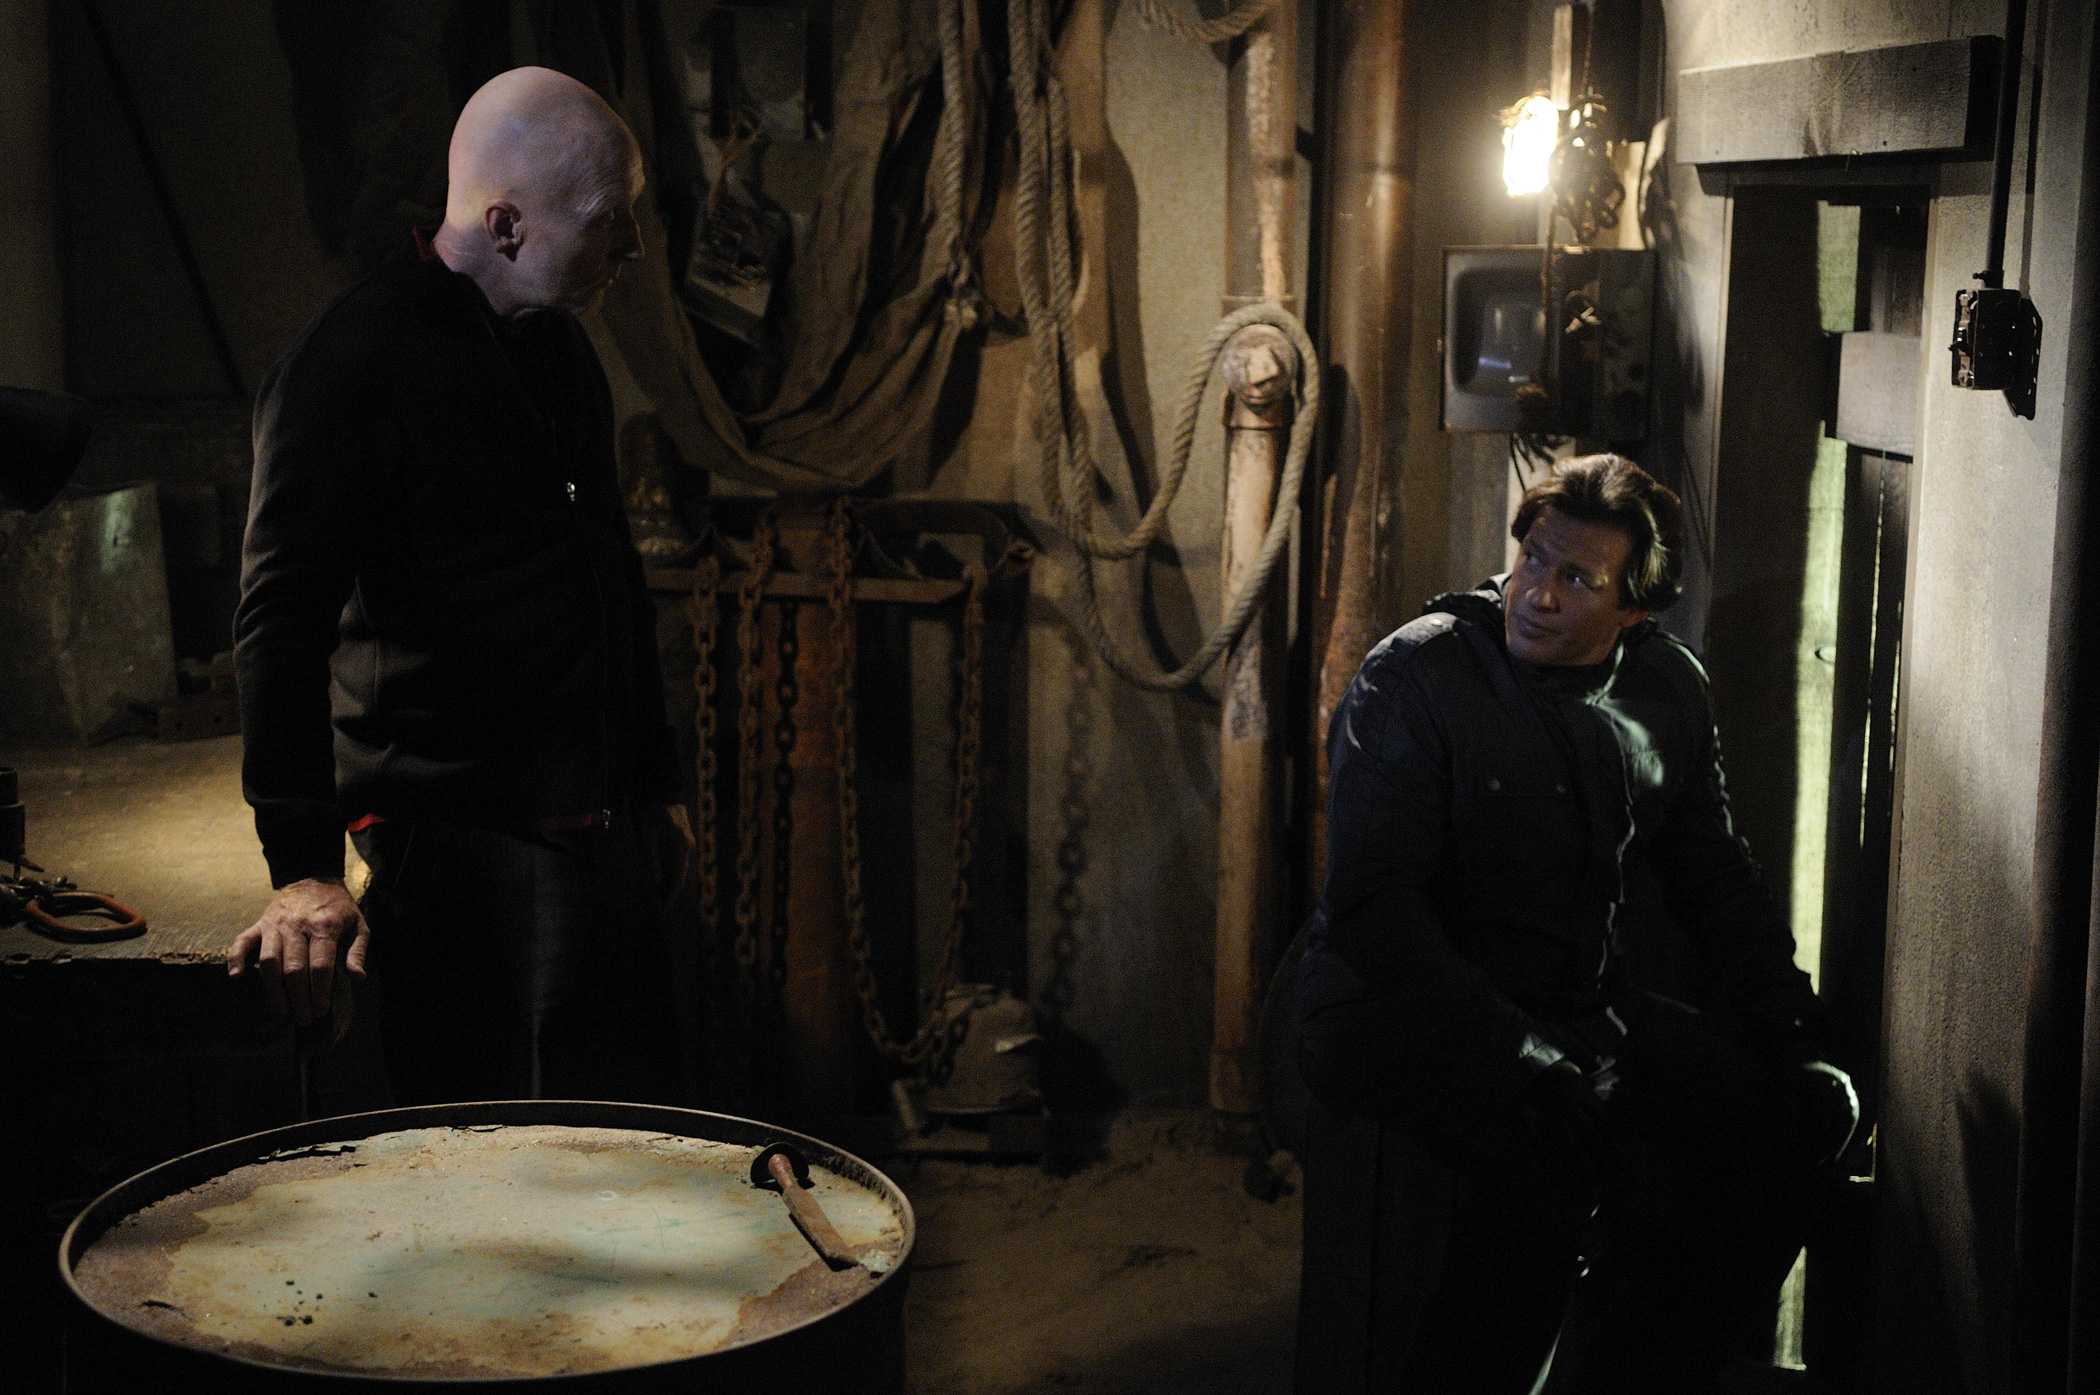
John returns to his hideout
Upon continuing his games, John chose a man named Jeff Ridenhour a his next test subject. After abducting him, he took him to the mannequin factory and strapped him to a mechanical chair, before he left his hideout again. Shortly afterwards, the detectives Tapp and Sing managed to find and break into the factory. However, when they heard the elevator, they went into hiding and observed him as he approached Jeff and told him that he wanted to use him to test a bigger project. At this moment, they left their hiding spot and aimed their weapons at John. John reacted quickly and activated the mechanical chair by stepping on a pressure button on the floor. Thereby, two drills started to approach Jeff's head from both sides. While Sing desperately tried to deactivate the trap, Tapp held John at gunpoint. Even though John told them that the key to the trap was in a box, Sing wasn't able to find the right one in time as there were dozens of keys attached to the key ring. In the last nick of time, Sing saved Jeff nonetheless by shooting the drills. This, however, distracted Tapp and gave John the opportunity to slash his throat with a hidden blade, before he ran away. Sing pursued him and shot him in a hallway, causing him to collapse. Thinking that he was dead, Sing approached his body and thereby triggered another trap, which caused him to be killed by four shotguns attached the a ceiling beam. Afterwards, John, who wore some kind of bulletproof body armor under his cloak, left the factory without any noteworthy injuries. (Saw)
Adam Stanheight and Lawrence Gordon's Test
Five months later, John decided that it was time to test Dr. Lawrence Gordon in another one of his deadly games. While observing him, he became aware of a young photographer named Adam Stanheight, who observed Gordon as well. After the death of Detective Sing, Tapp had suffered a mental breakdown and was discharged from the police force. However, as he was still convinced that Gordon was the Jigsaw Killer, he hired Adam for his observation. Therefore, John decided that Adam should also participate in this game, which was going to take place in a dilapidated bathroom located in an underground tunnel network. (Saw)

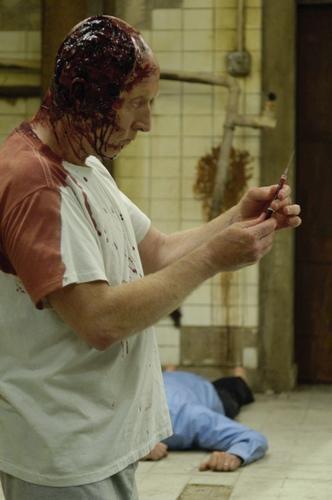
John injects himself with a muscle relaxant
Shortly after the unconscious doctor had already been chained to a pipe in the corner of the bathroom, Amanda arrived with Adam, who she had abducted from his apartment. As she entered the room, John stood in front of a mirror and applied fake blood to his head, which made him look as if he had shot himself in the head. When he ordered Amanda to shackle Adam to a pipe in the back corner of the room by his left leg, Amanda removed his belt and shoes and shackled him with a metal brace. After that, she heaved him into a bathtub filled with water and threw the key to his chain onto his stomach. Meanwhile, John poured a bucket of fake blood on the floor in the middle of the room and injected himself with a medicament that slowed his heart rate and relaxed his muscles. Once they had finished all of their preparations, Amanda took Adams shoes and belt as well as the things they had used to set up the game, and was about to leave. John, however, stayed in the room and lay down in the puddle of blood with a tape recorder in one hand and a revolver in the other, which fully gave him the appearance of a suicide victim. Then, Amanda turned off the light, left the room and closed the heavy sliding door behind her. (Saw, Saw III)
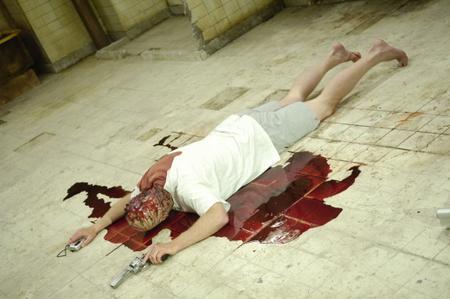

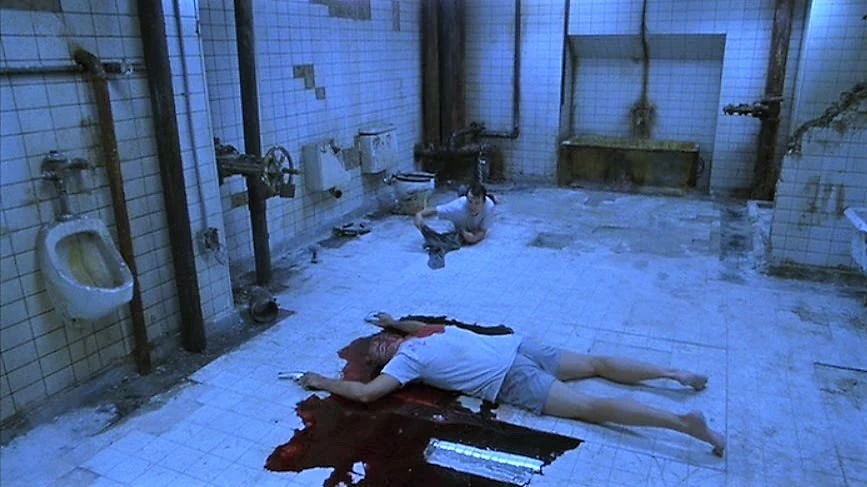
John poses as a suicide victim
Shortly afterwards, Adam woke up and gasped for breath after he had completely sunken into the water while he was unconscious. When he scrambled from the bathtub, he inadvertently pulled the plug and didn't notice how the key, which Amanda had left in the bathtub, went down the drain. He immediately started to panic and screamed for help, when he suddenly heard a man's voice in the darkness. When this man eventually found a switch and turned on the light, Adam realized that it was Lawrence Gordon, who was chained to a metal pipe in the opposite corner of the room just like him. However, he pretended not to recognize his cellmate. Instead, he further panicked when he saw the body of John Kramer, which was covered in blood. Gordon, however, managed to calm him down. After introducing himself, he asked Adam whether he knew the dead man or remembered how he ended up in the bathroom, which he denied. Despite his fear and distrust, he finally told Gordon his name as well. Meanwhile, the latter pointed out that their abductor could have killed them already and concluded that he or she wanted something from them. As he further examined the room, he noticed a clock on the wall, which was factory-fresh, as opposed to the environment, and thereby concluded that their abductor wanted them to know what time it was.
Adam tries to obtain John's recorder
While Gordon tried to open the sliding door, which was within his reach, Adam suddenly found a white envelope with his name on it in his pants pocket. It included a cassette with the message "Play me" written on it. Gordon also found such an envelope in his pocket. Besides another cassette, it also included a key as well as a single bullet. He immediately tried to use the key on his shackle. As this attempt remained unsuccessful, he threw the key to Adam, who couldn't free himself either. Moments later, Adam noticed the tape recorder in John's hand. However, as it was out of reach, he tried to use his shirt to get possession of it. When this didn't work, he eventually tied the plug from the bathtub to one of the sleeves. After some more attempts, he finally managed to obtain the recorder when the plug got caught up in a loop attached to it.
When he put the tape into the recorder and started the recording, a distorted voice gave him a gruesome ultimatum. His abductor mockingly confronted him with his voyeurism and his work, which basically consisted of spying on other people. On this day, he would watch himself die, unless he did something about it. Once the tape was over, Gordon asked him for the recorder so he could listen to his own recording. Out of fear that he could destroy the recorder by throwing it across the room, Adam refused and demanded the tape from Gordon, which Gordon eventually threw to him after briefly protesting against it. His tape had been recorded by the same distorted voice, which confronted him with the fact that he gave people the news of their impending death on every day of his working life. Now it was his task to cause the death of another human himself. The voice demanded that he killed Adam by 6 o'clock. Otherwise, his daughter, Diana, and his wife, Alison, would be killed, while he himself would be left to die in the bathroom. Furthermore, the voice told him that there were numerous clues and useful tools hidden in the bathroom, which could help him to solve his task. One of these clues was a cryptic message, according to which an "X marked the spot for the treasure." Additionally, the voice told him about the seemingly dead John Kramer, pointing out that the only thing left to do, when there was that much poison in one's blood, was to shoot oneself.
Once the recording ended, Gordon once again demanded the recorder from Adam, which the latter now gave him without hesitation. Upon repeatedly winding the tape back and forwards, he discovered one final clue. At the end of the recording, he heard the voice whispering the words "Follow your heart." Seconds later, he noticed a heart drawn on the water tank of a toilet right next to Adam. Despite his disgust, Adam searched the dirty toilet, albeit unsuccessful. Just when he searched the tank, he found a black plastic back inside, which contained two hacksaws as well as his photos of Gordon. Adam immediately tried to saw through his chain, while he threw the other saw to the doctor. Unnoticed by his fellow prisoner, he threw the bag with the photos into the empty bathtub. As both of them tried to cut through their chains, Adams saw broke after a few seconds. He angrily threw it towards one the mirrors on the wall, causing a single shard to break out. When Gordon's attempts to free himself remained unsuccessful as well, the latter eventually came to the conclusion that the saws weren't meant to cut through their chains, but rather to cut off their feet. Thereby, he realized that they had been abducted by the Jigsaw Killer and told Adam, how Jigsaw had tried to frame him for one of his murders when he had left Gordon's penlight at a crime scene five months earlier.
Even though he was shocked by the things Gordon told him about Jigsaw, Adam distrust grew further and for a moment even lead him to the conviction that Gordon himself had something to do with his abduction. In a fit of rage, he grabbed the shard from the mirror and threatened to kill Gordon if he didn't tell him what was going on around them. However, he stopped when he realized that the shard belonged to a one-way mirror. With pieces from broken tiles, he smashed the mirror, causing the glass to break entirely. In doing so, he discovered a camera, which was positioned behind the mirror. To his anger, it was protected by a second, shatterproof glass pane. Gordon tried to convince him to calm down and concentrate on Jigsaw's clues instead of becoming exasperated with the camera. When Adam subsequently asked him whether he even thought about the things Jigsaw could do to his family in the meantime, Gordon told him about the final conversation with Diana at the night of his abduction.
Thereby, he managed to put oil on troubled waters and told Adam about his family. Adam asked him whether he wanted more children, Gordon denied this as it was already hard enough for him and his wife to do justice to Diana. During their conversation, Gordon threw his wallet to Adam so he could take a look at some photos of Diana. However, when Adam searched the wallet for a picture of Gordon's wife, he made an unnerving discovery. Instead of the photo he was looking for, he found another picture, which was signed with the word "Regards" and a drawn jigsaw piece. The photo showed Gordon's family, who were gagged and tied up in the bedroom of apartment. As he didn't want to worry him, Adam didn't tell him about the picture and instead gave him the wallet back, claiming that the photo of his wife wasn't there. While the confused doctor searched the wallet, Adam unobtrusively took another look at the picture. On the back side of it, Jigsaw had written the message "X marks the spot. Sometimes you see more with your eyes shut."
When Adam's uncooperative attitude caused another argument between him and Gordon, he finally asked him to turn off the light, which Gordon did, despite being skeptical. Upon doing so, they spotted glowing "X" on the wall, which hadn't been visible in the light, leading Adam to the conclusion that it had been drawn with a special fluorescent paint. By using his saw, Gordon smashed the marked part of the wall and thereby discovered a hollow space with a small box hidden inside. Gordon managed to open it with the key he had found in his envelope at the beginning of his game. It contained a mobile, a lighter, two cigarettes as well as a written message, which told Gordon that the cigarettes were harmless, that he didn't need a gun to kill Adam and that "smoking was only poisonous when it ended in bloodshed." When Adam, who didn't notice any of this, asked him for a cigarette, Gordon denied his wish and instead tried to call the police. To his disappointment, the mobile couldn't be used to make calls, but only to receive them. However, this caused him to remember the night of his abduction, where something similar had happened to him in a parking garage, before he was attacked and subdued by a person with a pig mask.
After telling him about this, Gordon suddenly asked him how he knew that they had to turn off the light. When Adam claimed it was due to his instinct and obviously tried to avoid the question, the men began to argue once again until Adam finally revealed the photo of Gordon's abducted family to him. Prompted by his fear for Diana and Alison, Gordon thought about another way out and came up with a plan. Unnoticed by Adam, he dipped one of the cigarettes into the blood of the lifeless body of John Kramer, which, according to Jigsaw's clues, had to be poisoned. Afterwards, he turned off the lights and told Adam about his plan, which required him to fake his death. When he turned the lights on again, he threw the second, harmless cigarette and the lighter to Adam. Moments later, Adam pretended to collapse due to the poison. However, their plan failed when Adam received an electric shock from his shackle, which caused him to panic once again, while Gordon was angry and blamed him for the failure of their plan. The shock, however, caused Adam to remember his own abduction.
After he told Gordon about his abduction from his apartment, the phone rang. When Gordon answered the call, his frightened daughter begged him to save her and her mother. Afterwards, he also spoke with Alison, who warned him not to trust Adam as he had known him long before their game began. When Gordon confronted him with that warning, Adam finally admitted that he had observed and photographed him throughout the previous days and showed him the photos, which he had found in the bag with the hacksaws. This resulted in an argument, during which Adam revealed that he had followed Gordon to rendezvous with his student and mistress, Carla, at the Hotel Barfly. Angered by this, Gordon asked him who hired him, as he was convinced that Adam's client was also their abductor. However, when Adam described the man as a "tall black guy with a scar around his neck", Gordon realized that it was Detective Tapp, who was convinced that Gordon was the Jigsaw Killer and blamed him for the death of his partner five months earlier.
When the two of them lapsed into silence again, Adam suddenly noticed that one of the photos wasn't from him. It showed a man standing at the window of Gordon's bedroom, but Gordon claimed that, besides Diana and Alison, nobody had been in their apartment the night before. Therefore, Adam showed him the picture, causing the shocked doctor to recognize the man as Zep Hindle, the orderly at the Angel of Mercy Hospital. Seconds later, Adam realized that the time of their game was over. Shortly afterwards, the mobile rang again. To Gordon's surprise, he heard his wife's voice, who had managed to free herself from the sadistic orderly. However, only moments later, he also heard several gunshots and the desperate screams of his daughter. Therefore, Gordon started to cry, but suddenly lost his consciousness when he received an electric shock from his shackle.
Adam immediately tried to wake him up and was afraid that Gordon was dead, when the latter regained his consciousness. However, due to the events, Gordon suffered a breakdown, which became even worse when the phone rang again but was beyond his reach, as he had inadvertently thrown it away when he was electrocuted. In a last desperate attempt to save his family, he used his shirt to stanch his leg and, despite Adam's attempts to calm him down, began to cut off his foot. After he had managed to free himself from his chain, he crawled to the middle of the room and took the revolver from John Kramer's hand. Then, he used the bullet from his envelope and shot the frightened Adam, who collapsed immediately. Shocked by what he had done, Gordon screamed at the camera and begged for the life of his family.
Moments later, the door was opened and Zep Hindle entered the bathroom. Gordon frantically tried to shoot him, even though he had no more bullets. Unimpressed by this, Zep aimed his gun at him and wanted to kill him as he didn't finish his task in time. However, before he could do it, he was attacked by Adam as the bullet had only injured his shoulder. As the two of them lay on the floor and fought with each other, Adam managed to disarm his enemy and smashed his head with the lid of the toilet tank. When Gordon finally convinced him to stop, Adam started to cry due to his pain. Gordon told him that he'd bleed to death if he stayed with him and promised to get help. Despite Adam's desperate attempts to hold him back, the severely injured doctor crawled out of the room.

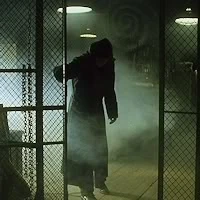
John reveals himself to Adam
When he was alone, Adam searched Zep's body for a key to his shackle. To his surprise, he found another tape recorder in his jacket pocket, which contained a message for Zep. The latter had been poisoned by Jigsaw and was forced to abduct Gordon's family and kill them if he failed his test, in order to obtain the antidote. Therefore, Adam realized that Zep was also just another victim of Jigsaw, when the actual killer, John Kramer, got up from the floor and removed his mask. Then, he told Adam that the key to his chain was in the bathtub. As Adam realized that the key had gone down the drain, he aimed Zep's gun at John, who incapacitated him with another electric shock. While Adam lay on the floor shivering, John turned off the light, closed the door and left the screaming young man with the words "Game Over." (Saw)
Recruitment of Lawrence Gordon

John congratulates Gordon for his survival
Due to his injury and the severe loss of blood, Lawrence didn't make it very far. Shortly after his escape, he reached a hot steaming pipe in one of the subterranean hallways leading to the bathroom. After initially hesitating, he pressed his stump against the pipe in order to cauterize the wound. Even though this was successful, he lost his consciousness due to immense pain. Shortly afterwards, he was found by John Kramer, who had followed his blood trail. As he dragged him away, Lawrence briefly regained his consciousness and recognized his patient, who smiled at him and congratulated him for his survival, before he passed out again. John took his doctor with him. When Lawrence woke up again, he started to panic, but calmed down when John treated his wound and adjusted a prosthesis to his stump. Because of this, he began to trust John and ultimately agreed to become his accomplice and assist in his future games. After his treatment, John let him go. (Saw 3D)
Adam Stanheight's Death


John comforts Amanda
After the end of the game, John and Amanda returned to their new hideout. As she felt guilty for Adam's fate, Amanda was haunted by nightmares. Therefore, she decided to return to the bathroom and kill Adam as an act of mercy. Assuming that John was sleeping, she left the hideout without noticing that John was, in fact, awake and observed her. Even though Amanda put her plan into action, this only worsened her feelings of remorse and caused her to counteract the emotional stress by harming herself. John, who noticed her mental instability, tried to comfort her. However, he eventually realized that her unstable state of mind could endanger the future of their work as well as the lives of their test subjects. (Saw II, Saw III)
S.U.R.V.I.V.E. - My Story of Overcoming Jigsaw


John visits Bobby Dagen's autograph session
Nonetheless, John continued his game and several other people throughout the following months, including a woman named Joan, who managed to survive her test. However, when she told about this horrific experience during a television experience, her story inspired a man named Bobby Dagen and his best friend, Cale, to write a book, in which Bobby claimed to be a survivor of Jigsaw's games himself. When Bobby eventually published his book under the title "S.U.R.V.I.V.E. - My Story of Overcoming Jigsaw", he gained much fame and recognition. However, his fraud also caught the attention of John. During an autograph session, which had been organized by Bobby's publicist, Nina, John spoke to him in person and hinted at his knowledge of Bobby's lies. They were, however, interrupted by Cale after Bobby had signed a copy of his book for John. John thanked him for the autograph, but gave him the book cover of his copy, which showed a photo of Bobby, claiming that he wouldn't need it anymore, as they knew each other now. Then, he left the session. (Saw 3D)
Preparations for the Future
When John realized the great extent of Bobby's lies, he decided that many more people had to be tested. However, as his physical condition worsened, he already anticipated that he wouldn't be able to test all of them on his own before his passing. Therefore, he prepared the games so his accomplices could continue his work after his death. In the focus of one of these games was a group of five people - Ashley, a fire inspector, Charles, a journalist, Luba Gibbs, a city planner, Brit, a real estate developer, and Mallick, a drug addict. All of them were in some way connected to a fire, which caused the deaths of eight people. Another game centered around William Easton and his colleagues at Umbrella Health - Hank, the janitor, Allen, William's file clerk, Addy, his secretary, Debbie, the company's lawyer, as well as Aaron, Emily, Gena, Dave, Shelby and Josh, William's most important associates. Furthermore, William's sister, a journalist named Pamela Jenkins, as well as Tara and Brent Abbott, two relatives of one of William's deceased clients, should participate in the game as well. The third game revolved around Bobby Dagen, his wife, Joyce Dagen, and his crew, consisting of his publicist, Nina, his lawyer, Suzanne, and his friend, Cale. Additionally, he also planned a game to test his own accomplice, Detective Mark Hoffman.
Throughout the following couple of months, John prepared the recordings for the games, designed the traps and gathered all necessary information about his future victims. Furthermore, he gave a black box to his executor, Bernie Feldman, and told him to give it to Jill after his death. Besides the instructions for William Easton's game, the box also contained a video for Dr. Gordon, in which John asked him to watch over Jill, as well as a modernized version of the trap, which he had used to test Amanda and which was also supposed to be used for Mark Hoffman's test. (Saw V, Saw VI, Saw 3D)
The Nerve Gas House
Nonetheless, John was also determined to set up some more games on his own. Therefore, he eventually targeted Eric Matthews, a corrupt detective, who had faked the evidence in many of his cases and thereby wrongfully arrested several innocent people. Among these people were a man named Jonas Singer, his manager, Gus Colyard, Addison Corday, the prostitute John met at the night of Gideon's death, Xavier Chavez, a drug dealer, a woman named Laura Hunter, a man named Obi Tate, and also Amanda Young, who had become addicted to heroine after Eric sent her to prison for a crime she didn't commit. In order to test Eric, John and his accomplices first set up another game in an abandoned, run-down residential house, which was connected to the underground tunnels leading to the bathroom by a trapdoor. Therefore, Detective Hoffman gave John the files of the seven people framed by Eric, as they were going to participate as well.


John hides the tape recorder
To accelerate their preparations, John also convinced Obi Tate to assist him with abducting the other victims. After the abductions of Jonas Singer, Gus Colyard, Addison Corday, Xavier Chavez, Laura Hunter and Eric Matthew's son, Daniel Matthews, were successful, all of them were taken to the house and trapped inside a room, where the hidden trapdoor was located. Afterwards, Hoffman abducted Obi Tate and took him to the same room as well. While they all lay on the floor unconsciously, Amanda joined them as she was supposed to play the role of a victim on her own in order to observe the progress of the other prisoners, while also protecting Daniel. Then, John placed a tape recorder, which contained the instructions for his victims, in a hollow space behind a wall and helped Hoffman to secure the only exit door with another trap. After that, the two of them left, closed the door behind them and directed a deadly nerve gas into the room. (Saw II, Saw V)
Michael Marks' Test
Their next victim was going to be Michael Marks, another one of Jill's patients and the informant of Eric Matthews. After his abduction, Lawrence Gordon performed a surgery on the young man, during which he placed a key behind Michael's right eye. This key would later become the only way for Michael to save himself from one of Jigsaw's traps, a so-called death mask. Within 60 seconds, Michael had to cut out his eye to obtain the key to his trap. However, his attempts to save himself remained unsuccessfully, ending in his death. At the crime scene, which was going to be found by Eric Matthews later on, John left two important clues for him. The first one was the message "Look closer, Detective Matthews", which John wrote on the ceiling of the wall. The second clue was one the metal parts used to built the death mask, which had an engraving of the Wilson Steel Plant, the location of John's hideout at that time. (Saw II, Saw IV, Saw 3D)
Eric Matthews' Test
Later, John returned to the steel plant, where he waited for Amanda, who arrived shortly afterwards along with the unconscious Daniel Matthews. The two of them were the only survivors of the game in the house. John tied Daniel up and locked him up inside a safe with a sufficient supply of oxygen. Furthermore, John prepared a video broadcast. Therefore, he set up a broadcasting station in another house at 237 North Hyde Crescent, which was almost identical to the Nerve Gas House. From there, he broadcasted the surveillance recordings of the game to several monitors at the steel plant. Back in his hideout, he set up another trap for the police, which was going to find the location soon afterwards.


John waits for the police to arrive
The next day, Eric Matthews, Detective Allison Kerry and a SWAT team led by Sergeant Daniel Rigg raided the building. As expected, the SWAT members triggered John's trap, which caused the death of two officers, while a third one, Officer Pete Baker, was severely injured. Nonetheless, the remaining cops soon reached the upper floor where they finally found John. Initially, Rigg ordered his men to arrest him. However, John spoke to Eric and told him that he should stay where he was until Eric had dealt with his "problem." Then, he told him to take a look in the next room, where he, along with Kerry and Rigg, found the surveillance monitors, which showed the recording of the game in the Nerve Gas House. Eric, who thought that the recording was actually a live broadcast, angrily attacked John when he recognized his son on the monitor. However, he was held back by Rigg. John explained the rules of his game to him. Eric's colleagues had to leave the room, while he only had to stay there and talk with John for the duration of two hours. After that time, Daniel, who was still trapped inside the safe without his father's knowledge, would be released.


John talks to Eric
After Kerry managed to convince Eric to accept John's challenge, Eric reluctantly agreed to play his game and sat down at his table. At the same time, he placed a walkie-talkie next to his chair so his colleagues were able to listen to their conversation. Initially, John introduced himself to him and thereby revealed his true identity. Over the course of the game, he repeatedly tried to provoke Eric, by confronting him with his aggression and propensity to violence. In that regard, he spoke about an incident five years earlier, where Eric had brutally battered a suspect. Furthermore, he talked to him about the relationship to his son, which was strained after Eric had and affair with Detective Kerry and thereby cheated on Daniel's mother. Besides his attempts to provoke him, John also wanted him to understand the purpose of his work. Therefore, he told him about his cancer, his failed suicide attempt and his newly found appreciation of his life. Furthermore, he also revealed the true meaning of the puzzle pieces cut from the skins of his dead victims. In doing so, he compared his own moral beliefs to Charles Darwin's evolutionary theory of the survival of the fittest and told Eric that only those, who had the ultimate will to survive, were able to win his games.
As time went by and some of the prisoners in the house were killed, Kerry came up with another plan and advised Eric to provoke John as well by destroying his blueprints, notes and drawings. However, as he did so, John was barely impressed by his fit of rage and his death threats. While watching him calmly, he responded that Eric wouldn't be able to convict him if he destroyed all the evidence in his hideout. Eric finally stopped when a tech team arrived to trace the video broadcast to its source. When he decided to end his conversation with John, the latter told him to look in the drawer of one of his desks. Upon doing so, he and Kerry found the files of the prisoners in the Nerve Gas House, which had all been framed by Eric for crimes they didn't commit. John mocked him and told him that Daniel would be in danger if his fellow prisoners learned of their connection.
Eric threatens John with his gun
Shortly afterwards, Eric watched as Daniel was pursued by one of the other prisoners, Xavier Chavez, and therefore ultimately lost his composure. In order to force John to reveal his son's whereabouts, he violently battered him, broke one of his fingers and threatened him with his gun. Therefore, John ended Eric's test with the words "Game Over" and agreed to take him to the house. However, he demanded to go there with Eric alone. Eric agreed and they left the building in a hidden elevator. Pursued by the officers of the SWAT team, the fled with one of their armored vehicles. On their way, John told him how to get to the house, while the SWAT officers went to the wrong address from where the recording was broadcasted. When John and Eric finally arrived, he gave him the key and waited in the car. Without Eric's knowledge, John had already planned these events and knew that Amanda was hiding in the bathroom underneath the house, where she waited for Eric. Ultimately, his plan was successful and Amanda chained Eric up in the bathroom, just like Adam and Dr. Gordon several months earlier. (Saw II)
Going into Hiding
Shortly afterwards, Amanda left the house severely injured. John knew that something went wrong and ordered Hoffman to look after Eric, without Amanda's knowledge. Meanwhile, he and Amanda were forced to go into hiding as the police knew their true identities now. Due to his physical condition, which continued to worsen dramatically, John became weak and bedridden and had to rely on the assistance of his accomplices, including Amanda, even though he knew about her mental instability. Knowing that he'd die soon, he began to plan his final games. With the help of his accomplices, he chose his victims and prepared the games, while he and Amanda stayed at their new hideout, the Gideon Meatpacking Plant, most of the time. (Saw III, Saw IV)
Trevor and Art Blank's Test
About two weeks before the beginning of the final games, John arranged for the abduction of his former lawyer and business Partner, Art Blank, and a second man named Trevor. After their abduction, Lawrence Gordon performed another surgery on both of them, during which he sutured Art's mouth and Trevor's eyes, so it would be impossible for them to communicate during their test. After finishing these preparations, the two of them were taken to a mausoleum, where their game was going to take place. During that game, Art killed Trevor in self-defense and thereby escaped from the trap. However, instead of regaining his freedom, he was forced to set up another game on his own. The participants, which John had chosen for this game, were the the special agents Peter Strahm and Lindsey Perez, the cops Daniel Rigg and Eric Matthews, as well as Brenda, Ivan Landsness, Rex and Morgan, former clients of Art Blank, who successfully conducted their defense in the past. (Saw IV, Saw 3D)
Final Preparations
Four days before the last games began, John ordered Amanda to test two other people. The first one of them was Troy, one of Jill's patients and a repeated offender. The second test was planned for Detective Kerry. However, John learned that Amanda had manipulated both games and thereby robbed Troy and Kerry of their chance to survive. Even though he had initially selected Amanda as his successor, John realized that she became too dangerous and decided to test her once again. (Saw III)
Additionally, John planned one more game, which revolved around a man named Jeff Denlon, who was obsessed with his thirst for revenge after his son, Dylan, was accidentally killed by a drunk driver named Timothy Young three years earlier. Furthermore, Lawrence Gordon suggested to abduct John's former doctor and Jeff's wife, Dr. Lynn Denlon, and force her to participate in the game as well. It should be her task to keep the severely weakened John alive until her husband managed to overcome a series of test. The reason for choosing Lynn, besides her connection with Jeff, were here formidable surgical skills. (Saw III, Saw 3D)


John observes Hoffman's work on the "Rack"
When the day of the final games had come, Amanda took John, who sat in a wheelchair at that point, to his quarter. On their way, they came across Mark Hoffman, who worked on a trap called "The Rack". As John saw that Hoffman switched the trap's gear ratio, he told him that he'd have to change the gear grease to match the increased friction and told him to coordinate all future changes with him. When Hoffman asked him how many more games he had planned, John merely responded that their work would go on as long as necessary. Afterwards, Hoffman recklessly dumped the unconscious body of Timothy Young out of a wheelbarrow to put him in the trap. John reminded him that Timothy was still a human being and asked him if he enjoyed the feeling of brutality. Hoffman responded that John wanted to see Timothy suffer just as much as he did. When we was about to continue his work, he engaged in a brief argument with Amanda, who asked him when he was going to be tested. Hoffman answered that this wasn't necessary as he, unlike her, had always valued his life and thereby pointed to the self-inflicted scars on her wrists. Amanda mocked him and advised him to get used to her as he wouldn't get rid of her. He, however, only asked her if she was really sure about that. Eventually, John interrupted the two of them. After that, he and Amanda went on and allowed Hoffman to finish his work on the trap.


John and Jill see each other for the last time
On their way to their improvised sleeping quarters, they unexpectedly came across Jill. As he wanted to talk to her alone, he told Amanda that she had to leave if she wanted to abduct Lynn Denlon and bring her to the meatpacking plant in time. Once they were alone, John asked his ex-wife for the reason of her visit. Jill begged him to finally stop his deadly games. He promised that he had prepared a way out for her and handed her a key, which belonged to the black box that he previously gave to his executor. However, when she asked him what it was for, he only told her that she'd know it when the time had come. This was their last conversation during his lifetime. After she left him, he went through the building and prepared the last remaining requisites for Jeff Denlon's game, before he finally returned to his quarter and went to bed. (Saw III, Saw VI)
Shortly afterwards, Hoffman also visited him one last time. On this occasion, they talked about Amanda and her increasingly unstable state of mind because Hoffman already assumed that she wouldn't pass her test and fail John. For him, John had prepared one more task. He gave him a folder, which contained the photos of Ashley, Charles, Luba Gibbs, Brit and Mallick, who he had chosen for another game. After John's death, Hoffman was supposed to set up this game. Moments later, they finally heard the desperate screams of Lynn Denlon next door. Hoffman told him once again that Amanda would fail him, before he left the room through a secret door. (Saw V)
The Final Tests
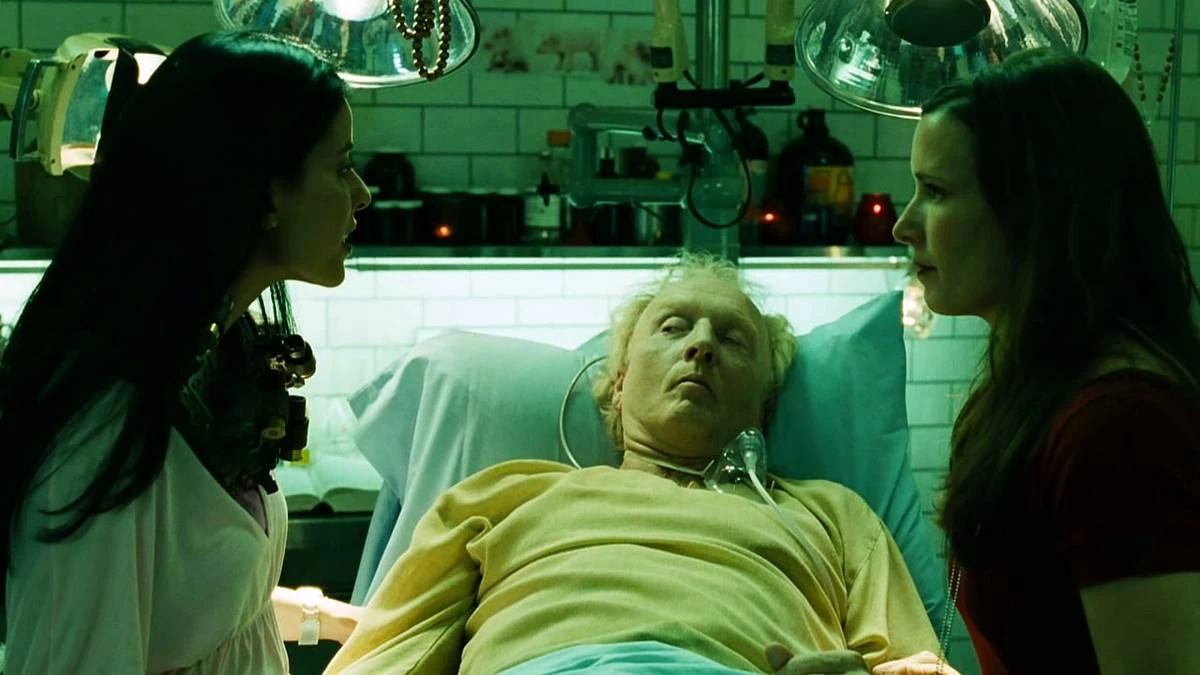
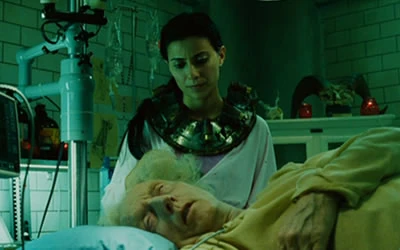
When Amanda and Lynn entered the room, John greeted his test subject and former doctor, who didn't remember him and only recognized him from the television news about the Jigsaw Case. After introducing himself, he reminded her of their last conversation at the hospital and presented her his medical file, before he explained the rules of her game to her. Amanda put a special collar on Lynn's neck, which was connected to John's heart rate monitor and had five explosive charges attached to it. If John flat line or Lynn moved too far away from him, those charges would detonate and kill her in the process. John told her that it was her task in this game to keep him alive until another test subject managed to overcome a series of tests. However, he didn't tell her that this other person was, in fact, her husband. Amanda, who was present the entire time, didn't realize that John was testing her as well and that his instructions for Lynn were also meant for her.

Lynn and Amanda discuss John's condition
Soon afterwards, Lynn started her examination and found out that John's brain was herniating. When Amanda told them that Jeff's game had begun, Lynn tried to convince her to take John to a hospital so he could undergo surgery to relieve the pressure on his brain. This led to an argument between her and Amanda, who insulted her and threatened her until John intervened. He reminded her that Lynn couldn't fulfill her task if she was threatened and that Amanda had to follow the rules just like everyone else involved. Only seconds later, he suddenly suffered from a severe cerebral seizure, which he just barely survived due to Lynn's help. Thereby, she eventually convinced Amanda, who was still in shock, that John had to be operated on. However, Amanda demanded that Lynn would perform the surgery at the Gideon Plant and then left the quarters to get the necessary equipment.
After her return, Amanda sat at John's sick bed. She told him about the progress of Jeff, who had finished his first test in one of the freezer rooms inside the building. During that test, he had unsuccessfully tried to save a woman named Danica Scott, who was the only witness of the accident that killed his son, but refused to testify against the drunk driver. Furthermore, Amanda explained to him that Lynn was almost ready perform the surgery on him in order to relieve his pain. Due to this emotional situation of stress, John encouraged her to stay strong and told her that there was something left to do for her. Therefore, he told her about a letter in the drawer of her desk.
Lynn prepares John for the surgery
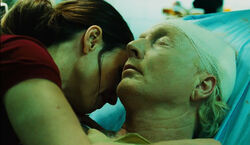
When Amanda left the room again to observe the game, Lynn prepared everything in John's room for the operation. Just as she shaved the back of his head, Amanda returned and informed him that Jeff had passed his second test and thereby saved a judge named Halden, who sentenced the murder of Jeff's son to a light sentence of merely six months in prison. Upon hearing this, John was surprised about Jeff's fast progress. Afterwards, Lynn finally explained the operation to him, during which she would remove a piece of his skullcap in order to relieve the pressure on his brain and to enhance his motor faculties. Then, she injected him with a local anesthetic, as the complexity of the surgery required John to stay awake. After the injection, Lynn cut off a large part of his scalp to expose the skull. After cleaning the wound with alcohol, she used a power drill to bore four holes in his skull in rectangular order. Then, she cut out this rectangle with an electric circular saw and finally removed the bone fragment with a small retractor. After his vital functions stabilized, Lynn told him to raise his hand and flex his fingers. However, upon doing so, he suffered a breakdown, causing Amanda to burst into tears. While his heart rate declined dramatically, he had hallucinated his ex-wife. Lynn just barely managed to stabilize him and save him once more. However, as he was still in a delirious state, he took her for Jill and told he that he loved her. Therefore, Amanda, who misunderstood the situation, left the room, because she was jealous of his attachment for Lynn.

Amanda hugs John
Weakened by his breakdown, John soon fell asleep. While Lynn washed off the blood and looked at the various pictures and drawings on the walls, Amanda reentered and tightly hugged John. However, when Lynn told her that he couldn't hear her and didn't even know about her presence, she became angry and grabbed her by the throat. Just as she was about to pull her gun, John woke up and harshly ordered her to put the gun away and leave, which she eventually did after some hesitation. Once they were alone, John apologized for Amanda's behavior, stating that while she was close to him, her strong emotions were also her greatest weakness.
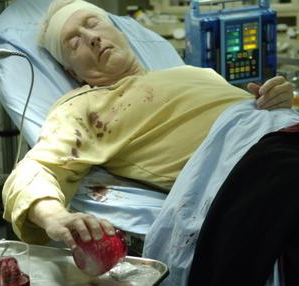

John pours wax on the tape
As time went by, he talked to Lynn about her family and advised her to appreciate them. Furthermore, he told about her depression after Dylan's death, her marital problems, the neglection of her daughter, Corbett, and her affair with a man named Chris. While doing so, he poured molten wax on an audio cassette and swallowed it. Lynn, angered by his accusations, told him that her marriage had survived more suffering than a murderer like him could ever grasp. He, however, merely responded that she didn't know the feeling of suffering, yet. Lynn once again begged him to let her go, when Amanda returned. When the latter refused to leave, despite John's request to do so, he asked Lynn to leave them alone for a moment. After a brief discussion with Amanda, he ordered his accomplice to bring Lynn back. The doctor begged him once more to release her as she had saved his life. John, however, told her that in the end, it might not have been his life that she saved and claimed that if she survived her game, Lynn would be grateful some day. Then, he asked her to tell him about her daughter and her son and wanted to know why she neglected the rest of her family while grieving for Dylan.
A few moments later, Amanda came back and told John that Jeff had finished his third test. John congratulated Lynn and told her that she could go. However, Amanda refused to remove Lynn's collar as Jeff hadn't finished his game, yet. After John repeatedly told her to follow the rules and free Lynn from her collar, Amanda pulled her gun and aimed it at the doctor, stating that she didn't deserve to be free. Therefore, Lynn bursted into tears. When John told Amanda once more to put down the gun and explained to her that her life was in Lynn's hands, she angrily yelled at him for giving Lynn the control over her. During their argument, John asked her if she felt that hatred for all of her test subjects, especially Eric Matthews, and thereby revealed that he knew that Amanda had manipulated her games and thereby deliberately killed her victims. In order to convince her to let Lynn go, he told Amanda that he had forgiven her and that Lynn's death would entail serious consequences for all of them. Amanda, however, still refused to let her go and accused John of being a murderer, just like her. Furthermore, she revealed that she didn't believe in John's moral philosophy, according to which people were able to change. When she asked him why Lynn was so important to him, John answered that she wasn't important to him, but to Amanda, which she denied. During his final attempt to calm her down, Jeff suddenly appeared outside the room. Upon seeing him, Lynn immediately went to him, bus was shot in the back by Amanda. Disappointed by her failure, John finally revealed to her that Lynn was Jeff's wife. Therefore, Jeff entered the room and shot Amanda in the throat with a gun he had found earlier. While she lay one the floor bleeding, John admitted that he had tested her the whole time in order to see if she was able to save the live of another human being. Knowing that she had become just another one of her mentor's test subjects, she eventually succumbed to her wound and died. John then ended her test with the words "Game Over." (Saw III)
Death


Jeff decides to kill John
Following Amanda's death, Jeff aimed his gun at John, who berated him for having learned nothing from his test and for still being obsessed with vengeance, which would only harm his loved ones, including his daughter, who needed him more than ever before. Furthermore, he told him that he couldn't kill him. Nonetheless, Jeff pulled the trigger, albeit his magazine was empty. When John told him that his wife was about to die, Jeff briefly got his senses back, comforted her and promised her to bring her home. John, however, warned him that she'd die if he tried to move her and offered to call an ambulance. Jeff agreed and accepted John's conditions, who demanded one final test to see if Jeff was able to overcome his thirst for revenge. He could either kill John with one of the various tools all around him or he could forgive him and thereby prove that he learned his lesson. Even though Lynn begged him to stay with her, Jeff got up and grabbed a circular saw from a table nearby. Then, he approached John, put his hand on his chest and told him that he forgave him. However, only a few seconds later, Jeff activated the saw and albeit Lynn desperately begged him to stop, he slashed John's throat. Once more, he mockingly said that he forgave John. Moments later, Lynn's collar was activated. With the last of his strength, John took out a tape recorder, which contained a recorded message for Jeff, which told him that he failed his final test. Furthermore, he learned why he couldn't kill John, as the latter had also abducted his and Lynn's daughter, Corbett, and was the only person who knew where she was. The message told Jeff that his daughter only had a limited supply of air and if he wanted to find her, he had to play another game. When the tape was over, John succumbed to his injuries, resulting in the detonation of Lynn's collar and her subsequent death. (Saw III)
Post-Mortem
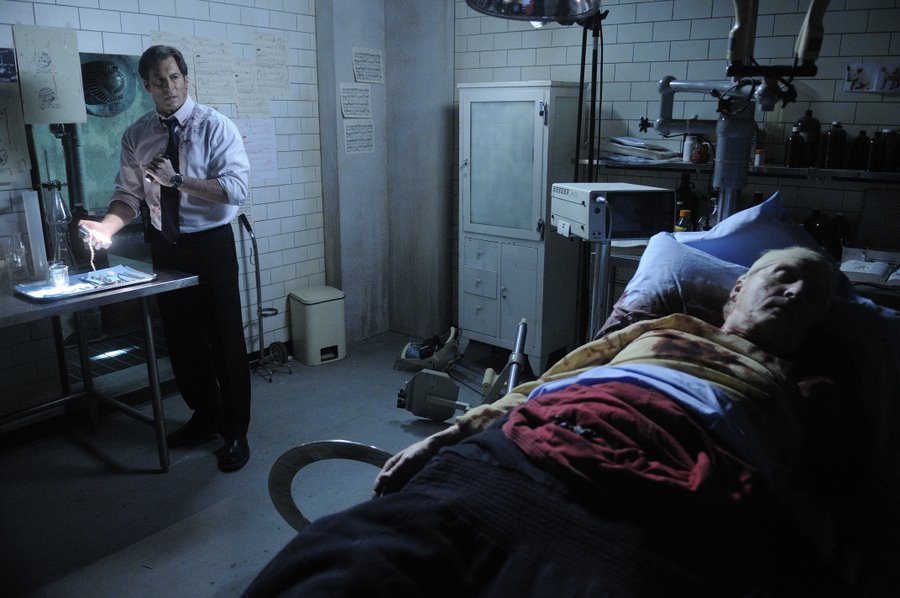

Strahm leaves John's corpse behind
Only moments later, Special Agent Peter Strahm entered the room after he was guided to the meatpacking plant through his own game. When he aimed his gun at Jeff and told him to show him his hands, Jeff raised his own gun and demanded to know where his daughter was. Therefore, Strahm shot him in self-defense. Shortly afterwards, he was trapped by Mark Hoffman, who closed the door behind him and turned off the light. Upon further examining the room, Strahm eventually found the secret door, which Hoffman had used to leave the room before the beginning of the games. Behind it, Strahm found another recorder with a message from John, who warned him to stay in the room and wait for the police to arrive. Strahm, however, refused to do so and instead entered the hallway behind the door. Later that night, the corpses where eventually found by the police, who took them to the morgue. (Saw IV, Saw V)


Dr. Heffner performs the autopsy on John
After the events at the Gideon Meatpacking Plant, the forensic pathologist in charge, Dr. Adam Heffner, performed the autopsy on John's corpse. Upon further examination of his stomach, he found the wax-coated tape, which John had swallowed after his surgery, and called Detective Hoffman. When the latter arrived at the morgue and played the tape, it turned out to be a warning for him. John announced that the games would continue after his death and that Hoffman himself wouldn't get away untested. These threats soon came true, when Hoffman continued the work of his mentor shortly afterwards. Despite the new games and the continuously increasing casualty figures, John Kramer remained the central figure of the Jigsaw Story published by the media. (Saw IV, Saw V, Saw VI)
Following his autopsy, John's body was buried in a local cemetery. Even though the murders ended a few months later. Ten years after John's death and Hoffman's disappearance, Dr. Logan Nelson eventually decided to continue John's work ten years after the latter's death. In order to confuse the police and the public and make them doubt John's death, he dug up his grave and replaced his corpse with the dead body of a murderer named Edgar Munsen. Afterwards, he buried the coffin again and took John's body with him. (Jigsaw)
In other Media
The Full Disclosure Report
In the "Full Disclosure Report", a documentary, which was focused on Jigsaw's early crimes, TV host Rich Skidmore talked about the early stages of the police investigation. While doing so, he presented his viewers the audio tape, which had been found at the crime scene of Paul Leahy's death. The tape had been sent to Skidmore and his team by an anonymous source.
The Scott Tibbs Documentary
After Adam Stanheight's disappearance, his best friend, Scott Tibbs, decided to film a documentary about the Jigsaw Killer along with his fellow band members. This way, he wanted to find out about the killer's motives. While filming, one of Scott's friends, Mr. D, called him to the Wilson Steel Plant shortly after Jigsaw's escape, during which he took Eric Matthews hostage. Upon further research, Scott found out about John's true identity and his cancer, which had caused him to start his deadly games. Soon afterwards, Scott became obsessed with Jigsaw. Due to his admiration for the killer, he ultimately tested himself to prove that John Kramer was right with his moral philosophy of survival.
Saw: Rebirth
John also appeared in the animated comic Saw: Rebirth, which served as a prequel for the first three films in the series. In his early life, John worked at a toy factory and was too lazy to make more of his live. Eventually, his lack of ambitions caused his wife, Jill, to leave him. However, even the end of his marriage was no sufficient motivation for him to improve on his life until he fell seriously sick one day. When his physical condition worsened dramatically, he went to the hospital, where the oncologist Dr. Lawrence Gordon diagnosed him with an inoperable brain tumor. Just after that, an orderly, Zep Hindle, told John that Lawrence, like many of the doctors at the hospital, cheated on his wife.
As he was going to die sooner or later, John began to pay closer attention to the lives of other people. At first, he studied the other patients at the hospital. Among them were Mark Wilson, an insurance fraudster, and Amanda Young, a drug addict, who had been admitted to the hospital after nearly succumbing to an overdose. The biggest surprise for John, however, was the story of Paul Leahy, one of his colleagues, who had attempted to kill himself, even though he had a job, a wife and children.
Utterly depressed, John ultimately tried to end his life as well by driving his car off a cliff. To his surprise, he survived the crash, albeit severely injured. Thereby, he realized that he had only learned to actually cherish his life when his death had been imminent. Severely injured, he crawled out of the wreck and decided to spent the remaining time of his life on testing other peoples' will to live, in order to convince them, to value their lives. His first test subjects were going to be the patients at the hospital. In order to put his plan into action, John neglected his own needs and instead educated himself in diverse fields and gained vast amounts of esoteric knowledge. He also began to design, test and improve the traps and constructions of his games until he was ready to start his mission.
Saw: The Video Game
John also appeared in the first video game of the franchise, which was set right after the first film. When he found the unconscious body of Detective David Tapp, who had been shot in the chest by Zep Hindle during a fight, he took him to the abandoned Whitehurst Insane Asylum, where he prepared a game for him with the assistance of another accomplice called Pighead. Thereby, he wanted to cure Tapp of his obsessions with apprehending Jigsaw. John treated his gunshot wound and took the opportunity to hide a key in his body. Besides Tapp, many other people were trapped at Whitehurst and needed the key to escape.
Over the course of his game, Tapp had to save six other victims, who were supposed to symbolize different aspects of his obsession. The first one was Amanda Young, who had been abducted again as she wasn't able to overcome her drug addiction and her self-harming tendencies after surviving her first test. When she woke up, she was strapped to a mechanical chair and immediately panicked when she was greeted by John. He confronted her with her acts of self-harm and berated her from having learned nothing from her first test. She repeatedly tried to convince him otherwise and promised that she would end this self-destructive behavior if he let her go. He, however, refused to do so and merely told her that Detective Tapp was trapped at Whitehurst as well and would soon arrive to save her.
The second participant in Tapp's game was a crime scene investigator named Jennings Foster, who killed a homeless man in a car accident while intoxicated and afterwards framed an innocent man, who was therefore sent to prison. Jigsaw strapped him to a large metal table underneath a huge blade in the shape of a pendulum. When he woke up, Jennings started to panic and desperately screamed for help until he was interrupted by his abductor. To his surprise, John knew the truth about the hit and run accident and confronted him with his crimes and the lives he had destroyed in the process. Jennings, however, showed no remorse and, despite his fear, angrily insulted him. He also claimed that he had no other choice and that nobody would have missed the man he killed as he was homeless and didn't have a family. John, however, remained unimpressed and left him behind shortly before Tapp arrived.
The next victim on Tapp's path was the widow of his dead partner, Melissa Sing, who suffered from severe depression after her husband's death. When she woke up in one of John's traps and was greeted by him, she immediately insulted him and accused him for the death of Detective Sing. John, however, defended himself, stating that the trap, which killed her husband, could've been easily disabled by police procedure if Tapp wouldn't have ignored it. When Melissa demanded to see her son, Franklin, John reminded her of how she neglected him after Sing's death. She, however, accused Tapp again, expressing her hate and her desire for him to suffer. John then told her that he was the only one who could save her.
The fourth person Tapp had to save throughout his game was Oswald McGillicutty, an investigative journalist, who had deliberately destroyed Tapp's reputation by publishing numerous articles, in which he blamed him for Detective Sing's death and the lacking progress in the investigation of the Jigsaw Case. While John strapped him to a mechanical contraption, Oswald woke up. As he saw him working on the trap, he angrily yelled at him and attempted to threaten him. However, he stopped and started to panic when he realized that this man was the Jigsaw Killer. Oswald immediately tried to persuade him to let him go, claiming that he had helped him to spread his message. John, however, told him he couldn't free him and instead confronted him with his personal vendetta against Tapp. When he asked him for the reasons of it, Oswald admitted that he wanted revenge on Tapp for not giving him information about the Jigsaw Case.
The fifth participant in Tapp's series of tests was a man named Obi Tate, who had put an advertisement in the newspaper, where he had asked Jigsaw to be tested. After he came to the asylum, John trapped him inside a large, walkable oven, which had been used for the disposal of the bodies of deceased patients of the Whitehurst. When Obi woke up, he was greeted by his abductor expressed his admiration for him and his work. However, he got angry when John told him that he couldn't save himself, but instead had to rely on the help of another person, as this was the only way for him to understand his work and his message.
The final victim of Tapp's game was Jeff Ridenhour, the man who had been saved from John's hideout by Tapp and Sing. Therefore, John decided to abduct him once more so he would finally have to participate in one of his games. When Jeff eventually woke up in a trap, he began to panic as he saw John. While the killer talked to him and confronted him with his repeated suicide attempts, Jeff finally admitted that he wanted to live. John, however, asked him why he had once more tried to kill himself even after had escaped for the first time. Jeff tried to defend himself, stating that he did it because Tapp kept harassing him afterwards in order to get information about the killer.
Saw II: Flesh & Blood
In the second video game, Saw II: Flesh & Blood, John set up another game with the help of another accomplice, Pighead II. In the focus of this game was Michael Tapp, the son of Detective Tapp, who had killed himself after the events at Whitehurst. Like his father, Michael had to save numerous other victims from Jigsaw's deadly traps. The first one was Henry Jacobs, the corrupt chief of the Metropolitan Police Department. The second victim was a drug addict named Sarah Blalok, who was also an informant of the police as well as a neighbor of Michael's father. Another corrupt detective, Joseph Poltzer, was the third person Michael had to save. The next test subject was Carla Song, Lawrence Gordon's former student and mistress. The fifth and last victim was Solomon Bates, an accountant and former business partner of John and Art Blank.
Throughout his game, John frequently appeared to Michael in person. On the first of those occasions, he waited in the ballroom of the abandoned Holmes Hotel, where Michael's game began. When Michael came reached the hotel lobby, John stood behind a fence and told him that Henry Jacobs was trapped with him in the room. Furthermore, he hinted at a secret, which had shattered his father's trust in Jacobs. John then left the room, with Michael being unable to pursue him.
Some time later, Michael reached the pool area of the hotel. He looked around and tried to enter the next room. However, John had forced him to put on a mechanical vest vest, which had nine shotgun shells attached to it. As he was about to enter the next room, the vest made a beeping sound, causing him to back off. Moments later, John entered the room and calmly warned him not to get closer as there was a sensor on the wall, which would activate Michael's vest and kill him if he went further. During their brief conversation, Jigsaw told Michael about Gideon and the miscarriage, which had caused his death. At the same time, Pighead II shoved the water pump of the pool into an elevator, moments before John followed him.
Later on in his game, Michael arrived at an abandoned chemical plant. While exploring the environment, he entered a room and spotted John behind a window. The latter confronted him with his past and played an audio tape, which contained a recording of a previous conversation between Michael and another man. While Michael's father still investigated the Jigsaw Case, he lied to his colleagues and the public about the death of his partner, Sing. The man on the tape told Michael to sell the true story about the raid on Jigsaw's hideout to the editor of the Herald in exchange for a job, which Michael did and thereby destroyed his father's reputation and caused his discharge from the police force. Angered by this, Michael tried to attack John, but was held back when a roller door slammed shut between them.
Over the course of his game, Michael found several written documents and audio recordings from his father. According to them, Tapp and his colleagues quickly found out about the death of Gideon Kramer shortly after the discovery of Cecil Adam's corpse. Therefore, they wanted to interrogate Jill and John, but were unable to find the latter.
Some of Tapp's files also contained information about John's work. Along with his lawyer, Art Blank, and his accountant, Solomon Bates, he was the founder of a company called Gideon, which was dedicated to property development for needy people. During his work for the foundation, John bought up abandoned properties to renovate them for people in need of affordable living space. At one point, he was labelled "Man of the Year" by a magazine for his charitable work.
At the same time as Michael's game took place, John also tested another victim, a drug addict named Campbell Iman, who suffered from incurable cancer and was looking for his estranged son. When he and Michael both reached the end of their respective games, they had to participate in one final test, which only one of them could survive. Depending on the players' decisions, the outcome of this test resulted in two different endings:
- Path of Flesh: In case of Michael's survival, John had left one final message for him, which gave him another important choice. Michael could simply leave and take the recordings and files of his father, which he had found over the course of his game. With these documents, he could publish the truth about the police corruption and thereby clear his father's name. However, he could also decide to join the killer and help him to continue his work.
- Path of Blood: In case of Campbell's survival, John waited for him at the end of his path. When they finally met each other in person, John told him that his son was safe and that Campbell had passed his test and was free to go. Campbell, however, angrily yelled at him and attacked John as he didn't want his son to live in a world with people like Jigsaw in it. When he charged at him, John evaded his attack and Campbell was impaled by a scythe swinging down from the ceiling. As he died, John ended his game and remarked his failure with the words "Game Over."
Personality
John Kramer was a diligent and hard-working man, who was just as devoted to his wife and his unborn son as he was to his work, which was dedicated to help those who were disadvantaged by society. He had strong moral convictions and a strong sense for justice. Even before his transformation to Jigsaw, he believed that only the knowledge of impending death could show if a human was actually willing to fight for their survival. Furthermore, he had a genius level intellect, as well as a great knowledge of facts on diverse fields, but he was also somehow spiritual and was interested in esoterics such as Chinese astrology.
However, when his son died and he himself was diagnosed with incurable cancer, John suffered from severe depression and turned away from his wife and his work, until he eventually tried to commit suicide. Just as this attempt failed, John realized that he wanted to live and decided to spent the remaining time of his life on testing other peoples' will to live, in order to convince them, to value their lives and the lives of those around them.
Therefore, John became the Jigsaw Killer and started to test other peoples' will to survive by putting them in gruesome, potentially deadly situations. Despite the immense brutality of these games, John took no pleasure in the suffering and death of his victims, but rather saw it as a necessary evil so they could learn to appreciate their lives. During his series of murders, he always tried to keep an emotional distance between him and his test subjects, so his personal feelings wouldn't affect his work.
Over the years, John rallied several disciples around him, who followed his will and continued his games, even after his death. While doing so, he was able to manipulate his accomplices through his charismatic personality as well as their own mental instability and thereby caused some of them to believe in his philosophy just as much as he did.
Trivia
- Tobin Bell is the only actor who filmed new scenes for every single installment in the Saw film series. He is also the only actor from the films, who dubbed his character in the video game adaptions Saw: The Video Game and Saw II: Flesh & Blood.
- John's car is a 1977 Oldsmobile Ninety-Eight Luxury.
- The main antagonist of the video game Heavy Rain, the Origami Killer, has a similar modus operandi. He forces his victims to participate in gruesome trials, during which they have to risk their own lives and, in one instance, mutilate themselves, to save the lives of their loved ones. Furthermore, the characters Gordi and Charles Kramer share their last name with John.
- Considering Logan's absence in the first seven films and the lack of information about his and John's relationship, it is likely that the two of them parted ways at some point.
Appearances and References
| Films | |||||||||
| Saw | Saw II | Saw III | Saw IV | Saw V | Saw VI | Saw 3D | Jigsaw | Spiral | Saw X |
| Appears | Appears | Appears | Flashback, Pictured, & Corpse | Flashback, Pictured, & Corpse | Flashback, Recording, & Mentioned | Flashback & Mentioned | Flashback & Mentioned | Absent | Absent |
| Other Media | |||||
| "Saw" (2003 Short) |
Saw: Rebirth (2005 Comic) |
Full Disclosure Report | The Scott Tibbs Documentary | Saw: The Video Game | Saw II: Flesh & Blood |
| Absent | Appears | Recording & Mentioned | Mentioned | Appears | Appears |