| Video Games |
| “ | Where are you, Jigsaw? I won't play your game! I won't! | ” |
— Tapp shouts at Jigsaw.[src]
| ||
Detective David Tapp is a fictional character from the Saw franchise. He was the primary protagonist of Saw: The Video Game and a supporting posthumous protagonist in Saw II: Flesh & Blood.
He was voiced by Earl Alexander.
Biography[]
Early Life[]
David Tapp was a homicide detective who worked for the Metropolitan Police Department. He was the husband of Kara Tapp and the father of Michael Tapp. As a classic workaholic, Tapp became obsessed with his work and neglected his family. Eventually, he abandoned them when Michael was still a child, which resulted in a messy divorce. (Saw II: Flesh & Blood)
K2K[]
During his career, Tapp got involved in the investigation of a case of mass murder. K2K, a small street gang from 118th Street, tried to expand their territory and drug traffic and subsequently invaded the local Yakuza's territory. This invasion resulted in a brutal gang war, which ended when the Yakuza kidnapped and executed most members of K2K by shooting them to pieces. The Yakuza lined up their corpses along 118th Street to demonstrate their power. While investigating the case, Tapp became acquainted with his future partner, Detective Steven Sing. (Saw II: Flesh & Blood)
The Bilson Murders[]
Tapp and Sing worked together again when they investigated another homicide case, the Bilson murders. Besides a well-functioning professional relationship, the two detectives developed a close friendship during their joint work. (Saw II: Flesh & Blood)
The Accident[]
Sometime later, Tapp learned about a hit-and-run accident, during which a homeless man was hit by a car and died as the driver fled the scene without helping him. Although Jennings Foster, a crime scene investigator, tried to convince him otherwise, Tapp insisted on investigating the case. Eventually, Tapp found evidence pointing toward a man, who was subsequently sent to prison. (Saw: The Video Game)
Further Investigations[]
Over the years, Detective Tapp apprehended numerous other criminals, many of whom were mentally unstable and highly violent. One of them was Anton, a mercenary whose preferred method of instilling terror in his victims was to scar their faces with corrosive acid. Another suspect was a psychotic arsonist named Barry, whom Tapp arrested for burning two people alive. On two different occasions, the detective investigated the cases of two violent offenders, Dwayne and Donovan. The latter of them was a ruthless man who regularly battered his girlfriends.
Another particularly tragic incident happened when Griff, a young and promising student, stalked and eventually raped one of his professors at the college when the latter rejected him. Tapp later arrested him for this crime. However, this incident was not the only case of sexual assault that Tapp had to investigate throughout his career. On another occasion, he arrested a child molester named Zeke after catching him in the act.
One of Tapp's most unpredictable suspects was a man named Patrick. Due to a childhood trauma caused by his abusive father, Patrick randomly attacked and carved up other people. After arresting him, Tapp testified in court, stating that he believed Patrick's mental illness to be incurable.
Yet another one of Tapp's cases revolved around a drug dealer named Chuck. Throughout the investigation, Tapp found enough evidence to arrest him. However, the latter attempted to receive a lighter sentence by incriminating his best customer, Robert, who was also apprehended due to Chuck's testimony. (Saw II: Flesh & Blood)
Cecil Adams' Death[]
At some point in his career, Tapp investigated a serial killer case. The first victim was a drug addict named Cecil Adams, who died of blood loss after falling into a cage filled with razor wire. He had eight parallel cuts on his face, and a jigsaw piece had been cut from his shoulder, leading to the killer being nicknamed Jigsaw by Chief Henry Jacobs. (Saw II: Flesh & Blood)
[]
Soon afterward, the remains of two other victims were found - Mitsuka Ito, a member of the local Yakuza, and Ronnie Navarro, a drug dealer and member of the Blood Eye Gang. The two of them were put in a trap, which consisted of a pulley system and several large barrels filled with sulfuric acid. Those were propped up above the victims, whose hands were strapped to ropes attached to the pulley system. The pulley would have given them enough slack to reach the exit door if they had pulled simultaneously. However, Detective Tapp assumed that something prevented them from working together. Eventually, both of them died when their bodies were spilled with acid. While the acid had not left much of their corpses, the jigsaw pieces cut from their bodies suggested that the murder was another crime committed by Jigsaw. Assuming the killings would continue, Chief Jacobs assigned Tapp to a task force alongside Detective Steven Sing, Detective Allison Kerry, Detective Mark Hoffman, and crime scene investigator Jennings Foster. (Saw II: Flesh & Blood)
Paul Leahy's Death[]
The next victim that was found was a drug addict named Paul Leahy. Jigsaw had chosen him to participate in one of his gruesome games because Paul had sliced his wrists earlier, not because of depression but to attract attention. Therefore, Jigsaw had taken him to a cellar. The back part of the basement where Paul was trapped was fenced-in and turned into a cage filled with razor wire. Upon examining the crime scene, the investigators found an audiotape that the killer had left for Paul. According to the tape, Paul was supposed to crawl through the razor wire to reach the exit door and save his life. However, the wounds he received while doing so were so severe that he ultimately died of blood loss. As the circumstances of Paul's demise reminded him of Cecil Adams' death, Tapp told Detective Hoffman to check what kind of razor wire had been used for Paul's cage and the one in which Cecil had died. (Saw II: Flesh & Blood)
Mark Wilson's Death[]
Shortly afterward, the detectives were called to another crime scene. The victim, a man named Mark Wilson, had been trapped inside a dark room with the only light source being a single candle. Furthermore, he was injected with a slow-acting poison and was informed by an audiotape that the only antidote was inside a safe. To open it, Mark had to find the correct combination among hundreds of numbers written all over the walls. Due to the darkness, he had to take the candle and walk to the walls to see the numbers. However, the killer had slathered his naked body with self-made napalm. When walking around the room with the candle, Mark accidentally ignited the napalm, causing him to suffer a heart attack due to the thermal shock. While investigating the crime scene, the detectives found a penlight and immediately sent it to the forensic lab.
Furthermore, Tapp informed Henry Jacobs about the audiotape, which implied that Mark had committed medical insurance fraud. Mark was a client of Umbrella Health, the same insurance company used by the police department. For that reason and because Tapp wanted to focus on investigating the murders, he left it to the chief to deal with the matter. (Saw II: Flesh & Blood)
Amanda Young's Survival[]
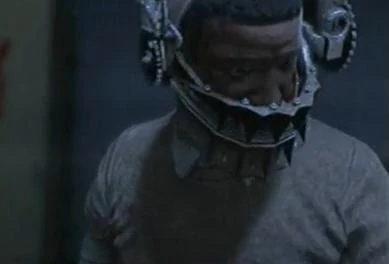
Soon after Mark's body had been found, Amanda Young, a drug addict, came to the police station after escaping one of Jigsaw's games. After a doctor examined her wounds, she was interrogated by Detective Tapp. Amanda told him she had woken up at an unknown location and found herself strapped to a chair. While Amanda was unconscious, Jigsaw had put a mechanical device on her head and hooked it into Amanda's upper and lower jaws. Amanda had received her instructions from a mechanical ventriloquist puppet named Billy, which spoke to her via a video recording. The doll described the device on her head as a "reverse bear trap," which would rip her mouth open if she did not free herself within 60 seconds. Therefore, she had to cut the key to the device from the stomach of her supposedly dead cellmate, Donald Greco. When the tape ended, Amanda successfully freed herself from the chair and ultimately obtained the key by disemboweling her fellow prisoner, who was, in fact, still alive at that point.
Upon securing the crime scene, the police found the trap, whereas Donald Greco's body was missing. However, they positively identified him by investigating the blood evidence. Back at the police station, Tapp thoroughly examined the vicious device until he no longer needed a key to unlock it. (Saw: The Video Game, Saw II: Flesh & Blood)
Seth Baxter's Death[]
Sometime later, another victim of Jigsaw was found in a deadly trap. A man named Seth Baxter had been cut in half by a giant pendulum-shaped blade. It turned out that the man used to be the boyfriend of Detective Hoffman's sister, Angelina Acomb. During a domestic dispute five years earlier, Seth killed her and was sentenced to life in prison. However, he was released the previous month due to a technicality. Because of Hoffman's connection to Seth, he asked Tapp for permission to avoid the crime scene. (Saw II: Flesh & Blood)
First Suspect[]
Shortly afterward, the forensic lab results came in, and the fingerprints on the penlight found at the scene of Mark Wilson's death were identified as those of Dr. Lawrence Gordon, a renowned oncologist. Tapp and Sing immediately went to the hospital where Gordon was working and took him to the police station for further interrogation. Eventually, he told the officers that he had assisted one of his medical trainees, Carla Song, in inserting IVs at the hospital as part of her education. Even though Carla confirmed his alibi, Detective Sing asked him to stay a little longer and listen to the interrogation of Amanda Young, whom they requested to repeat her testimony in Gordon's presence as they wanted to see his reaction. The doctor agreed and was visibly shocked as Amanda described her traumatic experience. After the interrogation, Gordon was allowed to leave. Nonetheless, Tapp still was not entirely convinced of the doctor's innocence and ordered Kerry to keep an eye on him. (Saw II: Flesh & Blood)
Hack Job[]
Around this time, Tapp's unit started getting bad press when a hack writer named Oswald McGillicutty openly criticized the forensics' work. He accused them of working sloppily as they had not found any helpful evidence despite the increasing number of dead victims. To confirm the details of his story, he tried to call Tapp. However, the latter did not get back to him as he deemed talking to McGillicutty a waste of time. Nonetheless, the unwarranted public criticism angered Tapp, who was keen on getting McGillicutty fired. (Saw: The Video Game, Saw II: Flesh & Blood)
Observation of Amanda Young[]
Unwilling to deal with the press, Tapp focused on the investigation and sent Detective Hoffman after Amanda Young when she left the station. Hoffman followed her to the International District, where he saw her talking to a woman named Sarah Blalok. As he reported back to Tapp, they quickly learned that Sarah was a police informant. When asked about Amanda, she told the detectives that the latter came to her to ask her about Cecil's whereabouts, assuming she was talking about Cecil Adams. Therefore, the police went to his apartment. However, the landlord of Cecil's flat had not seen him in a while. (Saw II: Flesh & Blood)
Gideon Kramer's Death[]
When searching Cecil's apartment, the police found a brand new spiral notebook with only a few entries. Cecil had used the notebook to write down a confession. Sometime before his abduction and subsequent death, Cecil's girlfriend, who turned out to be Amanda Young, had suffered from severe withdrawal symptoms and convinced Cecil to rob a free clinic and steal the medical drugs. They drove to the clinic and entered the building when they encountered a pregnant doctor. While Amanda hid in a corner, Cecil threatened the doctor with a pair of scissors, forcing her to open the door to the drug supplies. After she obeyed his order, Cecil told her to stand back. He quickly stole the medications and then ran back. Upon doing so, he accidentally slammed a doorknob into the doctor's stomach. As she saw the blood on her skirt, she slumped down and started to cry. When he realized what he had done, Cecil quickly fled and left Amanda behind. According to his notes, a person with a pig mask, whom he believed to be the woman, followed him ever since that night. Out of fear that she wanted revenge, Cecil had written his confession in case something happened to him.
By reviewing the incident reports, Tapp and his colleagues found out that there were six assaults on women and only one at a free clinic on the night in question. Therefore, they quickly identified Cecil's victim as Dr. Jill Tuck, who ran the clinic. Besides that, the pig mask mentioned by Cecil also caught Tapp's attention, as the Chinese Year of the Pig was celebrated in the International District during that time. (Saw II: Flesh & Blood)
False Alibi[]
Shortly afterward, Kerry reported back to Tapp after following Lawrence Gordon. While observing him, she had witnessed how Gordon and his trainee, Carla Song, spent about half an hour in the doctor's car. Although there was no sexual interaction between them, this incident reinforced Tapp's doubts about Gordon's alibi and made him consider him their prime suspect again. Tapp found out that Gordon was mainly responsible for treating terminal patients. These patients included Campbell Iman, a drug addict with a malign lymphoma, and Charles Carlyle, whom Lawrence diagnosed with an astrocytoma, a type of brain cancer that had entered a terminal state due to being diagnosed too late. Another patient, John Kramer, was diagnosed with a frontal lobe tumor. Assuming that this work was emotionally hard to deal with, Tapp wondered if it could have affected Gordon's state of mind enough to turn him into a killer. (Saw II: Flesh & Blood)
Jill Tuck's Interrogation[]
Later, Tapp visited Jill Tuck in her apartment to question her about Cecil Adams' assault on her. Although she was still distraught by the loss of her unborn son, she answered his questions and revealed to him that she had planned to call her child Gideon. When Tapp asked her about the father, Jill told him it was a man named John Kramer. Due to her emotional state and willingness to cooperate with the detective, Tapp immediately doubted that she was the killer. These doubts were confirmed when her alibi for the time of Mark Wilson's death proved accurate, as she had worked at the free clinic that night. (Saw II: Flesh & Blood)
John Kramer[]
When looking for information about John Kramer, Tapp discovered he was a successful civil engineer. His architectural firm was responsible for designing and building half the city skyline. However, John eventually got bored with this work and turned his attention to a new project. Alongside his business partners, he founded Gideon, a foundation dedicated to property development for needy people. The company bought up abandoned real estate and renovated them into low-cost housing. (Saw II: Flesh & Blood)
Suspects[]
As he reviewed his notes, Tapp also remembered that John was one of the terminal cancer patients treated by Lawrence Gordon. Although John had a motive for killing Cecil, Tapp deemed him an unlikely suspect due to his physical condition caused by his disease. He also theorized that John and Jill could have worked together but quickly discarded that idea as Jill had voluntarily given John's name to Tapp during her interrogation. Still unconvinced of Lawrence Gordon's innocence, Tapp wondered if the doctor could have killed Cecil out of pity for the Kramers' loss or teamed up with Jill as they were enraged by the robbery.
Upon further investigation, the detective compared the victims' names to a list of Jill's patients and learned that Cecil Adams, Paul Leahy, and Mark Wilson were treated at the free clinic. With their connection to the clinic, Amanda Young's addiction, and Mitsuka Ito's and Ronnie Navarro's involvement in drug crimes, the only victim who did not have any connection to drugs was Seth Baxter, the killer of Detective Hoffman's sister. As more and more names were added to his list of suspects, Tapp considered the different possibilities, concluding that anyone could be the Jigsaw Killer. (Saw II: Flesh & Blood)
Jigsaw's Hideout[]
Sometime later, Tapp seemingly achieved a breakthrough in the investigation. Upon further examining the video secured at the scene of Amanda Young's game, he spotted a graffito on a wall behind Jigsaw's puppet. This graffito was associated with K2K. Besides that, Tapp heard a fire alarm in the background and reviewed the recent fire reports for the area. With Sing's assistance, he ultimately learned about a fire in a rear house near an abandoned industrial building at 213 Stygian Street. Although they did not expect to get a warrant, the detectives left the police station and went to the location. (Saw II: Flesh & Blood)
Steven Sing's Death[]
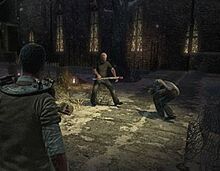
Minutes later, Tapp and Sing arrived and entered the building. While examining the location, they found the K2K graffito and recognized it as the same one from the video. When they searched the hideout, they suddenly caught a sound and discovered a man named Jeff Ridenhour strapped to a mechanical chair. However, when they heard a nearby elevator, they went into hiding. Moments later, Jigsaw arrived, disguised with a black cloak and hood. Tapp and Sing observed him as the latter approached Jeff and told him he wanted to use him to test a bigger project. At this moment, the detectives left their hiding spot and aimed their weapons at Jigsaw. Jigsaw reacted quickly and activated the mechanical chair by stepping on a button on the floor. Subsequently, two drills started to approach Jeff's head from both sides. While Sing desperately tried deactivating the contraption, Tapp held Jigsaw at gunpoint. Even though Jigsaw told them that the key to the trap was in a box next to Jeff, Sing could not find the right one in time as dozens of keys were attached to the key ring.
Nonetheless, Sing saved Jeff by shooting the drills in the last nick of time. However, the shots distracted Tapp, allowing Jigsaw to slash his throat with a hidden blade and run away. Sing pursued the killer and shot him in a hallway, causing him to collapse. Thinking he was dead, Sing approached his body and accidentally stepped on a tripwire. This carelessness proved fatal as the wire triggered another trap, which caused Sing to be killed by four shotguns attached to a ceiling beam. Afterward, Jigsaw, who wore bulletproof body armor under his cloak, left the factory unharmed. (Saw: The Video Game, Saw II: Flesh & Blood)
Internal Investigation[]
Tapp, who survived his injury, was saved after Jigsaw called an ambulance. However, he suffered a mental breakdown due to his role in Sing's death. As they had entered Jigsaw's hideout without a warrant, Tapp was on probation from then on. His firearm and badge were taken from him until the Internal Affairs Department finished its initial investigation. Furthermore, Chief Jacobs took him off the case as Tapp was technically a victim now. Therefore, Kerry became the new leading investigator and informed Tapp about this when she visited him at the hospital. However, Tapp felt guilty for Sing's death and was unwilling to accept Jacobs' decision. He tried to put Jennings Foster under pressure to get information about the progress of the investigation. To his dismay, Jennings held his tongue until they were interrupted by Kerry, who angrily told Tapp to let go of the case. (Saw: The Video Game, Saw II: Flesh & Blood)
Family Problems[]
Sometime after leaving the hospital, Tapp tried to call his ex-wife, Kara, to ask her why she did not visit him. However, Michael answered the call instead of her. While talking to his father, he told him he had trouble finding a paid position and asked Tapp for insider information on the Jigsaw case. Tapp got emotional and hung up the phone, as it was difficult for him to talk to Michael after abandoning him and his mother.
Nonetheless, Michael repeatedly visited him in his apartment shortly afterward. The two talked about Kara and Michael's job as he had become an intern at a local newspaper. During such a visit, Michael asked his father for some pomegranate juice. Tapp offered to go to the corner store because he had none at home. Unbeknownst to him, Michael used the opportunity to search his apartment. Thereby, he found Tapp's files and an audiotape. The tape contained a recording of Tapp confessing that he ignored proper police procedure when raiding Jigsaw's hideout. When Tapp eventually returned home, Michael was gone. He soon discovered that some of his files were missing but dismissed it as him becoming forgetful lately. (Saw II: Flesh & Blood)
The Article[]
Although Tapp tried to suppress the thought of Michael having stolen his files, these suspicions eventually turned out to be justified. Michael used the information from his father's files and tapes and published a newspaper article about the raid on Jigsaw's hideout. In that article, he revealed that Tapp had acted contrary to duty when invading the lair without a warrant, which contradicted his earlier testimony. Furthermore, Michael cast him in a negative light when stating that all evidence in the building would have been worthless as they could not be used in court due to Tapp's improper invasion. (Saw II: Flesh & Blood)
Discharge[]
Following the article's publication, Tapp was discharged from the police force by Chief Jacobs. After losing his job, he spent most of his time at home and developed a drinking habit. Neglecting himself, the former detective soon lost track of time until he saw an old magazine covering the story of John Kramer, who was voted Man of the Year for his philanthropic work. Feeling ashamed of wasting his time drinking and wallowing in self-pity while people like John Kramer and Jill Tuck dedicated their lives to helping others, Tapp became determined to bring Jigsaw to justice and end his games for good. Hoping to receive any information about the killer, Tapp repeatedly contacted Jeff Ridenhour. However, the latter could not answer his questions and eventually attempted suicide when the former detective did not stop harassing him. (Saw II: Flesh & Blood)
Sarah Blalok[]
Sometime later, Tapp went to a corner store, where a blonde woman asked him if he could change some money. He quickly recognized her as Sarah Blalok, the informant who had told them about Amanda Young's search for Cecil Adams. They got into a conversation and eventually developed a friendly relationship. Although Tapp had not fully recovered, Sarah helped him feel better after the recent strokes of fate caused by Sing's death, Jigsaw's escape, Michael's betrayal, and Tapp's subsequent discharge from the police. (Saw II: Flesh & Blood)
Observation of Lawrence Gordon[]
Eventually, Tapp continued his investigation on his own. As he still considered Lawrence Gordon the main suspect, his distrust of the doctor grew into a downright obsession. Tapp followed him on several occasions until the doctor eventually spotted him. When looking for another way to keep an eye on Gordon, Tapp remembered how Bernie, an officer who worked for the Metropolitan Police Department, had spoken about a freelance photographer named Adam. Bernie had suspected his wife of cheating on him. Therefore, he hired Adam to observe his spouse and find proof of her infidelity. Tapp eventually decided to call Adam and hired him to follow Dr. Gordon.
While Adam kept an eye on the doctor, Tapp broke into the police station to get his files back. However, his former colleagues soon discovered the theft and concluded that Tapp was behind it. A few days later, he spotted a beat cop bursting open the door to his apartment when he returned home. However, as Tapp had the files in his car, the cops did not find them. Knowing that he had to keep a low profile, Tapp avoided being seen by the cop and began looking for a new place to stay. Eventually, he rented a run-down flat across the street from Dr. Gordon's apartment. (Saw II: Flesh & Blood)
Gideon[]
Besides observing the doctor, Tapp also concentrated on learning more about Gideon, the charitable company founded by John Kramer. From the files he stole from Kerry's desk, Tapp knew that Gideon owned around eight city blocks and had three housing contractors on projects. In addition, some of the industrial buildings in the company's possession ran on the same sewer system. When delving into the matter, Tapp discovered that the foundation consisted of three people - John Kramer, a lawyer named Art Blank, and an accountant named Solomon Bates.
Tapp's attempts to contact John Kramer remained unsuccessful, and nobody could tell him where he was. Likewise, Art Blank had mysteriously disappeared. Although no one knew his whereabouts, his secretary assumed he was on vacation with his children. Therefore, Tapp focused on Solomon Bates, hoping the latter would eventually lead him to his partners. Bates, who took care of Gideon's financial concerns, was a member and associate of Bates & Gregson, a small accounting firm.
One day, Tapp followed Bates from his home to his office, where the latter stayed for three hours. Afterward, he went to a residence on 124th Street. When Bates left the house again after an hour, Tapp noticed that the accountant had a different briefcase than before. To find out more about the person Bates had met, Tapp gave the address to a private investigator he knew. (Saw II: Flesh & Blood)
Observation of Joseph Poltzer[]
Upon doing so, Tapp learned that the house was legally owned by a vice cop named Joseph Poltzer, whom his colleagues generally disliked due to his obtrusive, unfriendly, and annoying attitude. Albeit Tapp could not link him to Jigsaw, the former detective considered the possibility that Poltzer supplied the killer with potential victims. Therefore, he bought a bugging device from a local spy shop and broke into Poltzer's apartment to install it on his phone. This way, he wanted to keep track of Poltzer's phone calls to see if he was in contact with Jigsaw.
Sometime later, Tapp was surprised when Poltzer met up with Carla Song, Lawrence Gordon's alibi for the night of Mark Wilson's death. She handed Poltzer a manila envelope with something bulky in it. Confused by Carla's connection to Gordon and Poltzer, he put her and the doctor under surveillance. However, besides occasional hotel visits, Tapp did not observe anything suspicious. (Saw II: Flesh & Blood)
Observation of Carla Song[]
Eventually, Tapp went to a free clinic where Carla worked to see what she did after hours. He hid in an empty closet and waited until the lights went out before following Carla to the pharmacy. From his hiding spot, he witnessed how she stole several bottles of drugs and put them in a manila envelope. After she left, Tapp looked at the remaining bottles and saw they had expired the week before. (Saw II: Flesh & Blood)
The Drug Cartel[]
Upon continuing his observation of Joseph Poltzer, Tapp discovered that he met up with Chief Jacobs every night after work to give him big cash stacks. These meetings made Tapp assume that Poltzer paid Jacobs so the latter would ignore his criminal activities. Furthermore, he concluded that the alleged bribe money was why Jacobs had discharged him from the force.
However, one night, Carla Song, Henry Jacobs, Solomon Bates, and Joseph Poltzer met in the latter's house. By observing them, Tapp finally realized that all of them were members of a drug cartel. While Jacobs and Poltzer led the organization, Carla supplied them with drugs stolen from the clinic. Meanwhile, Solomon Bates concealed the cartel's profits and activities. This revelation was a major disappointment for Tapp as he had wasted several months observing them, although none of them was connected to Jigsaw. Therefore, he returned to his previous suspects, looking for something he might have missed earlier. (Saw II: Flesh & Blood)
Zep Hindle[]
One night, Tapp finally made a shocking observation in Dr. Gordon's house when an invader named Zep Hindle took Gordon's wife and daughter, Alison and Diana Gordon, hostage and held them at gunpoint. Believing that Zep was the Jigsaw Killer, Tapp stormed into the apartment and opened fire on Zep, while Alison grabbed the chance to free her daughter and escaped with her.
When the attacker fled, Tapp pursued him to an abandoned industrial building. He followed him into the building and outran Zep in an underground tunnel network. The men engaged in another fight, during which the former detective quickly gained the upper hand by brutally battering Zep. However, during their scuffle, Tapp was shot in the chest, collapsed, and eventually passed out, allowing Zep to escape. (Saw: The Video Game, Saw II: Flesh & Blood)
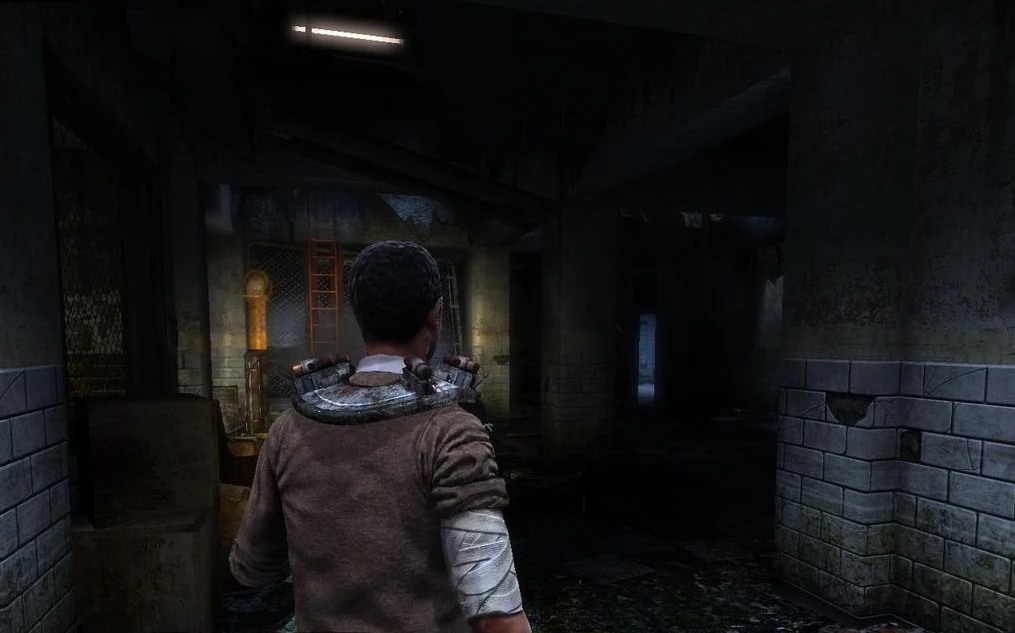
Trial[]
While wandering through the hallways, John Kramer, the real Jigsaw Killer, found Tapp unconscious but still alive. He took him to the abandoned Whitehurst Insane Asylum, where he prepared a game for him. While doing so, he was aided by a mysterious pig-masked accomplice. By forcing him to play one of his games, John wanted to cure Tapp of his obsession with catching him. While the detective was unconscious, John treated his gunshot wound and took the opportunity to hide a key inside his body. Besides Tapp, many other people were trapped at Whitehurst and needed the key to escape. After the surgery, another one of John's victims strapped Tapp to a wheelchair and took him to a bathroom in the asylum. Upon their arrival, he put a mechanical contraption on his head, which worked like the trap used to test Amanda Young. (Saw: The Video Game)
First Test[]
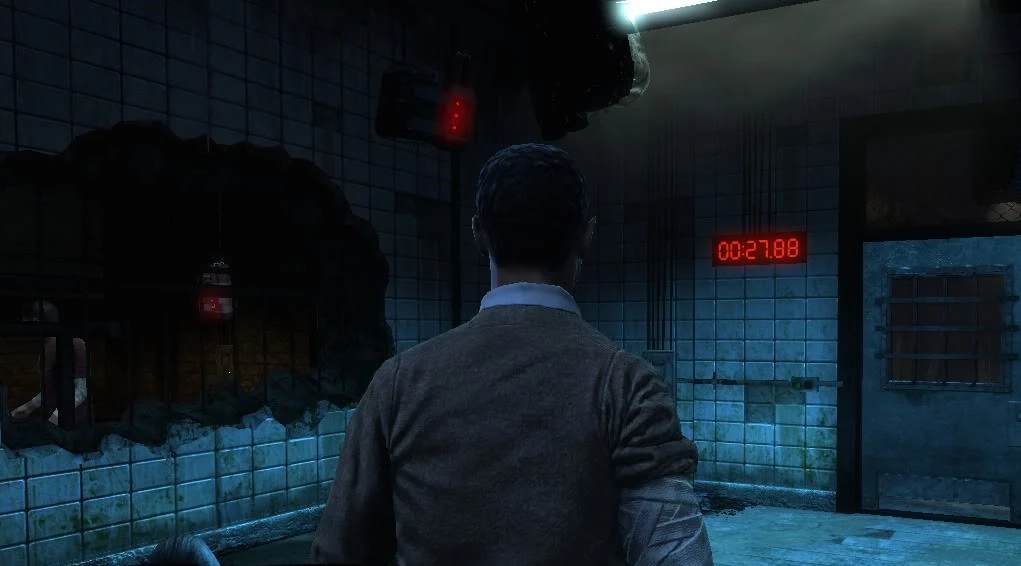
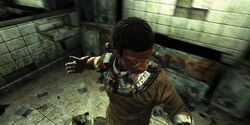
Tapp wakes up at Whitehurst.
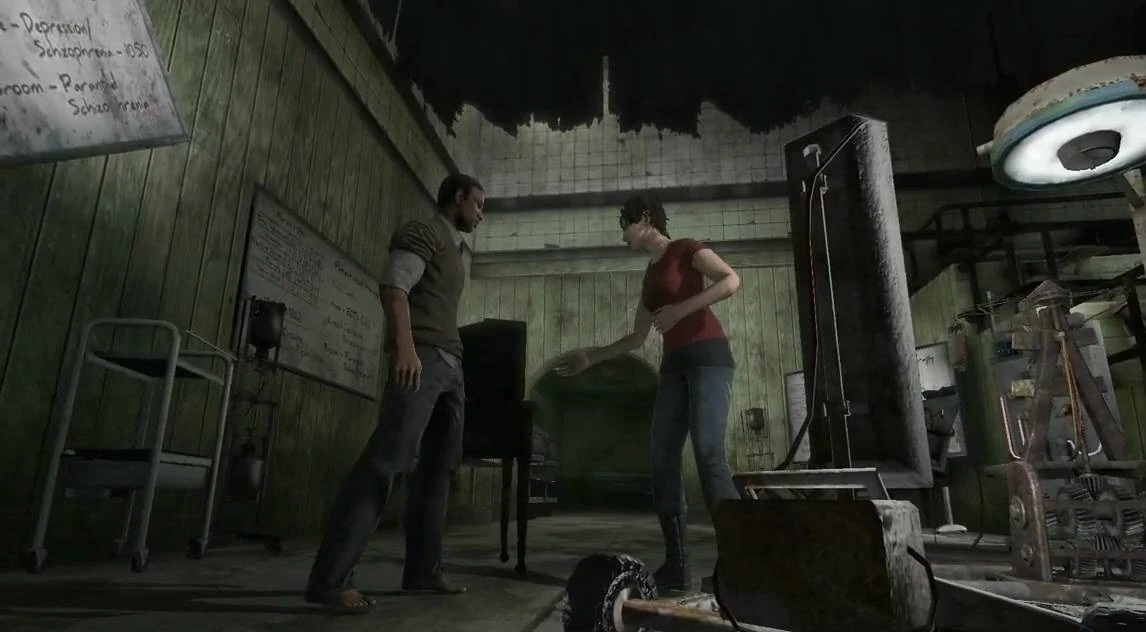
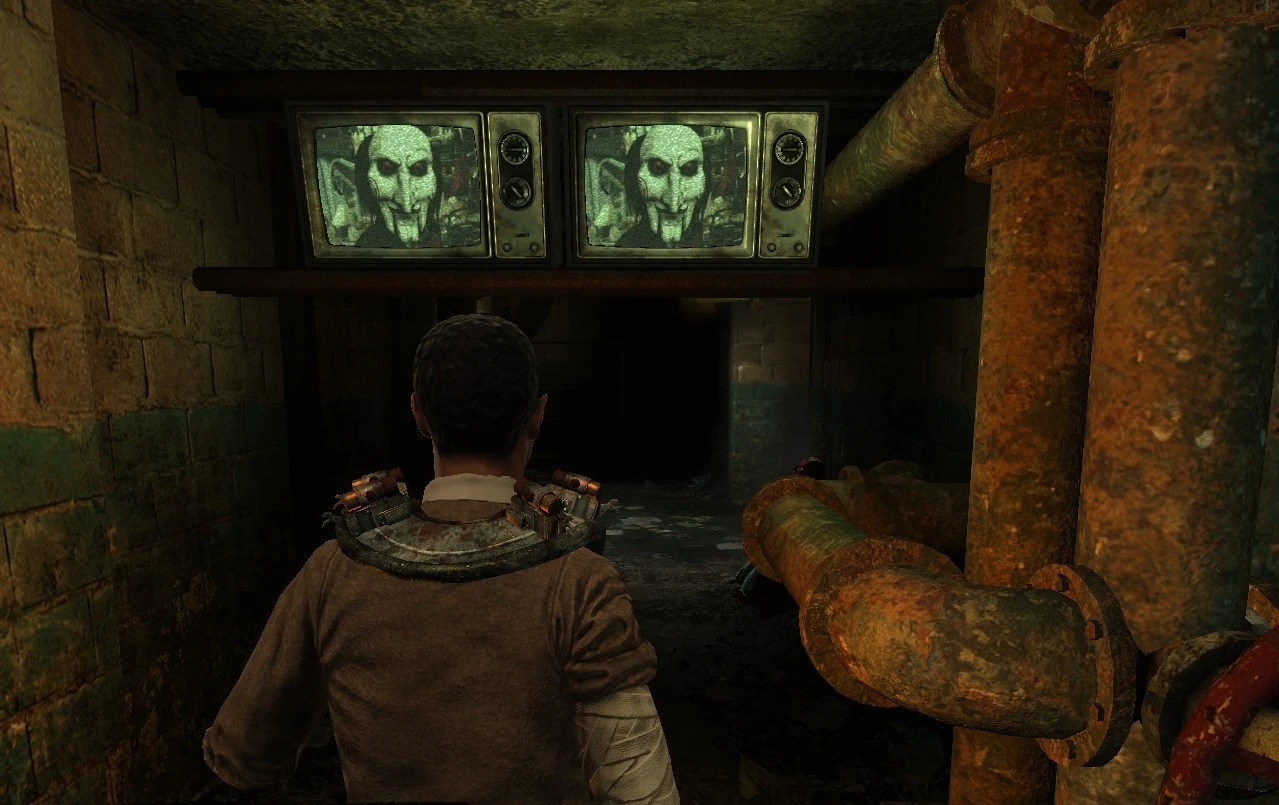
When Tapp eventually woke up, he panicked and attempted to free himself from the chair. However, he stopped when a TV turned on in front of him. Jigsaw's mechanical ventriloquist puppet appeared on-screen and greeted him. The doll confronted Tapp with his obsession with apprehending Jigsaw and his subsequent sacrifices, such as Sing's death or the bullet wound caused by Zep Hindle. It also reminded him of the device on his head and demonstrated its deadly function on a mannequin sitting on another chair.
After the tape ended and the TV turned off again, Tapp got free from his chair and tried to remove the device. Although he did not have a key, Tapp had spent much time examining the trap from the crime scene of Amanda Young's game and could open it either way. Tapp quickly removed the contraption and threw it away, causing it to burst open only moments after hitting the floor. He angrily yelled at Jigsaw that he would not play his game but quickly realized he had no choice and tried to calm down. Meanwhile, he was observed by John Kramer over the surveillance cameras. (Saw: The Video Game)
The Bomb Room[]
Upon trying to escape, Tapp realized that the exit door leading out of the room was secured by a padlock, which required a three-digit combination to open. He soon discovered that the necessary numbers had been written mirror-inverted on the room's three toilet cabins' doors. Tapp closed the doors and read the numbers by looking in a mirror on the room's opposite wall. With the right combination, 437, Tapp opened the door and continued.
He soon heard the voice of a man who screamed for help. Tapp followed his voice and entered another toilet room, where numerous nail bombs were hanging from the ceiling. Seconds later, the door slammed shut behind him. Tapp saw the screaming man in the adjacent room through a metal grate. At this moment, another TV turned on, showing the puppet, which informed the men about their next test. Two control panels secured the doors to both of their rooms. However, to activate them, Tapp first had to find a fuse in one of the toilets.
Tapp faces his next test.
When the tape ended, a 90-second-timer started to count down. In a panic, the first man told Tapp he had witnessed someone dropping the fuse in the toilet. The toilet, however, was full of used syringes. Therefore, the other man frantically encouraged Tapp to get it out. Eventually, Tapp obtained the fuse and inserted it in a fuse box, causing the timer to stop. Afterward, the men opened the doors with the panels. Upon leaving their cells, the first man noticed that the floor in Tapp's path was covered in broken glass. However, he explicitly refused to give Tapp his shoes and showed himself rather ungrateful for his salvation. Afterward, he went on and left Tapp behind. (Saw: The Video Game)
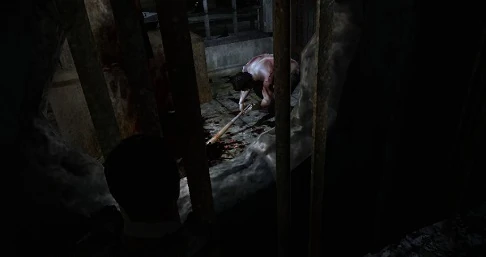
Appreciate Your Life[]
Upon passing the floor covered in broken glass, Tapp followed the same way as the other prisoner and came to a dark hallway, which he could only illuminate with a lighter from his pocket. As he progressed, he heard a metallic sound, followed by the noises of someone running away. Seconds later, he stumbled upon a man's mutilated corpse. Unable to do anything for him, Tapp went on and eventually came to a fence. Behind the barrier were two men who argued with each other. One of them had one of Jigsaw's traps, a so-called death mask, locked around his neck. The two halves of this mask were spiked with nails on the inside. They were horizontally positioned before and behind the victim's head, similar to a Venus flytrap. While talking to the second man, the trapped prisoner demanded the key to the device. The other man claimed that a cop named Tapp had it. Angered by this, his opponent brutally beat him to death. Seconds later, he noticed a ticking sound and spotted Tapp on the other side of the fence. He approached him, screaming in fear, but ultimately died and collapsed when the mask closed on his head.

Tapp finds the message.
After witnessing this brutal scene, Tapp went on and soon came across another TV, which turned on right in front of him. Yet again, the puppet appeared on-screen and explained the reasons for Jigsaw's grisly games to Tapp, warning him that he would have to make some sacrifices to survive and leave this place alive. When the TV turned off again, Tapp read the message "Will you appreciate your life?" on a wall in red letters. He then continued his way and climbed up a ladder. Halfway up, he suddenly spotted Jigsaw's pig-masked accomplice, who ran toward him but was held back by a grate. Terrified by this encounter, Tapp quickly climbed the rest of the ladder. (Saw: The Video Game)
The Ambush[]
Thereby, Tapp reached the surgical theater of Whitehurst. Upon doing so, he heard a woman's voice from the theater's lower level as she screamed for help. Unfortunately, another fence prevented Tapp from reaching her. Furthermore, he could not see her due to a big, white curtain blocking his view. As he went further on the upper level, he found the corpse of another male victim of Jigsaw. Next to him was a tape recorder. Tapp learned from this tape that the woman was one of his witnesses and the "first victim of his obsession." The recording also told him he could save her if he reached her in time.

The prisoner attacks Tapp.
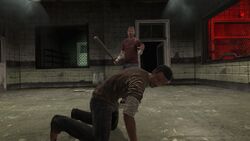
Eager to help the woman, Tapp went on. However, just as he passed another door, he was suddenly attacked from behind by the man he had saved from the nail bombs earlier. The latter assured him it was nothing personal but part of his game and then advised Tapp to grab a weapon. Just as Tapp got back on his feet, the man went to the next room and closed the door behind him. Through a grate, he witnessed how Tapp was attacked by a second prisoner, who was much more aggressive. Therefore, Tapp grabbed a metal pipe from a trashcan and defended himself by killing the attacker.
Moments later, another TV turned on in the room where the first man had locked himself up. When the puppet appeared on-screen and mockingly laughed at him, the prisoner angrily yelled that his game was over as he had done what he was told. However, when he opened another door and tried to leave, he was shot by a shotgun positioned above the door. Unable to react fast enough, he was killed and fell to the floor before Tapp's eyes. (Saw: The Video Game)
The Key[]

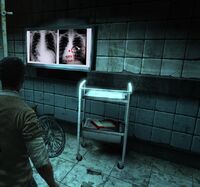
Tapp finds the X-rays.
Tapp searched his attacker's corpse and found a key to open the next door. Furthermore, he found a written note by Jigsaw, in which the latter told the prisoners that he had hidden a key inside Tapp's body, which could save all of them from Whitehurst. As Tapp went on, he eventually entered a room with a bed and an X-ray of his chest. The X-ray showed the key inside Tapp's body and was marked with the words "Tapp is the key to your survival." Another written message confirmed Tapp's worst assumptions, as it told him that Jigsaw had hidden the key inside him while treating his gunshot wound received from Zep Hindle. (Saw: The Video Game)
The Right Body[]
Tapp went on and attempted to enter the main hallway. However, the door automatically closed before him as he approached it and could not be opened again without a key. Therefore, Tapp chose another way and passed by a dead man hanging between countless razor wire skeins. In the room next to him was another audiotape left by Jigsaw, in which he tried to convince Tapp that not everyone saw his work as something evil, claiming that some people wanted to be tested or even created tests on their own.
Tapp finds the bodies.
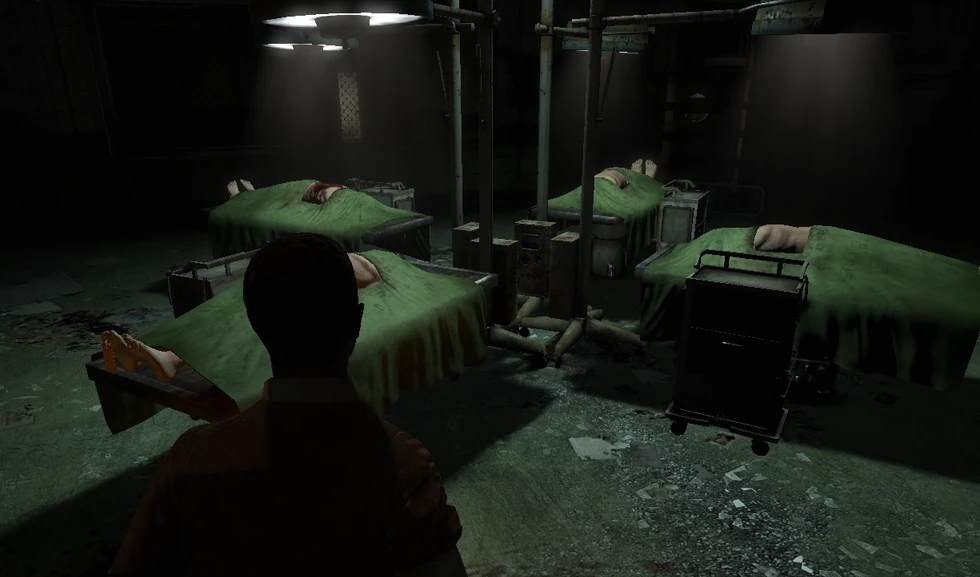
Tapp continued his way and reached an operating room. Through the fenced windows, he saw four men - Arney Faulkner, Jim Aumen, Marvin Johnson, and Tom Robinson - each lying on an operating table and covered with a surgical drape. Tapp was able to open the door to the room by restoring the power. Over the loudspeakers, Jigsaw informed him that one of the bodies contained a key required to progress. However, he also warned him about the consequences if he chose the wrong one. Another audiotape told Tapp that Jigsaw had not placed the key himself. Instead, another one of his victims was ordered to do so and had to take action if Tapp searched the wrong body. By looking at some X-rays on the walls and the tags at the men's toes, Tapp quickly found out that the key was in the body of Arney Faulkner, who was, in fact, the only one who was already dead. With a scalpel from a table, Tapp cut open the body and obtained the key.
Moments later, a TV turned on before him, showing the woman trapped in the surgical theater. Tapp recognized her as Amanda Young, who was strapped to a medical chair. Upon waking up, Amanda panicked as Jigsaw, who concealed himself with a cloak and a hood, worked on the chair for some final preparations. Amanda desperately told him that she had passed her test already. However, he responded that she did not learn her lesson as she still did not overcome her drug addiction and self-harming tendencies, which were the reason for her test in the first place. (Saw: The Video Game)
Freedom is an Illusion[]
Tapp went on with the key and soon returned to the door to the main hallway, which he could open now. When he entered the next room, he saw that the floor had collapsed, and only a single wooden beam provided a path forward. Another prisoner with a reverse bear trap on his head was on the other side of the room. As he noticed Tapp's presence, he immediately yelled at him and tried to reach him by running over the beam. However, he quickly lost his balance, plunged into the abyss, and was impaled and killed by numerous metal spikes. Nonetheless, Tapp had no choice but to try to walk over the beam. He eventually reached the other side unharmed by keeping his balance and moving slowly and carefully.
After doing so, he found another door leading to the surgical theater, which was closed. Furthermore, it was surrounded by several monitors, with the words "Can you rescue her, Detective Tapp?" appearing on the screens. While looking around to find another way, Tapp noticed a window with the word "Freedom..." written above it. However, as he approached it, a roller shutter slid down with the words "...is an illusion" on it. Realizing that Jigsaw merely tried to mock him, Tapp continued his path. Thereby, he came across a locked security gate. He had to find a coupler and put it into a nearby circuit box to open it. (Saw: The Video Game)
A Different Perspective[]
As he went on to find it, Tapp noticed a small black box with a message that said, "Who am I?". It contained an excerpt from a partly blacked-out patient file of a 34-year-old man who was a patient at Whitehurst in 1998. According to the document, the patient was a highly intelligent man with a narcissistic disorder. However, this information was insufficient to help Tapp identify the man. Therefore, he moved on and climbed down a ladder to one of the lower floors.
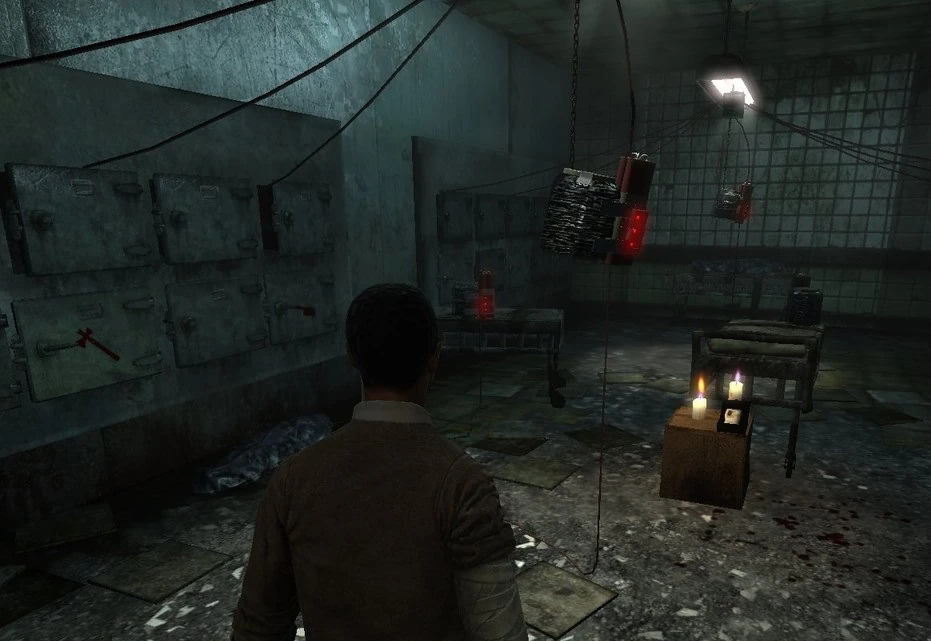
As Tapp entered an area resembling a morgue, another TV turned on before him, showing Jigsaw speaking to Amanda. To Amanda's surprise, he informed her that Detective Tapp was on his way to save her. When the TV turned off again, the words "Darkness also illuminates," written on a table, were revealed, as they had been written with fluorescent color.
Tapp searches the morgue.
Tapp looked around the morgue and saw several nail bombs hanging from the ceiling. There were also numerous lockers with different symbols drawn on them. Another audiotape advised Tapp to look at the problem from a "completely different perspective" if he wanted to solve his next task. When he found a fuse inside a nearby cabinet, Tapp decided to follow Jigsaw's clues and used it to activate a panel, which caused some of the incandescent lamps in the room to burst.
Tapp saw several fluorescent-colored lines drawn on the walls in the newly created darkness. From the correct perspective, these lines looked like a gun. Therefore, Tapp opened the locker with a pistol drawn on its door and ultimately found the coupler. Unfortunately, opening the vault caused the timer of the nail bombs around him to count down. Tapp fled from the room and quickly got out of the range of the explosion. Afterward, he returned to the security gate he had found earlier and used the coupler to open it. (Saw: The Video Game)
The Way to Amanda Young[]
After passing the door, Tapp continued his way. As he went through the hallways, he was ambushed by another prisoner breaking through a door before him. The man was ready to kill him to get the key from inside his body. Tapp reacted quickly and bolted another door before the attacker could reach him. Additionally, he blocked it by shoving a large wooden crate before it. Having evaded the attack, Tapp went on and came across a desk, where he found another audiotape and the badge of his late partner, Steven Sing. The tape reminded him of Sing's death and Tapp's interrogation of Amanda Young after her survival. Furthermore, he learned that the desk held the key to her chamber. Mourning Sing's death and feeling guilty for it, Tapp picked up his badge and took it with him as he went on.
He soon entered a room with another set of nail bombs. As their timer started to count down, the door behind Tapp slammed shut. His only way to escape was to open the next door within 60 seconds. The lock required another three-digit combination. In a panic, Tapp searched the file cabinets in the room and ultimately found a fuse. When he used it to activate the next panel, three TVs turned on and showed him the combination, one digit per screen. With the combination 579, Tapp managed to escape the explosion in time. Just as he opened the door, the timer stopped to count down. Following his escape, Tapp found a key on a small table. However, as he grabbed it, the mysterious man with the pig mask suddenly broke through the next door and sedated him. (Saw: The Video Game)
Amanda Young's Salvation[]
When Tapp woke up again, he found himself lying on the floor directly in front of the door to the surgical theater. He unlocked it with the key and went down a set of stairs, where he found another TV. As he approached it, he saw Amanda in her trap. She tried once more to convince Jigsaw to free her, promising that she did not tell the police anything about him and that she would overcome her drug addiction and her acts of self-harm. However, Jigsaw calmly denied her plea for freedom and ultimately left her behind.
As the screen went blurry again, the next door opened. Upon passing it, Tapp finally reached the surgical theater. The white curtain was lifted, revealing Amanda. Moments later, the next TV turned on in front of them. Jigsaw's ventriloquist puppet appeared on-screen and confronted Amanda about her previous misdeeds. It also informed her that only Detective Tapp could save her from her trap. Meanwhile, two needles injected her with poison.
When the tape ended, Tapp sat down on a second chair and was injected with poison by two needles piercing his neck. Between him and Amanda was another large machine, which processed colored vials of the different antidotes. Tapp had to ensure that each vial was processed to the right chair. The red vials would cure Amanda, while the blue vials would save Tapp. While Amanda panicked, Tapp tried administering all the colored vials correctly.
Amanda argues with Tapp.
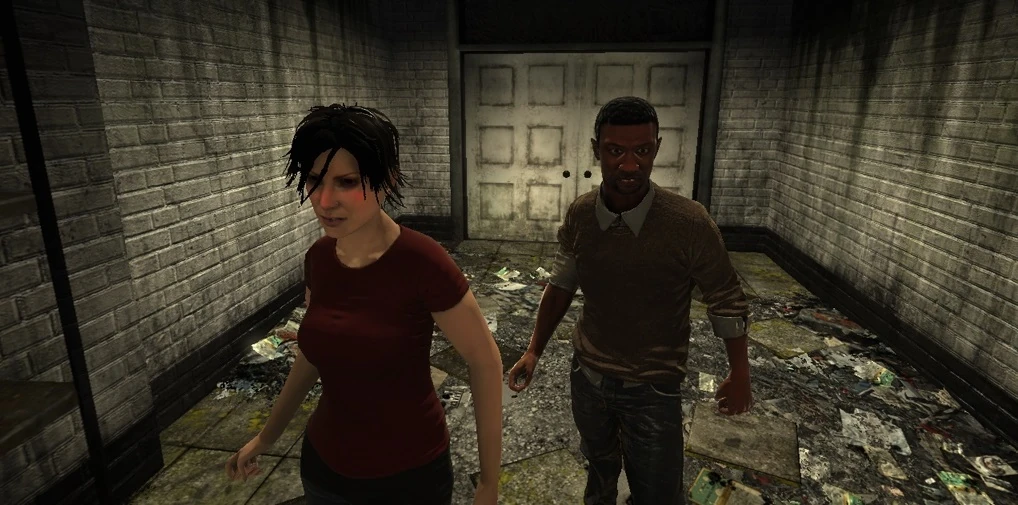
Eventually, he managed to cure himself and Amanda of the poisons, and both were released from their chairs. As Amanda was still agitated, Tapp tried to calm her down. When she told him she had seen Jigsaw, Tapp asked her who he was and what he looked like. This question angered Amanda, who scolded Tapp for showing more interest in Jigsaw than the fact that the trap had almost killed her. She also blamed the former detective for having been tested again. Nonetheless, the two of them went on and continued their way together. (Saw: The Video Game)
Amanda Young's Abduction[]

Tapp and Amanda continue their way.
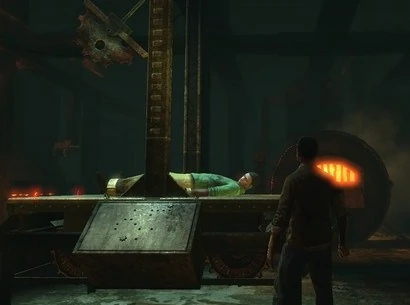
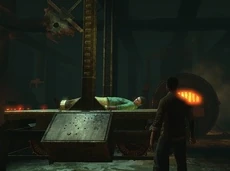
As they continued, Amanda warned Tapp that they had to obey Jigsaw's rules to escape the asylum. When he asked her why she was tested again, Amanda responded that she did not learn her lesson in the killer's eyes. Furthermore, she made no secret of her aversion to Tapp and reminded him that Jigsaw controlled everything around them. Upon going down a staircase, they reached a door with numerous TVs around it, showing Jigsaw's puppet. Additionally, there was a tape recorder in a small box and the words "Find secrets buried in the basement" written on the wall. Once Tapp started the tape, the TVs switched to a live feed of Jennings Foster. The latter was strapped to a metal table underneath a giant pendulum-shaped blade. The recording informed Tapp that he had to reach Jennings in time. It also urged him to ask Jennings about the truth behind the hit-and-run accident they both worked on years earlier, indicating that Jennings had something to do with it.

Tapp witnesses Amanda's abduction.
When the tape ended, the door opened, and Tapp and Amanda went on. After a few steps, another set of TVs turned on, showing Jennings. Upon waking up, he immediately screamed for help but was interrupted by Jigsaw. To his surprise, Jigsaw knew the truth about the car accident. It was Jennings who had killed the homeless man while intoxicated. Afraid that Tapp might discover the truth, Jennings manipulated the evidence and framed an innocent man, who was subsequently sent to prison. When Jigsaw confronted him about his crimes, Jennings showed no remorse and, despite his fear, angrily insulted his abductor. When the TVs turned off again, the next door opened. However, it slammed shut behind him once Tapp passed it, separating him and Amanda. Moments later, the man with the pig mask attacked Amanda and dragged her away. (Saw: The Video Game)
The Shotgun Collar[]
Forced to continue his way alone, Tapp went on. A few seconds later, he witnessed another prisoner behind a lattice gate. The man desperately screamed and tried to remove a mechanical collar locked around his neck but was killed when the collar suddenly detonated. The words "Innocent or guilty? Friend or enemy? Find the truth." appeared on numerous TVs around the gate. Unfortunately for Tapp, he did not have the key to open it yet and had to find another way. He soon came across a barrel filled with acid. Yet another TV turned on, showing Jigsaw's doll, which told him about a key hidden in the barrel. Having no choice but grabbing it with his bare hands, Tapp received the key but suffered intense pain due to the acid.
However, the key was not meant to open the gate Tapp just came across but a second gate leading to the asylum's boiler room. As he tried to get there, he soon reached the next obstacle. Hot steam emerged from a broken pipe and blocked his way. Two TVs turned on, showing the puppet yet again, which told Tapp that he needed a valve wheel to shut off the steam. The only clue given to him was a message written on the wall: "See the janitor about the steam." Therefore, he followed a direction sign leading to the janitor's office. When he passed another gate, Tapp was attacked and subdued by the man with the pig mask, who took him to a bathroom somewhere else in the building.

Tapp awakes with the collar around his neck.
When Tapp woke up again, he was initially dazed but quickly regained his senses and realized that Pighead had locked an explosive collar around his neck. He desperately tried to remove it but ultimately accepted that it was impossible. Therefore, Tapp continued his path and tried to find a way out of the room. He saw some letters written on a mirror and the opposite wall. Looking at the mirror from the correct perspective, he read, "Darkness illuminates." Next, Tapp turned off the lights and spotted the symbol of a key painted on a wall above a toilet cabin. He discovered that the key was in the toilet among many used syringes. Nonetheless, he eventually obtained it and finally left the bathroom.
Outside the room, he found the corpse of another one of Jigsaw's victims with a tape recorder in front of him. Tapp learned that his collar would be activated whenever he got too close to other victims in the asylum who wore the same collars. His only way to survive was to kill them or bring some distance between himself and the other victims. Only moments later, he witnessed the collars' deadly function. A man attacked him to obtain the key from inside his body. Therefore, Tapp quickly closed a door and bolted it, making it impossible for his attacker to follow him. Afterward, Tapp ran away, and moments after moving out of range, the second man's collar detonated. (Saw: The Video Game)
The Valve Wheel[]
Tapp finally reached the janitor's office. A message on a chart told him that the valve wheel he needed to shut off the steam was nearby. Shortly afterward, Tapp found it in the office and picked it up. However, on his way back, he encountered two other prisoners who wanted Tapp's key, forcing him to kill them in self-defense. When they were dead, Tapp eventually returned to the path blocked by the steam. He attached the wheel to the designated position and shut it off.

The puppet talks to Tapp.
The TVs above the pipes turned on again, and the puppet congratulated him for solving his task while warning him that other prisoners might use the same path. As Tapp was about to pass the pipes, he stumbled upon a dead man who had died of severe, extensive burns and held another tape. Upon playing the recording, Tapp learned that Jigsaw had told the man to redirect the steam to slow him down. However, as he had been too careless, the man was killed by the hot vapor from the pipe. (Saw: The Video Game)
The Steam Maze[]
Tapp moved forward and soon found his next obstacle - a maze of different hallways. Hot steam coming from various pipes blocked his path. Tapp had to turn several valves to find a way through the maze and move forward gradually. After following several white arrows painted on the walls and moving the valves in the correct order, he eventually reached the end of the maze and finally made it to the boiler room. (Saw: The Video Game)
The Boiler Room[]
As he entered it, a written message informed him that he had reached the heart of the boiler room. However, he was not alone. Another prisoner was there with a large metal box on his head. Due to the contraption, he could not see anything and had to rely on his hearing. In a panic, he began flailing around and tried to locate Tapp to kill him and obtain the key from his body. By setting up several traps with various components he had found throughout his game, Tapp managed to kill his opponent.
Afterward, he entered an adjacent room and found a small box on a table. This box contained the key, which he needed to reach the place where Jennings Foster was trapped. However, as he picked it up, the puppet, which appeared on another set of TV screens, told him to hurry up as the pressure from the pipes around him rose dramatically. Just as the tape ended, a timer of two and a half minutes started to count down. Therefore, Tapp quickly ran back while the pipes around him began to blow. When he reached the door to Jennings, the boiler exploded behind him and destroyed most of the area. (Saw: The Video Game)
The Furnace Room[]
With the key from the boiler room, Tapp finally opened the door he found shortly after Amanda's abduction. As he followed the direction signs to the furnace room, he saw another TV showing Jigsaw, who talked to Jennings in his trap. Upon being confronted with the hit-and-run accident, Jennings desperately tried to play it down by stating that no one would have missed the homeless man as the latter had no family. He also attempted to justify that he wrongfully incriminated an innocent man, saying it was necessary to protect himself. His prevarications, however, did not convince Jigsaw to release him. Instead, he left him behind as Tapp was about to arrive for the next part of his game.
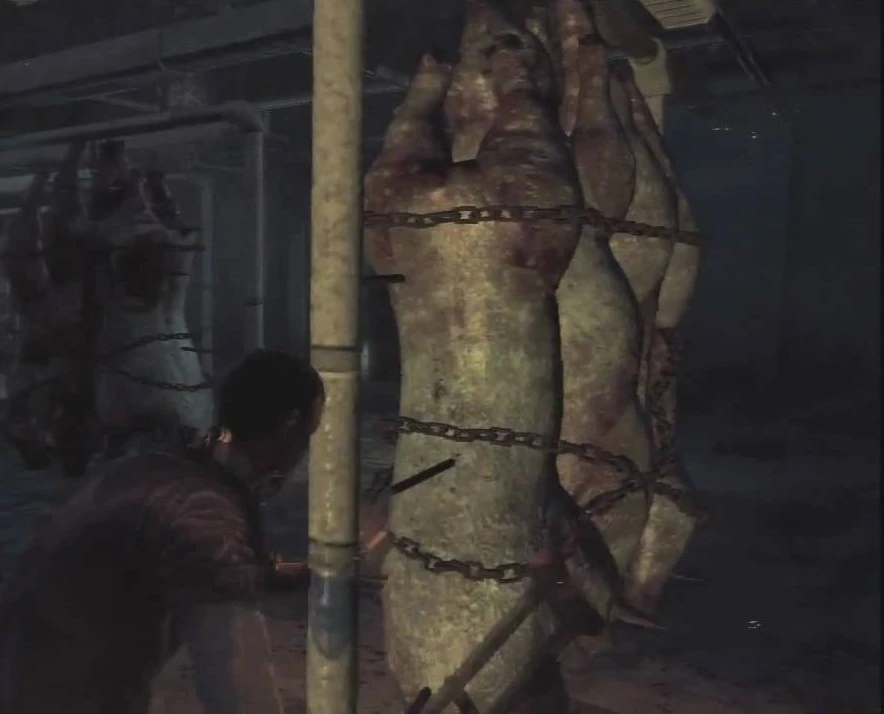
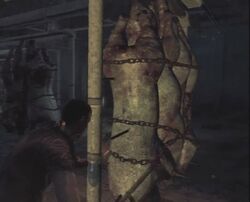
Tapp moves the pigs out of the way.
Tapp continued and came across another message on a wall, which told him to "Push and pull your way forward." In the next room, he found several rotten pig carcasses hanging from large meat hooks. Tapp had to move them correctly to clear the path and move on. Thereby, he came into a room where another victim of Jigsaw was released from a cell. Like the one in the boiler room, this man could not see due to a metallic contraption on his head. However, he was just as aggressive as the other prisoners and flailed around in his attempt to kill Tapp. Therefore, Tapp killed him instead and retrieved a key from his body. With this key, he opened the door to the furnace room and finally found Jennings Foster. His former colleague was still chained to the metal table underneath the pendulum. (Saw: The Video Game)
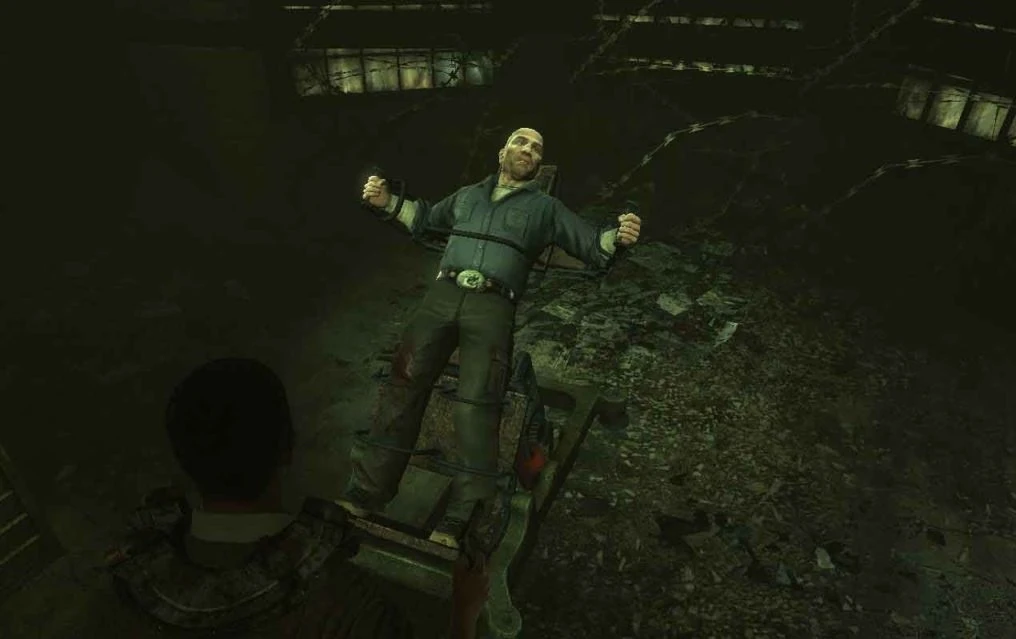
Jennings Foster's Salvation[]
When Tapp entered the room, the next TV turned on, and Jigsaw's puppet appeared on-screen. It confronted Jennings about his crimes and told Detective Tapp how to save him from the trap. Three panels with gears were positioned around the table. Tapp had to connect them by adding more cogs of varying sizes. If one series of cogwheels was connected successfully, the pendulum, which was lowered at regular intervals, returned to its original position, granting Tapp more time to finish his task.
Tapp finds Jennings in his trap.
When the tape ended, the pendulum blade suspended above Jennings started swinging back and forth. While Jennings further panicked and shouted at Tapp, the latter tried to connect the gears on the three panels around the table. Eventually, he successfully did so in time, and the pendulum abruptly came to a standstill. Seconds later, the blade broke away from its holding mechanism and fell right between Jennings' legs, barely missing him.
Afterward, Jennings was released from his shackles and stood up from the table. While Tapp tried to calm him down, Jennings angrily yelled at and insulted him, as Jigsaw had only abducted him because of Tapp's obsession. These accusations resulted in a brief argument between them, during which Tapp confronted Jennings about the accident years earlier, which the latter once again tried to play down. Afterward, he went away to find a way out on his own and left Tapp behind. (Saw: The Video Game)
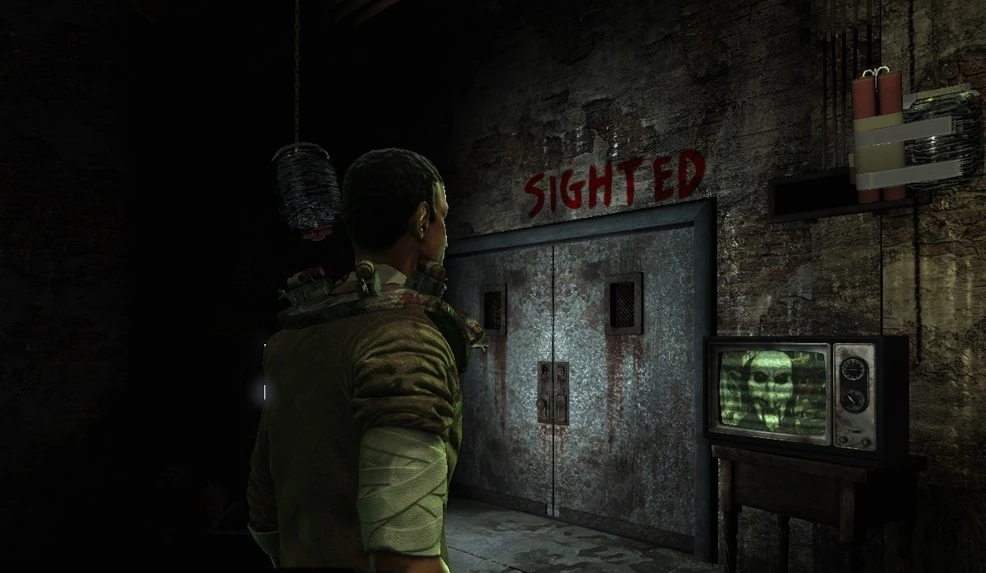
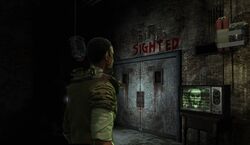
Blindsight[]
Tapp has to choose a way forward.
Forced to continue his way alone again, Tapp soon entered another room with several nail bombs positioned all around him. A TV turned on, standing on a table between two doors, one with the word "Sighted," the other with "Blind" written above it. The puppet explained that both ways would allow him to move forward, while each posed a different threat. The left path would enable Tapp to progress through the area while being able to see. However, he would have to evade several traps and obstacles. If Tapp chose the right way instead, he had to bypass several explosive barrels around the area while relying on weak light sources, such as a firelighter or a camera. Thereby, he had to be careful so the barrels would not explode. Eventually, Tapp passed this test before the 3-minute-timer expired and the nail bombs detonated. (Saw: The Video Game)
The Utility Room[]
After escaping the bombs, Tapp found a door leading to the utility room. However, as it was locked, he went upstairs instead and came across another security checkpoint. He had to restore the power to pass it, which could only be done in the utility room. Tapp found the key in a toilet filled with syringes in another washroom nearby and returned to the door.
As he entered the next area, he realized the entire room was partly underwater. Moments later, the door slammed shut behind him, and another video recording of Jigsaw's puppet explained his next task. A corpse was hanging from a chain and wrapped in several electric cords. The body was lowered slowly by a winch and would eventually energize the water, resulting in Tapp's death. Tapp's only way to escape was to open the cage where the body was located and reroute the power within three minutes. The cage door, however, was secured by a combination lock.
When the tape ended, Tapp quickly searched the entire room. While doing so, he saw fragments of numbers painted all over the walls and columns. From the correct perspective, the former detective found the right combination, 435. Furthermore, he had to look for another coupler, which he eventually found in a storage locker. After obtaining the correct numbers and the coupler, Tapp opened the cage and manipulated the fuse box. He successfully rerouted the power and escaped the room in time. (Saw: The Video Game)
The Grave[]
Upon returning to the checkpoint gate, Tapp saw a TV showing Melissa Sing, his late partner's widow. Following Detective Sing's death, Melissa suffered from severe depression. Unable to cope with her grief, she neglected herself and her son, Franklin, and blamed Tapp for her crisis as she deemed him responsible for Sing's demise. Due to the child neglect and Melissa's hatred for Tapp, Jigsaw had chosen her to participate in Tapp's game and put her in another gruesome trap. Melissa was forced to stand between two metal plates equipped with numerous rotating saw blades with her hands strapped behind her back. When she woke up, she was greeted by Jigsaw and immediately insulted him, accusing him of having killed her husband. Jigsaw defended himself, stating that the trap that killed Sing could have been easily disabled by police procedure if Tapp had not ignored it. These words further fueled Melissa's hatred for her late husband's partner.
Tapp then passed the checkpoint. Upon doing so, another set of TVs turned on, showing a man digging a grave with Steven Sing's name written on the tombstone. As Tapp proceeded through the decayed hallways, he reached another locked door. While trying to find a way to open it, he came across another prisoner. Just as he noticed him, the man shot himself in the head, apologizing to Tapp as he had only one bullet left.
Afterward, Tapp examined the next room. Unfortunately, he was locked up, and toxic gas was passed into the room. However, Tapp managed to shut it off by repairing a valve and left the room with a coupler, which he used to restore the power and open the previously locked door. As he went on, he found another audiotape left by Jigsaw, which confronted him with his role in Sing's death and how his decision had affected the life of the latter's family, especially his wife.
Tapp eventually entered a small yard. Moments later, he was attacked by another prisoner, who threw Molotov cocktails at him from a canopy. However, Tapp was able to kill him before he could set the yard on fire. As he looked around the area, the detective witnessed Pighead through a window in a room above him while the latter brutally strangled another prisoner. After watching this disturbing scene, Tapp climbed a ladder to the canopy and reentered the building. He came across the message "Your late partner holds the key" written on a wall while proceeding through the next hallways.

Tapp enters the graveyard.
Afterward, Tapp finally reached the asylum's cemetery and was informed by Jigsaw to look for the key in Sing's grave. As he entered the yard, he witnessed two men who initially fought each other but chose to attack Tapp instead once they noticed his presence. After killing them, Tapp began searching the graveyard and saw several boxes on each tomb. Each box, except for one, was connected to a nail bomb. Knowing that they would detonate and he could only open the box on Sing's grave, Tapp looked for his partner's tomb and eventually received the key to the Cedar Ward. (Saw: The Video Game)
The Cedar Ward[]
Just as he found the key, Jigsaw gave him the next clue, saying that he had to "find the angel" to save Melissa's life. Afterward, Tapp immediately entered the ward. While looking for the next clue, he reached a hallway containing the holding cells for Whitehurst's highly aggressive and violent patients. As he entered, the door was locked behind him, and a timer of two and a half minutes started to count down. To escape the explosion of yet another set of nail bombs, Tapp had to find the combination for a padlock securing the exit door. However, he was not alone, as another prisoner with a metal box on his head was in one of the cells. Tapp lured him out of his cell and went in himself as there was a peephole in the wall. He saw the combination 838 written on the opposite wall of the adjacent room by looking through it. Therefore, Tapp was able to escape the area and locked the door behind him. The word "Patience" on the wall told him to wait until the bombs detonated.
Following the explosion, Tapp returned to the hallway, where the bombs had partly destroyed a decayed wall. From there, he entered another toilet room by climbing through a hole and found a key in a toilet filled with needles. With this key, Tapp opened the door to the stairs leading down to the next room. As he went in, he saw the message, "You ended his life. Who saved yours?" written on the wall and a tape recorder lying underneath it. The tape contained a recording of an emergency call made by Jigsaw on the night of Sing's death. Due to this call, Tapp was found in time and could be saved after being injured by the killer.
Furthermore, several documents were hanging on the walls, including newspaper articles by Oswald McGillicutty, whose publications had ruined Tapp's reputation after Sing's death. There were also official documents and a voicemail recording from Elizabeth Harris, the school counselor of Melissa and Steven Sing's son. Tapp learned that Elizabeth had sought talks with Melissa as Franklin had come to school unfed and with dirty clothes. However, Melissa did not respond to her call, which caused Elizabeth to report the situation to the County Office of Child Protective Services.
As Tapp left the room, he was surprised by Pighead, who tried to attack him but was held back by several planks blocking his way. Therefore, Tapp was able to go on unharmed. He then went down another staircase and found the next audiotape left by Jigsaw. The recording confronted him once more with the consequences his own decisions had for others, telling him that he was not any better than the killer he pursued. Nonetheless, this did not affect Tapp's decision to stop him.
He went on and came across a locked door with several TVs positioned around it. On the screens, the words "Fallen Angel's Wings" appeared. As Tapp looked around, he saw several rooms containing angel statues. However, only one of them attracted his attention as it was the only one without wings. Realizing the true meaning of Jigsaw's previous clues, Tapp destroyed the statue, which turned out to be hollow and contained the key to Whitehurst's chapel. Melissa appeared on the monitors as he was about to open the previously locked door. She demanded to see her son when Jigsaw reminded her of how she had neglected him after Sing's death. Once again, Melissa blamed Tapp for her misery, expressing her hate and desire for him to suffer. (Saw: The Video Game)
The Chapel[]
Tapp then passed the door and encountered another hostile prisoner. The man carried a small, cubical glass box with an explosive inside it. He had to cling to the explosive as the cube would detonate if he dropped it. Like the other prisoners, he desired to get his hands on the key in Tapp's body and immediately attacked him. Once again, Tapp was forced to use lethal violence and killed the man. He searched the latter's body and found a coupler which he used to close a circuit and open the next door. Another TV showed Melissa, who tried to convince Jigsaw that Tapp was, indeed, the one responsible for her and Franklin's situation. Jigsaw, however, merely told her that Tapp was the only one who could save her. Afterward, Tapp finally reached the run-down chapel. (Saw: The Video Game)
Melissa Sing's Salvation[]
Upon entering the big hall, he found Melissa trapped in Jigsaw's vicious device. Moments later, a TV turned on in front of them. Jigsaw's mechanical ventriloquist puppet appeared on-screen and confronted Melissa with her hatred and depression. It told her that the plates before and behind her would snap shut unless Tapp could save her. Therefore, it instructed the latter on how to do so.
When the tape ended, the saws attached to the plates were activated and began spinning. Melissa desperately urged Tapp to hurry up while he tried to shut off the machine. He had to deactivate the blades by placing a magnetic cube in the correct circuit. Failure to avoid shorting out the batteries that held the saws in place would result in both plates slamming shut on her. Eventually, he accomplished his task, and Melissa was freed from her restraints. As she was still afraid, Tapp tried to calm her down. However, Melissa told him not to touch her. She accused him of being responsible for Sing's death and claimed that she wished he would not have saved her. Tapp defended himself, stating that he would have taken Sing's place if possible, and then went on. (Saw: The Video Game)
The Pine Ward[]
Melissa followed him to the Pine Ward, but after only a few minutes, she left him again. Before abandoning him, she stated that she could not forgive him and that he deserved this game. As she locked the door behind her, Tapp could not follow her and went on alone. He came across the next set of TVs and was told about the next victim, Oswald McGillicutty. To reach him, Tapp had to find two bags of puzzle pieces.
After a while, he entered another room with nail bombs all around him. Jigsaw told him to search the adjacent rooms as one contained the means necessary to prevent the explosion. As the timer began to count down, Tapp noticed a reversely written number on the door and closed it to see it correctly in the mirror. As the number was 207, Tapp went to the room with the same number, a padded cell, where he found numerous articles written by Oswald McGillicutty and a strange box. This box contained a bag full of puzzle pieces. As he picked it up, the timer of the bombs stopped to count down further. (Saw: The Video Game)
The Oak Ward[]
Tapp was about to leave the bomb room with the pieces in his possession. Another video of Jigsaw's puppet congratulated him for finding them and told him the second bag was hidden in the Oak Ward. Tapp entered another hallway, where he saw a big hole in the floor. Another TV turned on as he jumped to the lower level, showing Oswald strapped to a trap that could break his back and limbs by bending them backward. While Jigsaw finished his work on the deadly contraption, Oswald woke up. Upon seeing his abductor, he angrily yelled at and threatened him. However, he stopped and started to panic when he realized that the man was, in fact, the Jigsaw Killer.

Tapp encounters his next enemy.
Tapp proceeded through several rooms and hallways until he suddenly encountered a prisoner who ruthlessly smashed another man's head with a nail-studded baseball bat. As he noticed Tapp's presence, he immediately attacked him. However, as before, Tapp overpowered his opponent and killed him in self-defense. He then moved forward and faced several more dangers and obstacles, such as blocked doors, barricades, and more enemies.
Nonetheless, he ultimately managed to find the next tape. The recording reminded him of how Oswald McGillicutty had ruined his reputation by purposefully badmouthing him in his articles. However, it was still Tapp's task to save him. To do so, he had to find the remaining pieces of the puzzle and then return to this room to assemble it and open the door.
Tapp proceeded further to the Oak Ward when he came across another TV. The feed showed Oswald, who tried to persuade Jigsaw to let him go, claiming that his articles had helped the latter spread his message. However, Jigsaw told him he could not free him and confronted him with his vendetta against Tapp. When he asked him for the reasons for his smear campaign, Oswald admitted wanting revenge on the former detective for not giving him information about the Jigsaw case.
As Tapp went on, he finally reached the ward but was locked up in another room with nail bombs. His way out was blocked by several pig carcasses hanging from metallic carts. He could only escape the room in time by pulling and pushing them in the correct order and direction. As he did, he reached the next area with a message on the wall, saying: "Rigid arms contain the code." Several mannequins and dozens of numbers were written on the room's walls. Upon turning on some spotlights, Tapp discovered that the mannequins' shadows on the walls pointed at the combination, 206. Upon solving this riddle, another recording of Jigsaw's puppet was played.


Tapp watches Oswald in his trap.
On his way back, he was locked up in another room when deadly gas was passed into it. As before, on an earlier occasion, Tapp turned off the gas by repairing a valve and continued. He came to a previously locked door, which he could now open with the newly found combination. Inside, Tapp found the second and last bag of puzzle pieces. Upon returning to the puzzle room, he passed by another TV and witnessed Oswald's interrogation by Jigsaw. Then, Tapp reentered the room where the former detective had to assemble the puzzle, which depicted Jigsaw's puppet. After completing it, he passed the next door. (Saw: The Video Game)
Oswald McGillicutty's Salvation[]
Inside the next room, he finally found Oswald. Moments later, another TV turned on. Jigsaw's ventriloquist puppet appeared and confronted Oswald with his sensationalism and hate campaign against Tapp. It also told him that the trap he was strapped to would bend his limbs and midsection backward and kill him if Tapp did not save him within four minutes. Eventually, Tapp received his instructions on how to do so.
Tapp tries to save Oswald.
When the tape ended, the contraption was slowly set in motion. Oswald frantically yelled at Tapp while the latter tried to shut off the machine. To free Oswald, he had to reverse the trap's electric motors by bypassing three circuit panels on the walls. Eventually, Tapp accomplished his task in time, resulting in Oswald being released from the device unharmed. After his salvation, he accused Tapp of having let Jigsaw escape. However, he ultimately admitted that he was wrong when he suspected Tapp. Tapp asked him what Jigsaw looked like, which Oswald could not answer. In an attempt to escape, both of them went on and continued their way together. (Saw: The Video Game)
Oswald McGillicutty's Death[]
As they made their way through the next ward of the asylum and looked for Jigsaw's next clue, they found a ladder and climbed to the upper floor. Oswald suggested separating as it would increase their chance of finding the exit faster. When he entered an adjacent hallway, he accidentally stepped on a tripwire and noticed two large blades to the right and the left of the door. However, before he could react, the blades rushed toward him and killed him right before Tapp's eyes. (Saw: The Video Game)
Desired to be Tested[]

Tapp moves forward to the second floor.
Unable to do anything for him, Tapp left his body behind and went on. He soon found another audiotape, which told him about the next victim, Obi Tate, who was trapped in the crematorium. However, Tapp also learned that Obi was there of his own free will and desired to be tested by Jigsaw. As Tapp passed through the next door, he witnessed Pighead, who dragged a screaming man away but overlooked Tapp, who continued his way. After facing several obstacles, the detective successfully reached the second floor. A door secured by a combination lock blocked his path forward. Tapp found the necessary numbers in the next room, where the combination, 628, was revealed to him by a slide projector.
After passing the door, Tapp jumped through a hole in the floor and returned to the lower level. Upon doing so, he came across a set of TVs, allowing him to witness the madness of Obi Tate. When Obi woke up inside a furnace and was greeted by Jigsaw, the prisoner was happy and expressed his admiration for the killer's work, reaffirming his wish to participate in one of Jigsaw's games. However, Jigsaw asked him what the point of his game was if he wasted his life looking for a way to be tested. (Saw: The Video Game)
A Surgeon's Hand[]
As Tapp went on, he read the message "Cut by a surgeon's hand" on a wall. A note left by Jigsaw told him that a surgeon's hand held the key to life. Therefore, Tapp set out for the surgery and came across another message: "X marks the spot." Shortly afterward, he found the "X" painted on a wall above a hole in the floor. Tapp climbed down and discovered a frozen hand in a box, holding a key.
When he picked it up, Jigsaw spoke to him over the loudspeakers, advising him to incinerate the hand as it was the only way to retrieve the key from its grasp. Another door was opened near the message on the wall. Upon moving forward, the detective was suddenly attacked by an enemy who wore a metal box on his head and could not see him. Tapp was once more forced to use deadly means to defend himself. Afterward, he went on and was surprised by Pighead, who stood behind a lattice gate and stared at him before he went on. At the same time, another TV turned on, showing Obi in his trap. Obi asked Jigsaw about the rules of his game and how he was supposed to free himself. To his dismay, Jigsaw told him that he could not save himself. Instead, Obi had to rely on Tapp's help to escape the crematorium.
The next gate opened, allowing Tapp to continue. Moments later, he found himself in another room, surrounded by several nail bombs. At the same time, a countdown of three and a half minutes started ticking down. To open the next door and escape the room, Tapp had to find two couplers and use them to activate two circuit boxes. Despite the limited time, Tapp once more accomplished his task and escaped the room before the bombs exploded.
Following his escape, another set of TVs allowed him to see Obi. The latter begged Jigsaw for another test, stating he wanted to feel the pain of going through it without anyone's help. Jigsaw responded that he first had to be saved by someone else to learn the true meaning of his games. Ignoring Obi's attempts to convince him otherwise, Jigsaw ultimately left him behind for his game to play out. Afterward, Tapp had to activate two more circuit boxes to escape a room full of bombs. This task was more complicated than the first time as he faced numerous additional threats, such as an aggressive prisoner and a passage blocked by poisonous gas. However, he successfully opened the next door and escaped once more.
He found the next audiotape behind the door, lying in a box on a small table. The recording informed him that Obi was right ahead of him. The next door opened, enabling Tapp to enter the crematorium. He put the frozen hand in a furnace, causing it to melt, and then picked up the key. With this key, he opened the final door and reached the oven where Obi was trapped. (Saw: The Video Game)
Obi Tate's Salvation[]
As he approached him, a TV turned on before them. The ventriloquist puppet appeared on-screen and confronted Obi with his desire to be tested by Jigsaw. Besides that, it also told him that he would be burned alive due to the increasing heat, with Tapp being his only hope of salvation.
When the tape ended, the furnace started heating up. Tapp tried to reroute the gas lines leading to the oven's burners. Eventually, he finished his task and opened the furnace's door, allowing Obi to escape. However, Obi was ungrateful for his salvation and angrily yelled at Tapp, accusing him of ruining his game. To Tapp's surprise and shock, the young man had put up a newspaper ad to contact the killer as he desired to be tested. This attempt was successful when Jigsaw told Obi to come to Whitehurst. Even though Tapp was shocked and called him crazy, the men continued their way together. (Saw: The Video Game)
A Gift[]
When they passed a hallway, they found another audiotape on a table. The recording informed Tapp about the next victim he had to save - a man who had attempted to commit suicide and was therefore abducted by Jigsaw. After that, he and Obi went up a stairwell when Obi suddenly confronted Tapp about his obsession with stopping Jigsaw. As he saw his games as a gift and a way to salvation, he merely believed Tapp to be ungrateful and blinded and decided to leave him. Tapp did not bother following him and instead continued his way to reach the end of his game. (Saw: The Video Game)
The Path of Light[]
Shortly afterward, Tapp reached Whitehurst's theater and went up another stairwell to a walkway from where he could see the stage. The next tape left by Jigsaw told him that he had to use light to continue. However, the bulbs of two of the spotlights were missing, making it Tapp's next objective to find them. Therefore, he went back down the stairs and through a hallway.
As he passed another checkpoint, a TV turned on above him, showing a man he recognized as Jeff Ridenhour. Jeff was strapped to a metal platform in a standing position. Behind him was a machine with several long, thin, pointy metal spikes that could impale his body. Upon waking up, Jeff immediately panicked when he saw Jigsaw. When he asked his captor if he had not suffered enough already, Jigsaw confronted him with the fact that Jeff had attempted suicide twice before, promising that Jeff would know the value of life the closer he came to losing it.
Tapp moved forward and entered a hall. On the floor, he read the words: "To the left and the right, down each path is the light." Tapp then went to the staff housing. Upon passing the next security checkpoint, he saw Jeff again on a TV screen. Jeff told Jigsaw that Tapp had kept harassing him after escaping from his hideout to get information about the killer. This frequent harassment was also the reason for his second attempted suicide, as Jeff saw no other way to escape his situation, but Jigsaw told him that he would soon learn that there was no escape. Afterward, Tapp came across another message on the wall: "A nab's obsession can lead to ruin."
He then went up a stairwell and found the next door secured by a combination lock. Therefore, he went down another stairwell again and entered a utility room. He looked into the next room through a small hole in the wall and read the message: "I know you are looking. Come to room 204." As it turned out, 204 was also the combination that allowed Tapp to enter the women's wing. Inside room 204, he finally found the first bulb in a box. However, upon taking it, poisonous gas was passed into the room, and once again, Tapp had to repair a valve to survive. Over the loudspeakers, Jigsaw told him to look for the second bulb in the cafeteria.
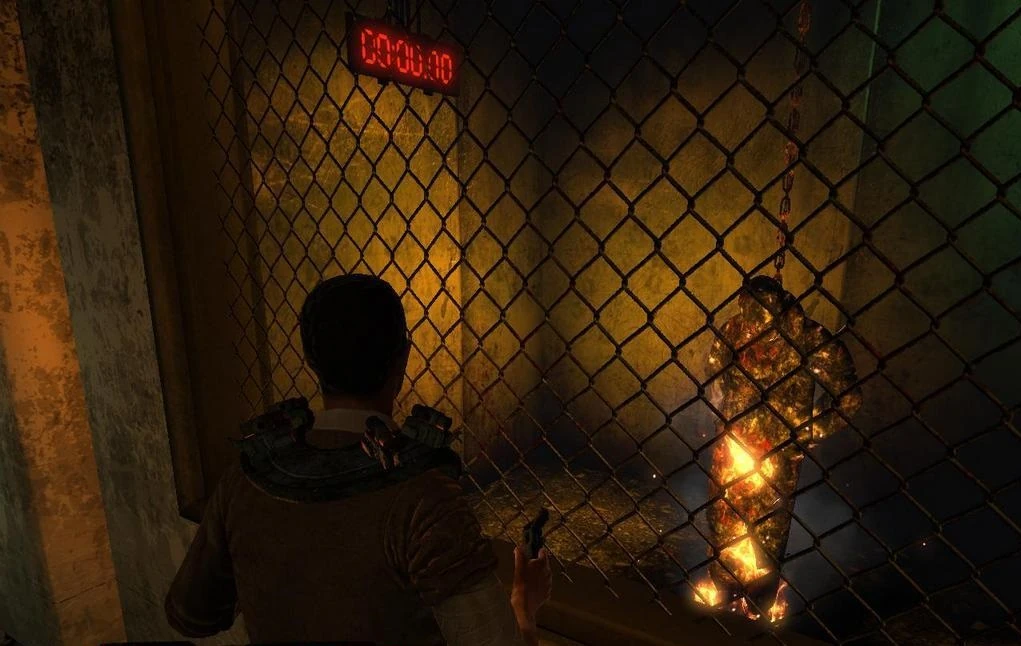
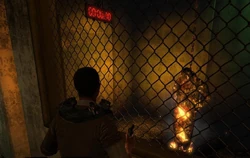
Tapp faces the horrors of Whitehurst.
Tapp returned to the hall with the inscription on the floor and went down the other hallway. As before, he passed a security checkpoint and reached another door with a combination lock. Next to it, another set of TVs turned on. Jigsaw asked Jeff if he genuinely wanted to die, which the latter negated. Therefore, Jigsaw confronted him with his second attempted suicide after escaping his first trap. To defend himself, Jeff blamed Tapp for having caused him to make this decision. After the TVs turned off, Tapp tried to open the door. He returned to the checkpoint to find the combination and noticed three TVs, each with a number on its screen. With the combination 038, Tapp opened the lock and continued his way.
Moments later, the detective reached the cafeteria. As the door was blocked, he had to find another way around. While going through several rooms, he found the locked entrance to the freezer. In the next room, the words "Feed the grinder to get the key." were written on the wall. Tapp walked down a stairwell, where he saw several pig carcasses hanging from a conveyor bar on the ceiling, directly above a grinder. He activated the bar and began throwing bricks at the pigs to make them fall into the rotating blades, where they were liquefied. The liquid was then carried into a vat, where the key to the freezer room lay on a wooden board. As the vat filled with fluid, the key slowly came into Tapp's range until he could pick it up.
Tapp went back up the stairwell and entered the freezer. He was locked up in the room only moments later, alongside several pig carcasses hanging from metallic carts. Over the loudspeakers, Jigsaw warned him to find a way out as fast as possible. Otherwise, he would freeze to death. Then, the sprinklers on the ceiling were activated. Due to the low temperature, the water froze almost immediately. Tapp began moving the carts back and forth to find a way out. Eventually, he successfully managed to escape the freezer, undercooled but alive. (Saw: The Video Game)
The Theater[]
Tapp ultimately found the final bulb and returned to the theater, where he went back up the stairs to the spotlights. After inserting the bulbs, he turned on the green, blue, and red spotlights, which revealed the digits 831. With these numbers, Tapp opened the door to the theater. Once inside, he went to the stage where Jeff was trapped. (Saw: The Video Game)
Jeff Ridenhour's Salvation[]
As he approached him, a TV turned on in front of them. Jigsaw's ventriloquist puppet appeared on-screen and once more confronted Jeff with his repeated attempts of suicide. It also informed him that Tapp was now the only one who could save him and gave the latter his instructions. Finally, several symbols briefly showed up on 16 TV screens in front of them before disappearing again.
When the tape ended, Tapp tried to find the corresponding symbols just as Jigsaw had told him. For every mistake, one of the metal spikes behind Jeff would rush forward and pierce the latter's body. After too many errors, the final spike would impale his head, killing him. Eventually, Tapp accomplished his task, releasing Jeff from the trap. He fell to his knees and could only stand up under great pain. As Jeff recognized Tapp, the man was distraught to see the detective. Despite the latter's attempts to calm him down, Jeff angrily yelled at him. Although Tapp assured him they could beat Jigsaw together, Jeff merely insulted and abandoned Tapp, stating that he was on his own. (Saw: The Video Game)
Pighead's Death[]
Once again, Tapp continued his way alone and headed for the library. As he went to the entrance, he was surprised by Pighead, who tried to attack him but was held back by a fence and disappeared. Tapp then found the next tape on a table before him. Jigsaw asked Tapp whether he saw him as a masked vigilante or an obsessed psychopath, stating that there was, in fact, no difference between them. Nonetheless, Tapp went on undaunted. Over the loudspeakers, Jigsaw told him that what he was looking for was located in the library. As Tapp searched the rooms, he watched a hooded figure in a chamber below him, who worked on some chemicals before disappearing.
Tapp continued his path and proceeded to the lower level. There, he found the next tape left by Jigsaw in a box. Throughout the game, Jigsaw realized that his accomplice, Pighead, tried to sabotage Tapp's game to surpass his mentor. He warned Tapp of his former ally and told him he held the only key to escape Whitehurst.
Moments later, Tapp reached a yard, where he saw another prisoner trapped in a small fenced area. Pighead, while waiting for Tapp, pushed a button and energized the floor, killing the man behind the barrier. Afterward, he and Tapp engaged in a fight. However, as Pighead was a ruthless and capable opponent, Tapp was forced to keep him at a distance. Unable to defeat him by other means, Tapp eventually lured Pighead into the fenced area and closed the door behind him. Afterward, he pressed the button and fatally electrocuted his enemy. Following Pighead's death, Tapp searched his body and found the key. (Saw: The Video Game)
The Library[]
Tapp passed a door, where another video recording of Jigsaw's puppet awaited him. The doll confronted him with Pighead's death, asking him if he saw himself as a murderer and how far he would go to catch him. Jigsaw also told him he was waiting for him in the library, where his final test would occur.
Afterward, Tapp entered the atrium, where he found three doors. One was labeled with "Freedom," the other with "Truth," and the last was uninscribed. Tapp went through the latter and saw the hooded figure again, who stood on a pedestal above him. Several TVs turned on, and the puppet introduced him to his final test. He had to choose whether to go through the door leading to the "Truth" or "Freedom." But first of all, he had to retrieve a final key. (Saw: The Video Game)
Final Test[]

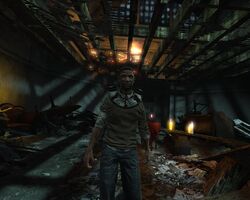
Tapp faces his final test.
Eager to finally end this game, Tapp went on and faced his last obstacle. Within ten minutes, he had to find his path through a maze of ladders, stairs, and walkways while encountering numerous dangers, such as aggressive enemies, electrified water, and dozens of nail bombs. However, Tapp made it through the area and returned to the atrium after retrieving the key. When he stood in front of the two doors, Jigsaw gave Tapp his final ultimatum. The detective could either let go of his obsession with Jigsaw in exchange for the freedom of all remaining victims still trapped at Whitehurst or decide to uncover the truth about Jigsaw and condemn all the other prisoners. Eventually, Tapp chose freedom and saved the rest of the people trapped in the asylum. (Saw: The Video Game)
Aftermath[]
Throughout the following days, the press frequently reported the events at Whitehurst, declaring Tapp a hero. After his escape, he described Zep Hindle to his colleagues, still believing him to be the killer. In the aftermath of his game, he learned about the fate of some people he had saved at Whitehurst. Jeff Ridenhour finally committed suicide by shooting himself in the head two days after his escape. Oswald McGillicutty was buried shortly afterward, and Tapp was the only one present during his funeral. However, he did not learn about Melissa's fate and did not try to find her, knowing she would not want to see him.
Following the traumatic events, Jennings Foster was on sick leave for a short time. Despite his anger during their last conversation at Whitehurst, Jennings was grateful for his salvation and eventually reconciled with Tapp. He occasionally visited him in his apartment to see how his former colleague was doing. Upon seeing how Tapp's obsession with Jigsaw had affected him, Jennings wrote a letter to thank him for his salvation from Whitehurst. He promised to find and kill Jigsaw for what the killer had done to them, stating that he already had a plan for how he wanted to do it. Eventually, he asked Tapp to burn the letter. (Saw: The Video Game, Saw II: Flesh & Blood)
Death[]
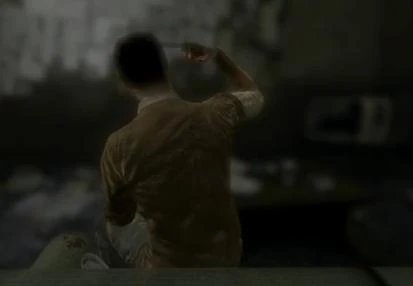

Tapp commits suicide.
Although the newspapers redeemed his reputation, Tapp continued to suffer from severe depression. Unable to let go of his guilt for Sing's death, he asked himself whether he made the right choice at Whitehurst by allowing Jigsaw to escape. Furthermore, the traumatic events in the asylum and Michael's betrayal took a toll on him. Ultimately, Tapp could not overcome his obsession with Jigsaw and committed suicide in his apartment by shooting himself in the head. (Saw: The Video Game, Saw II: Flesh & Blood)
Personality[]
David Tapp was a hard-working detective, eager to solve every case he was confronted with and bring justice to both the victims and the offenders. He was also good friends with his partner, Steven Sing. However, his eagerness eventually became an obsession when Tapp started working on the Jigsaw case. When Sing was killed by one of Jigsaw's traps, and Tapp was subsequently discharged from the police force, his mental state worsened to the point where he suffered an emotional breakdown. Obsessed with ending Jigsaw's games and driven by his guilt for Sing's demise, Tapp severely neglected himself for the sake of his investigation.
He was also very stubborn as he was convinced that Lawrence Gordon was the Jigsaw Killer, although the latter had an alibi for the time of the murders. Therefore, he started observing Gordon's house and meticulously wrote down everything he thought would be significant. Despite being a respected and experienced detective, Tapp was willing to break the service regulations and even the law if it served his investigation. This recklessness ultimately led to Sing's death.
The events at Whitehurst proved that he would go to great lengths to arrest his sworn enemy. Throughout his game, he overcame all obstacles that Jigsaw put in his path, even if it required him to physically and mentally harm himself. Although his obsession and thirst for revenge were his primary motivation, he occasionally showed genuine compassion for those he saved. As he went on and encountered the people he had harmed with his reckless behavior, Tapp realized his own mistakes, which eventually enabled him to let go of Jigsaw and save everyone else left at Whitehurst.
However, his greatest regret was the abandonment of his wife and son when Michael was still a child. Since then, their relationship never recovered and worsened to the point where Tapp could not even talk to Michael without feeling insecure. Yet, despite his past mistakes, Tapp genuinely loved his son. Therefore, Michael's betrayal hurt him all the more. All these strokes of fate caused him to develop a drinking habit and ultimately commit suicide.
Appearances and References[]
| Films | |||||||||
| Saw | Saw II | Saw III | Saw IV | Saw V | Saw VI | Saw 3D | Jigsaw | Spiral | Saw X |
| Appears | Absent | Archive | Absent | Archive, Pictured, & Mentioned | Absent | Absent | Absent | Absent | Absent |
| Other Media | |||||
| "Saw" (2003 Short) |
Saw: Rebirth (2005 Comic) |
Full Disclosure Report | The Scott Tibbs Documentary | Saw: The Video Game | Saw II: Flesh & Blood |
| Absent | Absent | Pictured & Mentioned | Absent | Appears | Pictured, Recording, & Mentioned |