| “ | My department's gone. They're all dead. | ” |
— Hoffman talks about the aftermath of the Jigsaw Case[src]
| ||
The Homicide Unit is a fictional group in the Saw franchise as well as the main protagonistic faction in the first four films. and in Spiral.
History[]
The Jigsaw Case[]
The Homicide Unit was a special law enforcement unit working for the police with the purpose of investigating and solving deadly crimes of violence. At one point, the homicide unit of the Metropolitan Police Department got involved in the case of a serial killer known as Jigsaw, who forced his victims to fight for their lives in deadly games and cut a jigsaw piece from their skin after their death. After the first victim, a drug addict named Cecil Adams, was found after participating in one of Jigsaw's traps, the unit founded a task force to investigate the case. The task force was led by Detective David Tapp and consisted of him and his partners, Detective Steven Sing, Detective Allison Kerry, Detective Mark Hoffman and Detective Fisk. (Saw, II, III, IV)
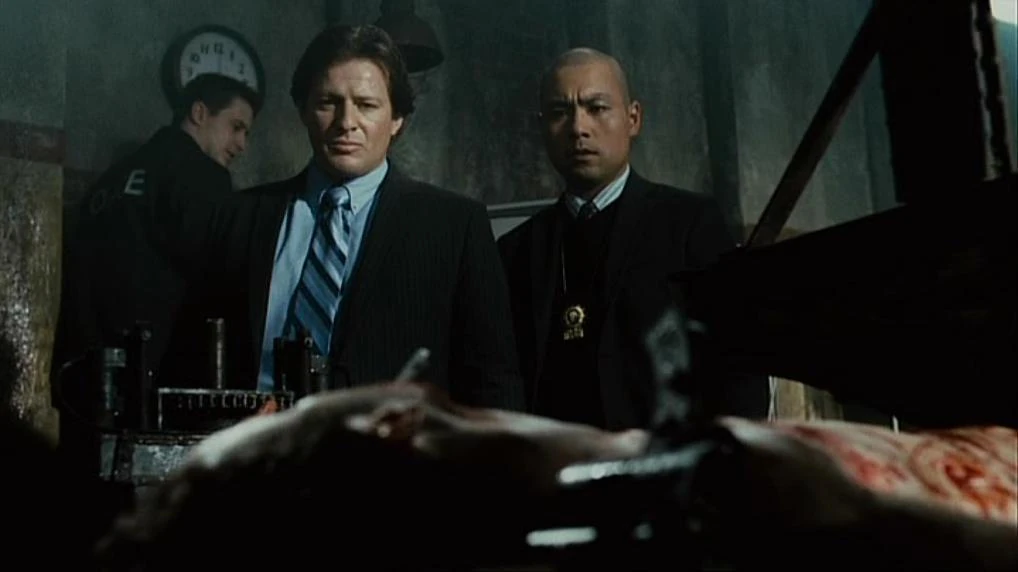
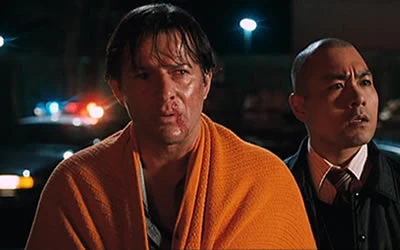
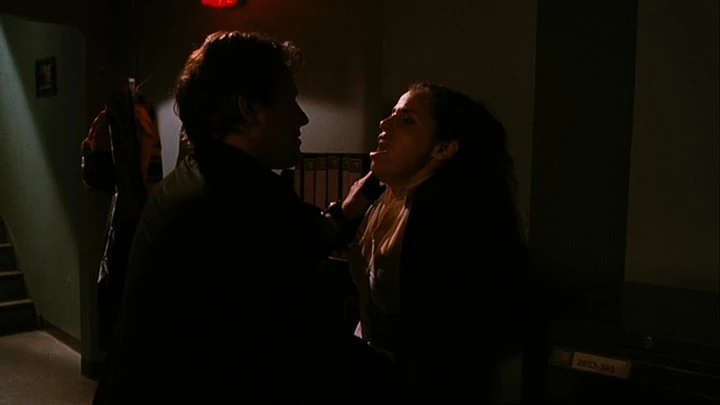
Hoffman and Fisk at Seth's crime scene
As the games continued, the police soon found the corpse of Seth Baxter, who had been sliced in half by a giant pendulum blade. Therefore, Detective Fisk informed Hoffman and went to the crime scene along with him. Upon seeing the victim, Hoffman identified him as Seth Baxter, the ex-boyfriend and murderer of his sister, Angelina Acomb. Fisk, who knew the story about the murder of Angelina, was surprised by this but stated that Seth had become what he deserved. Due to Hoffman being potentially biased, the further investigation on Seth's death, which soon became known to the public as the "Pendulum Murder", was taken over by Detective Kerry. However, Hoffman still asked Fisk to keep him informed, to which the latter agreed. Unknown to his colleagues, Hoffman had actually killed Seth to take revenge for his sister and had thereby imitated Jigsaw's modus operandi. (Saw V)
Sometime later, the next victim, Paul Leahy, was found in a basement approximately three weeks after his death. He had been forced to crawl through a fenced area filled with razor wire in order to save his life and escape the basement. When Detective Tapp and Detective Sing arrived at the crime scene, they were expected by Kerry, who had already gathered information from the forensics and therefore was able to tell them about Paul's game as well as his fatal injuries and presented them an audio tape, which had been used to give Paul his instructions.
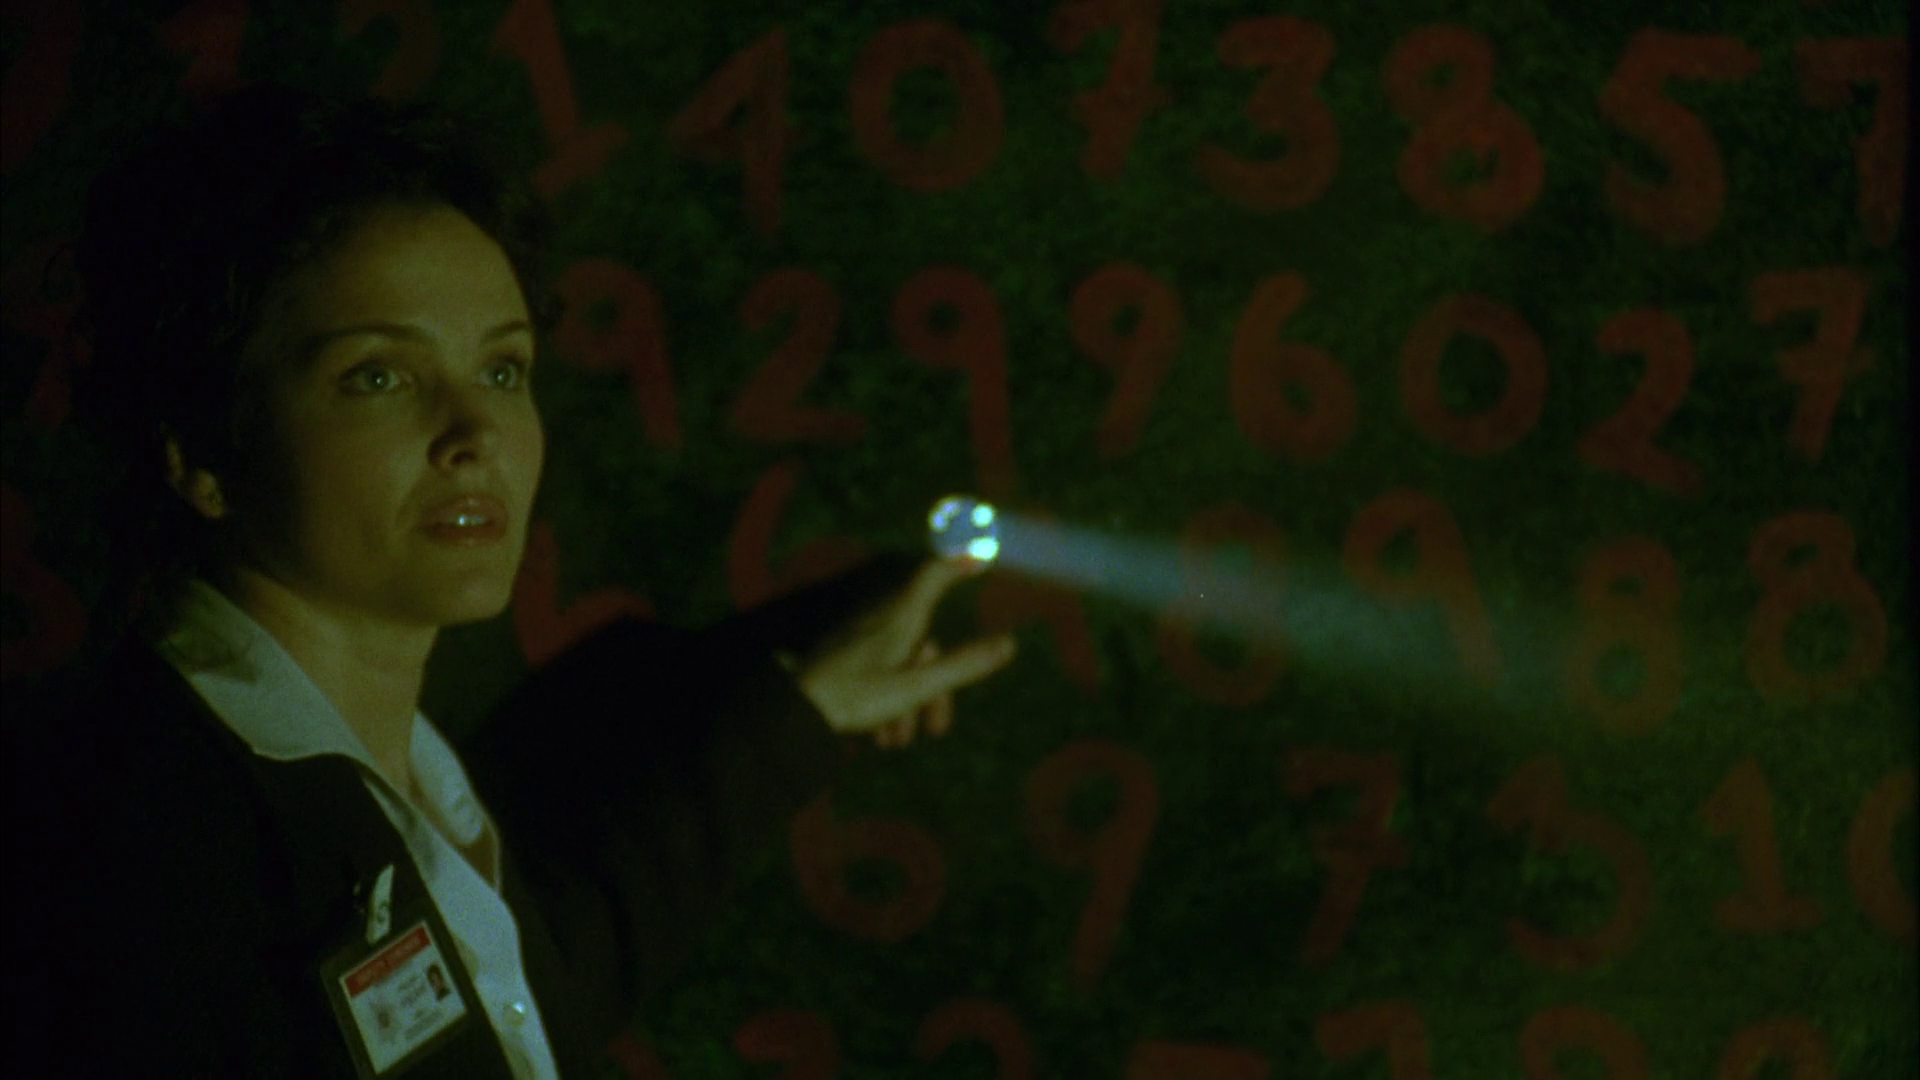
Kerry discovers the peephole
Shortly afterwards, Tapp, Sing and Kerry were also present at the crime scene of Mark Wilson's game, who had died after accidently igniting himself with a candle in an attempt to find an antidote for a slow-acting poison in his blood. At the crime scene, Kerry found a peephole used by Jigsaw to witness his game and remarked that she had seen one of those before at Paul Leahy's crime scene as well. Furthermore, she told them about a penlight found at the place of Mark's death. Tapp ordered her to send it to the laboratory to see if they could find any fingerprints on it. (Saw)
First Suspect[]
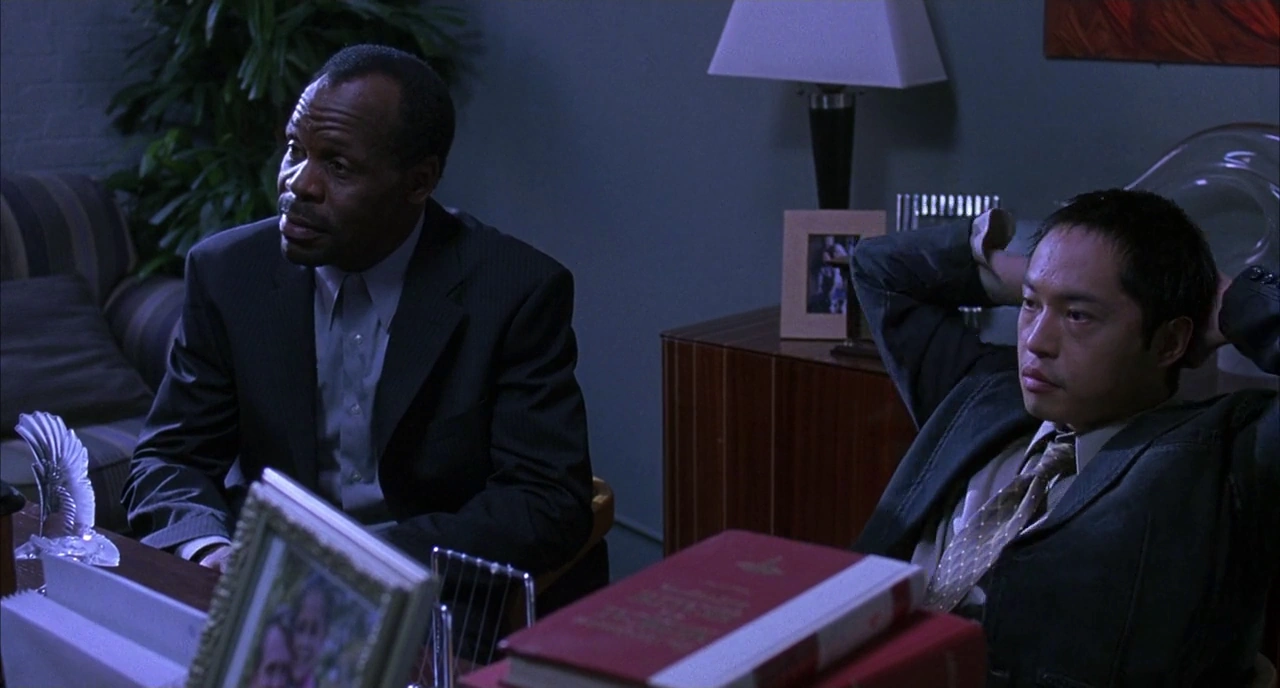
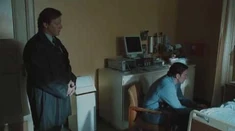
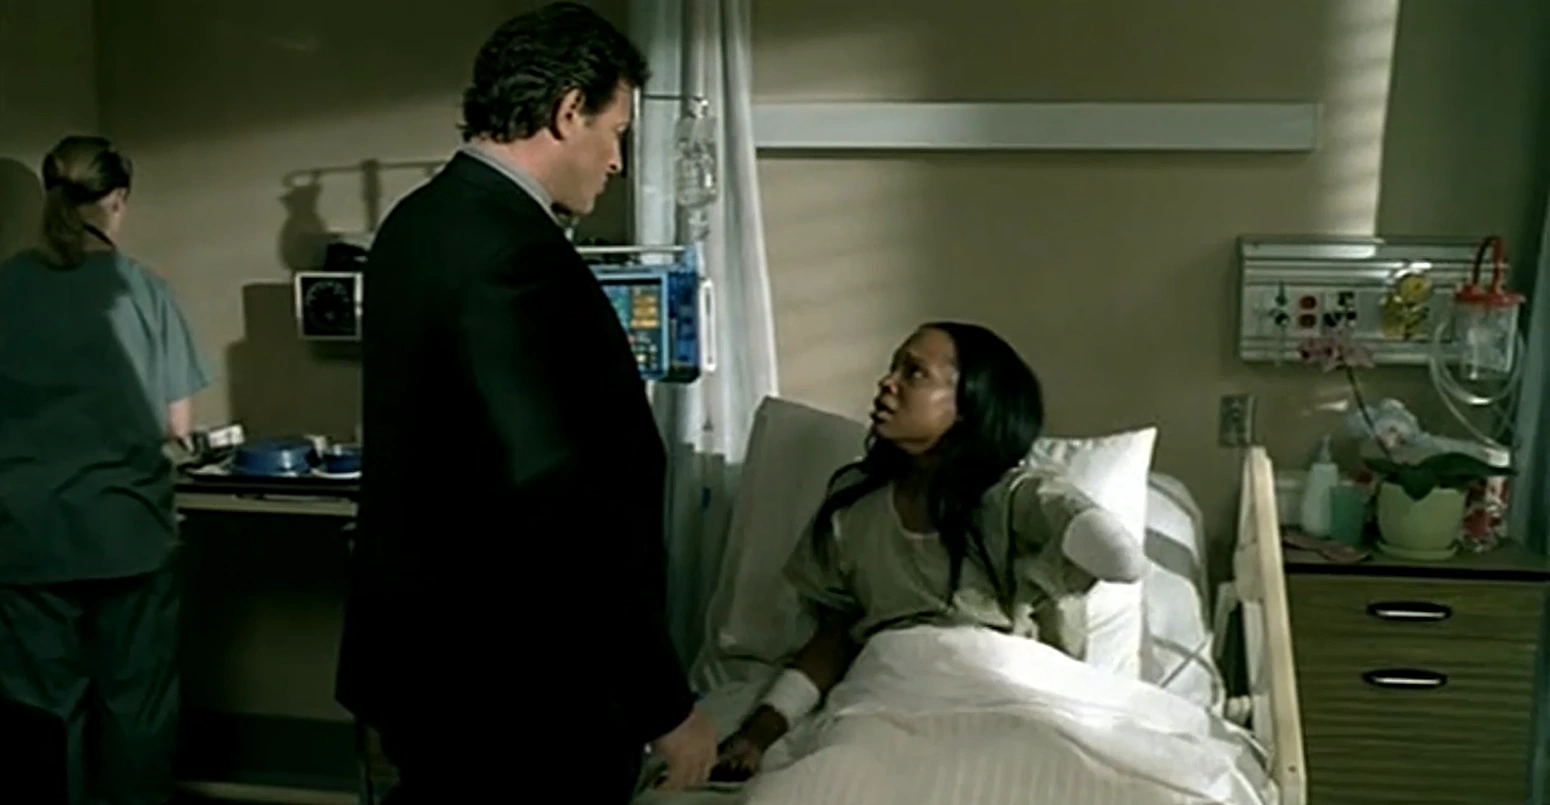
Tapp and Sing visit Lawrence Gordon at the hospital
Upon further examination of the penlight, the laboratory was able to find fingerprints on it that belonged to Dr. Lawrence Gordon, a renowned oncologist at the Angel of Mercy Hospital. Tapp and Sing went to Dr. Gordon's office where they asked him about his alibi for the previous night when Mark Wilson had been killed. They took Gordon to the police station where he was further interrogated. After some hesitation, he eventually revealed that he was with his mistress Carla at the time of the murder, which the police quickly found out to be the truth. However, despite this, Detective Sing asked him to stay for a little longer to witness the interrogation of Amanda Young, a new victim of Jigsaw and the first survivor of one of his deadly games. While talking to her, Tapp kept a wary eye on Gordon to see his reaction to her story. After the interrogation, Lawrence was released from custody and brought home by Tapp, who implied that he still wasn't convinced of his innocence. (Saw)
Jigsaw's Hideout[]
Back at the police station, Tapp further examined Jigsaw's video tape from Amanda Young's crime scene. When Sing was about to leave work for the day he asked him to go to the bar at the corner for an after-work beer with him and some of their colleagues, which Tapp declined with thanks as he wanted to continue his examination. Sing joked that Tapp should find himself a girlfriend before he left, but was held back by Tapp, when the latter saw something in the background of the video that made him suspicious. Sing eventually identified it to be a graffito of K2K, a small gang from 118th street. Upon hearing a fire alarm in the background, Tapp ordered his partner to help him checking all fire reports for the area from the last two weeks. Ultimately Sing found out about a fire in a rear house at 213 Stygian Street and told Tapp about an abandoned mannequin factory in this area which would be a potential hideout for Jigsaw. Despite his doubts that this would be enough for them to get a warrant, he immediately agreed to go there with Tapp.

Tapp discovers Jeff Ridenhour
Minutes later Tapp and Sing arrived at the factory. Armed with a shotgun, Sing broke through the front door and entered the building followed by Tapp, who gave him cover. Upon going upstairs they found the K2K graffito and recognized it as the same one from the video. When they searched the hideout, they found a box with little figures resembling another deadly game Jigsaw had already planned for the future. Furthermore, they found one of the pig masks he used for his abductions as well as the mechanical ventriloquist puppet from Amanda Young's video which had been used by Jigsaw to give her the instructions for her game. Moments later they were startled by a noise nearby, coming from under a large red hood. Eventually this turned out to be the voice of Jeff Ridenhour, a man strapped to another one of Jigsaw's traps. However, when they wanted to free him, they suddenly heard the elevator. Tapp told Sing to go into hiding to see what Jigsaw was going to do. Eager to finally arrest the Jigsaw Killer, Sing initially refused to follow Tapp's order but eventually decided to do so and put the cloth back on Jeff before quickly going into hiding with Tapp.
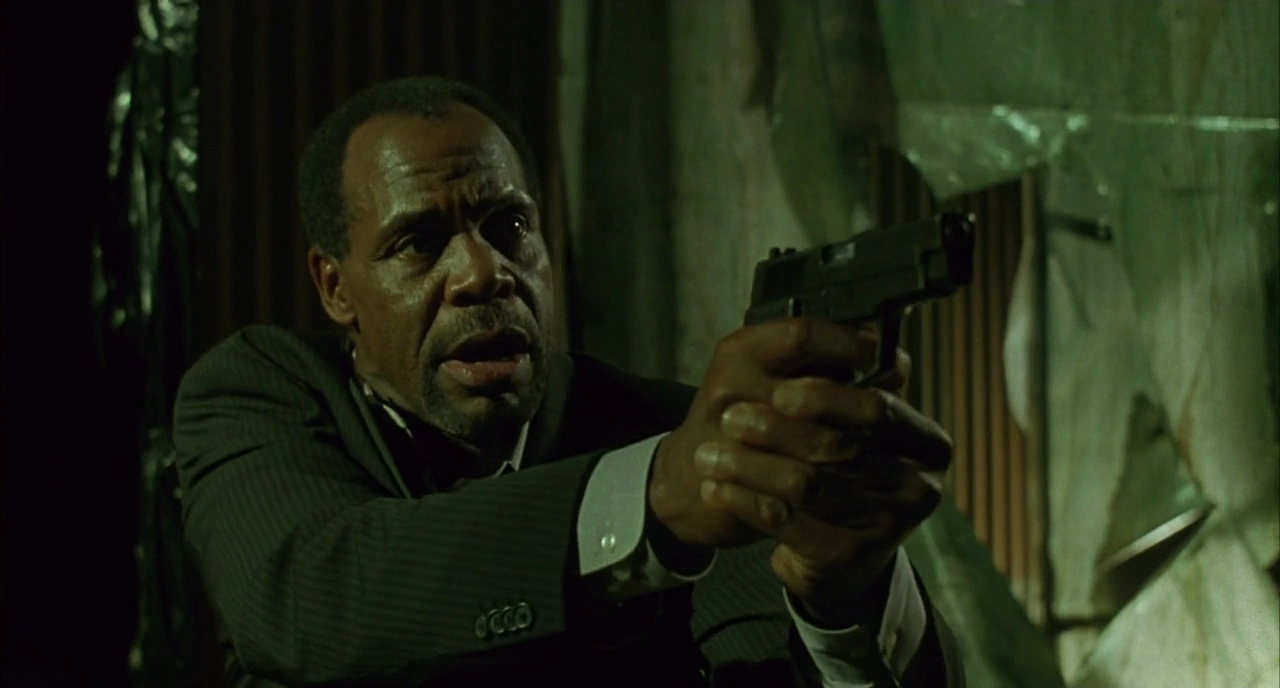

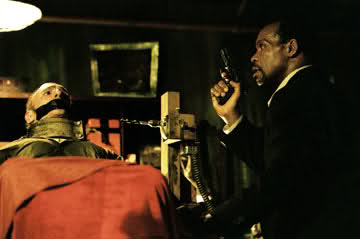
Tapp holds Jigsaw at gunpoint
Moments later, a hooded man, Jigsaw, arrived and approached Jeff. When he told Jeff that he had planned a bigger test for him, the detectives came out of their hiding spot and held Jigsaw at gunpoint. However, the latter managed to activate Jeff's trap, which caused two drills to approach his head until they finally pierced it, giving the detectives merely 20 seconds to save him. While Tapp took care of the killer and held him at gunpoint, he demanded him to tell Sing how to stop the trap and was told that a key would unlock the metal neck brace which held Jeff's head in place. When Sing found a set of keys in a box, he desperately tried to find the right one among the dozens of keys. Having only a few seconds left, Sing decided to shoot the drills, saving Jeff's life in the process. However, this distracted Tapp, giving Jigsaw the chance to slash Tapp's throat with a hidden blade. When he ran away Sing immediately pursued him. Moments later Tapp, weakened by his injury, attempted to follow them and eventually found the corpse of his dead friend and partner who had been killed by a booby trap. (Saw)
Michael Marks' Death[]
Kerry and Eric at the crime scene
Due to their invasion of Jigsaw's hideout without a warrant and Sing's subsequent death, Tapp was discharged from the department and suffered a mental breakdown. Therefore, Kerry took over his position as the leading investigator. Several months later, the corpse of Michael Marks was found found during an asbestos disposal, after he had been killed by a nail-spiked metal mask closed on his head. When she arrived, she found a message written at the ceiling which said "Look closer, Detective Matthews", referring to Detective Eric Matthews, her former partner whom she once had an affair with which resulted in him alienating from his son Daniel and his wife who subsequently filed for divorce. The first officer who arrived at the crime scene told her that Michael was one of Eric's informants. However as he wasn't completely sure about this Kerry decided to call Eric for help. Even though he wasn't happy to see Kerry due to their affair, he agreed to take a look at the corpse and was shocked to see what had happened to him. Despite the mask, Eric was still able to identify Michael due to a tattoo on his leg and confirmed that he was in fact his informant. Furthermore he discovered that a jigsaw piece had been cut from Michael's skin, leading him to the conclusion that his informant had become another victim of the killer. When he asked Kerry when she wanted to tell him about it, to which she responded that she thought Eric wanted to find it himself. However as Eric didn't want to have anything to do with the case nor with Kerry, he angrily went away but stopped when Kerry drew his attention to the message written on the ceiling. (Saw, II)
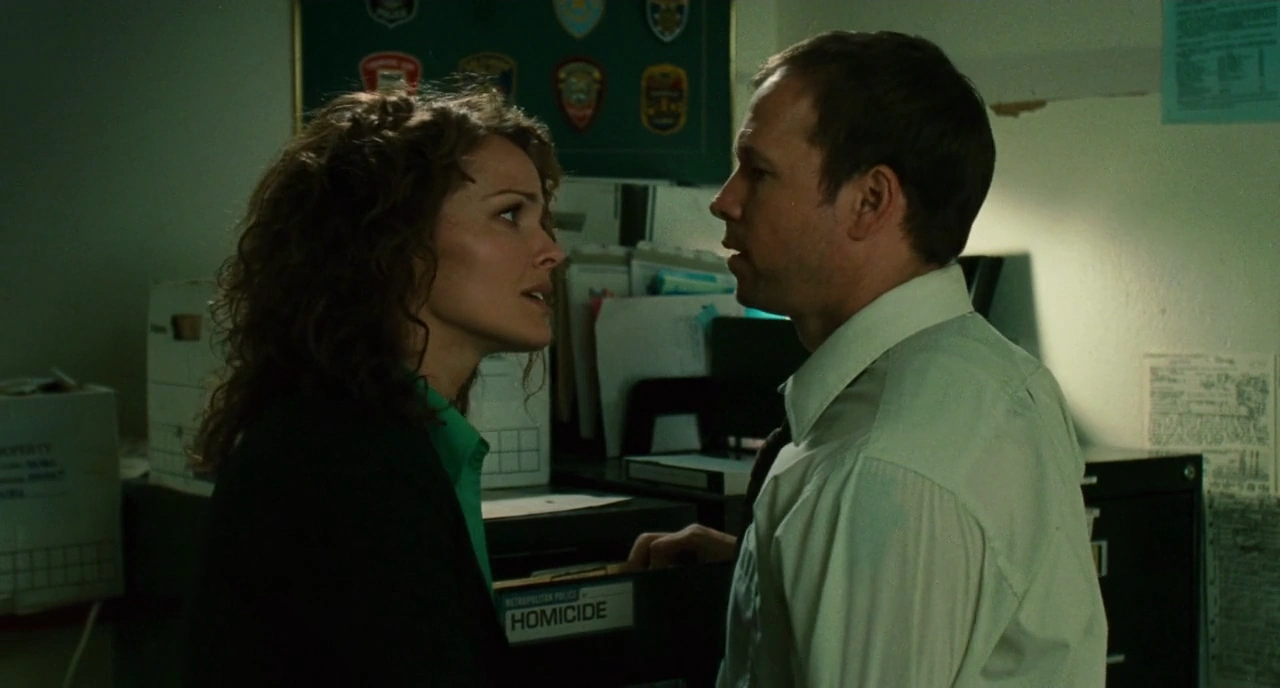
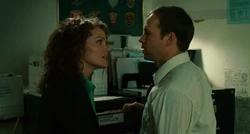
Kerry and Eric
Back at the police station Eric and Kerry engaged in an argument. While Kerry was examining the video found at Michael's crime scene, Eric interrupted her and compared her to Jigsaw, claiming they have much in common as they both like to play with other people. When Kerry apologized for her behavior at the crime scene and tried to convince Eric to help her, he reminded her that this was her case and they were no partners anymore, causing her to leave angrily, asking when he stopped to be a cop. (Saw II)
Eric Matthews' Test[]


Kerry and Eric witness Jigsaw's game
However, when Eric deduced the true meaning behind Jigsaw's message, he was able to identify the killer's hideout at the Wilson Steel Plant, due to an engraving on Michael's mask. The next day, Eric decided to accompany his former partner, Detective Kerry, and a SWAT team led by Sergeant Daniel Rigg during their raid on the plant. Rigg, who had been at Wilson Steel at one point already, instructed his men. Minutes later, they went to the plant. Following Detective Kerry's orders, Officer Pete Baker was the first one who broke through a side door and entered the building along with Rigg and two of their teammates. Unfortunately, the team accidently activated a booby trap, resulting in the death of two officers and Officer Baker's legs being broken. Called in for reinforcement by Rigg, Kerry entered the building with Eric and the remaining SWAT team and moments later finally found the Jigsaw Killer, John Kramer. Sergeant Rigg ordered his men to arrest him but they refused to do so when John told Eric it'd the best if John stayed where he was until Eric took care of his problem and told him to watch at the surveillance monitors in the next room. Kerry, Rigg and Eric entered the room. Upon looking at the monitors they saw what appeared to be another one of Jigsaw's games and recognized one of the eight victims as Eric's son, Daniel. When he saw the recording of the game Eric immediately attempted to attack John and angrily yelled at him but was held back by Sergeant Rigg. John then explained him the rules of his test. Eric's colleagues had to leave the room while Eric merely had to sit down and talk to John for a period of two hours until a timer went off. If he could do that he'd eventually see his son again. Otherwise, his son and the other prisoners would be killed by a deadly nerve agent.


Eric accepts to talk to John
Eric then unsuccessfully tried to call his son, as he was hoping that Jigsaw was only bluffing. Kerry tried to calm Eric down. However, this attempt remained unsuccessful as Eric got more and more nervous, especially when the first victim, Gus Colyard, was killed by a booby trap only a few minutes after the game began. On Rigg's advice, Kerry called for a tech team to trace back the video broadcast. After a talk with John Kramer, Eric told his colleagues about his ultimatum: In order to save his son he had to just sit down and talk to John until the end of the game. Kerry got into an argument with Rigg, who suggested to grill John about the victims' whereabouts by using violence. She told him this wouldn't work, stating that John fits a certain psychological profile. Eventually, Eric reluctantly agreed to John's challenge and conversed with him while Kerry kept an eye on the progress of the game. However, when talking to him, Eric placed a walkie-talkie beneath his chair so his colleagues were able to listen to their conversation.
When they began to talk to each other, John introduced himself to Eric by his name. However when Eric asked him if he shouldn't rather call him "Jigsaw", John claimed that this nickname came from the police and the press, not from him. Furthermore he revealed the true meaning of the jigsaw pieces which he cut from his deceased victims' skins and that gave him his nickname. They were a symbol of an important piece of the "human puzzle" that the victims, who failed their tests, were missing in John's opinion: the survival instinct. He also told Eric about his attempted suicide after he was diagnosed with cancer and how his survival of this event caused him to start his mission. During their conversation, he frequently provoked Eric by talking about his violent behavior towards a suspect approximately five years ago and the bad relationship he had with his son after he cheated on his wife with Kerry. By telling him the truth about his self-imposed mission and confronting him with his past mistakes, John wanted Eric to understand him and his work.

Kerry learns about the people framed by Eric
When the second victim in the house, Obi Tate, died in his trap, Rigg persisted on using violence to force John to tell them about the house, as they were just wasting time in his opinion, but Kerry insisted on keeping the situation calm as long as possible. However, Eric became more and more distressed as the game went on, and the tech team was running late, which caused Kerry to formulate a new plan. As she thought John was proud about his work and that it meant everything to him, she told Eric to threaten to destroy all of John's construction plans and notes in the hideout. Eric followed through, but was in turn only provoked by John, who was rarely impressed by Eric's outburst of rage, which only ended when he received his instructions from Kerry after the tech team finally arrived. As Eric refused to play the game and talk to John any longer, the latter told him and his colleagues to look in the desk located in the same room as the monitors. As Kerry did so, she found a bunch of files of old cases, which were the files of the seven other prisoners in the house. Eric ultimately recognized them as the people he had framed throughout his career and realized that they were about to find out the truth about Daniel.

Kerry approaches the safe
When the game in the house got out of control as one of the victims, Xavier, started to kill the other prisoners and pursued Daniel and Amanda, Eric brutally beat John up to make him reveal Daniel's whereabouts. Kerry tried to stop him, but she was held back by Rigg. Heavily injured, John ultimately offered to take him to the house when Eric threatened him with his gun, but demanded to go there with Eric alone. Eric agreed and left the building with John in a hidden elevator. Pursued by the SWAT officers, Eric and John took one of their armored vehicles to flee. While on their way, John told Eric how to get to the Nerve Gas House, where the game was taking place. Meanwhile, Kerry sent the SWAT team after them while she stayed with the tech team, who traced the video feed back to an address at 237 North Hyde Crescent shortly afterwards. However, when Rigg and his team arrived there, they realized that the game was already over and the video feed was merely a recording, so Kerry told the team to come back. As the timer went off, a safe in John's hideout suddenly opened and revealed Daniel Matthews, who had been locked up in the safe all along. (Saw II)
Jill Tuck's Interrogation[]
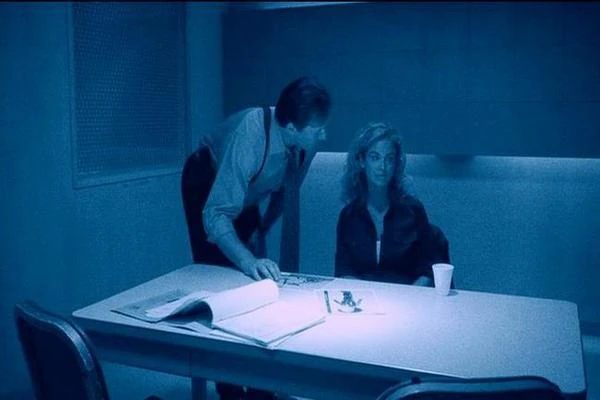

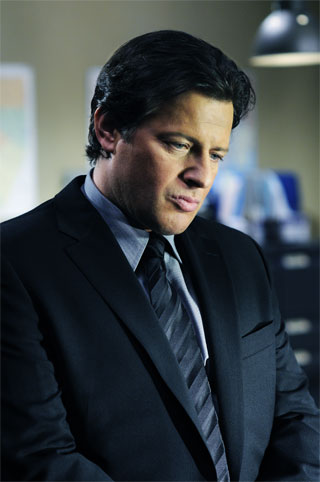
Hoffman interrogates Jill
When Eric didn't return, his colleagues eventually came the conclusion that he had become a victim of Jigsaw on his own. Shortly after the game Kerry found out, probably due to Daniel's testimony, that Amanda Young was Jigsaw's accomplice and had merely pretended to be a victim in the game. Desperate to find Eric, Kerry began to feel guilty for his disappearance as she thought it likely wouldn't have happened if she didn't push him to help her. These feelings of guilt caused her to have nightmares in which she saw him, which worsened her emotional state even more. Due to her mental instability, Detective Mark Hoffman became the new lead investigator in the case. In the following weeks, the police began to interrogate his ex-wife, Jill Tuck, and searched her house for evidence. Upon doing so, they found a small wooden ventriloquist puppet, similar to the mechanical one used by Jigsaw, as well as a red tricycle used by the puppet. During Jill's interrogation at the police station, Hoffman asked her about these finds. To cover the fact that they knew about each other and their connection to John, Jill refused to give him any useful information and instead called her lawyer, Art Blank. (Saw IV)
The Classroom Trap[]


Kerry at Troy's crime scene
Six months later, Kerry was called to an elementary school by Rigg, who had found the crime scene of another game, which the victim, Troy didn't survive. When she arrived, she immediately asked if the victim was Eric. However, Hoffman, who was investigating the crime scene, told her it wasn't him. Hoffman told her that the victim was held in place by eleven chains piercing his body and was eventually killed by a nail bomb. However she got suspicious when she learned that the SWAT team had to cut open the door as it had been welded shut, giving Troy no chance to escape even if he would've passed his test. This led her to the conclusion that someone else was responsible for the game. Seconds later a member of the forensic team told her that the video tape containing the instructions for Troy's trap was still intact despite the explosion. (Saw III)
Allison Kerry's Abduction[]
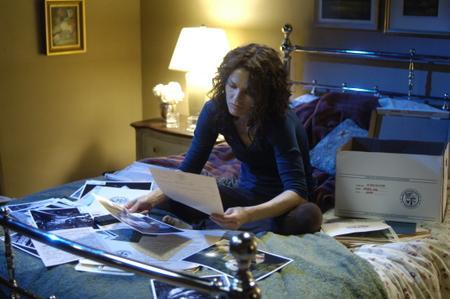

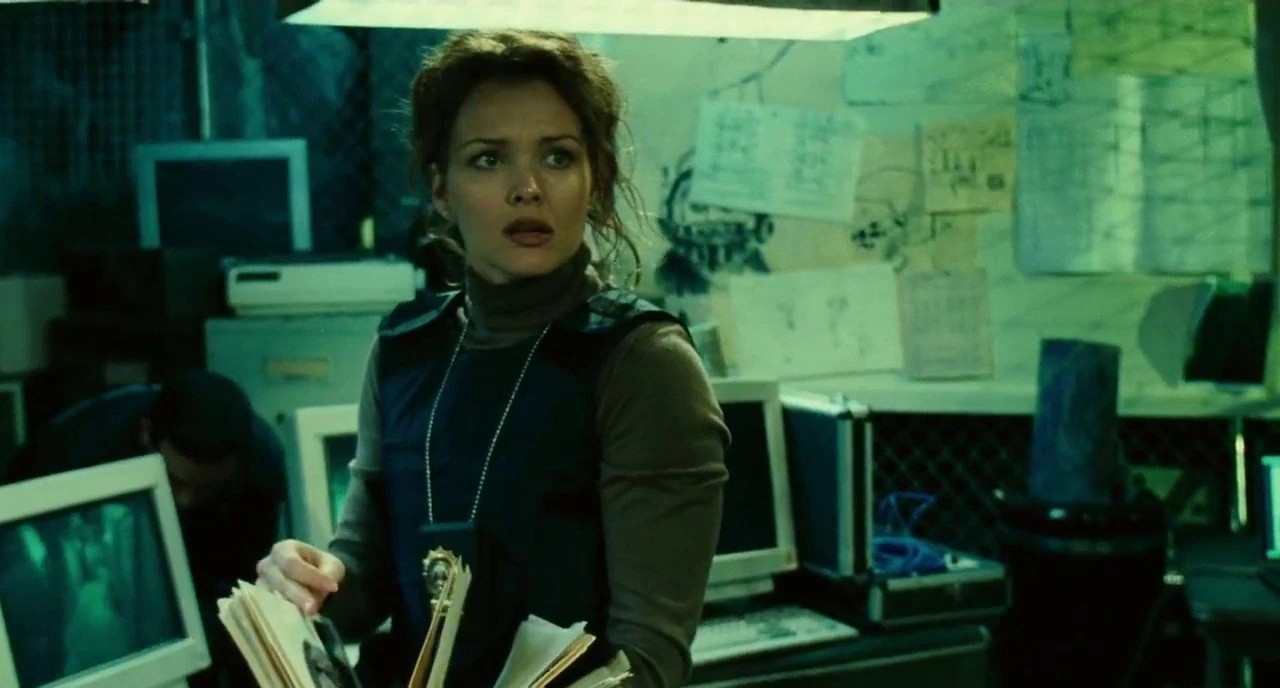
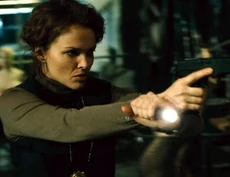
Kerry in her apartment
Eager to find Eric and finally put an end to Jigsaw's games, Kerry took the video from Troy's crime scene and a bunch of photos and files home to continue her research. While she was watching the video over and over again she suddenly saw herself on her TV screen. She realized that she was filmed from inside her closet and shot right through its door. When she searched the closet she found the camera and removed it but was then subdued by an invader with a pig mask who had sneaked up to her. Amanda Young and Detective Hoffman abducted her and placed her in one of Jigsaw's traps, where she ultimately died in as Amanda has manipulated this trap as well. (Saw III)
Finding Allison Kerry[]

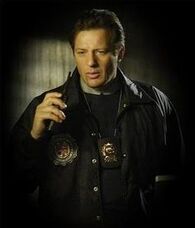
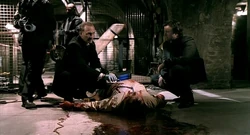
Hoffman, moments before the discovery of Kerry
Four days later, Hoffman accompanied a SWAT team led by Lieutenant Rigg and Officer Lamanna to the location of Kerry's death. They entered the area and found a chain link door. When they discovered a device connected to the door, Hoffman ordered them to send in a tactical robot before entering. Rigg ordered Officer Baker, who had recovered from his injuries suffered at Wilson Steel, to cut a hole in the door and send the robot in. The robot slowly made its way through the lower floor and reached a corpse hanging from the ceiling. When the camera of the robot eventually captured the person's face, Rigg realized it was Kerry. Horrified by the discovery, Rigg broke through the door and ran to her, thinking he could still save her. However, when he finally reached her, he realized that she had been killed by one of Jigsaw's traps. Seconds later, the remaining SWAT officers entered the lower floor of the basement and called for the forensics, who arrived shortly afterwards.
After securing the crime scene, a depressed Rigg sat down and observed the work of the forensic team. He asked his partner, Officer Lamanna, to cut down Kerry's mutilated corpse. Lamanna replied that he couldn't do this, but Rigg repeated his plea, as he wanted to bestow at least some respect to her. He then left Lamanna alone when Hoffman approached him. Initially angry at him, Hoffman reminded Rigg that he should know not to go through an unsecured door, but calmed down when Rigg told him that he thought he could have saved Kerry. Depressed by the discovery of their partner, they talked about their work and how they could still go on. Hoffman then noticed a message written on the wall which said "Cherish your life." Rigg asked him how they could if this was their life, to which Hoffman merely responded that they chose it and told Rigg to go home. (Saw IV)
FBI Assistance[]
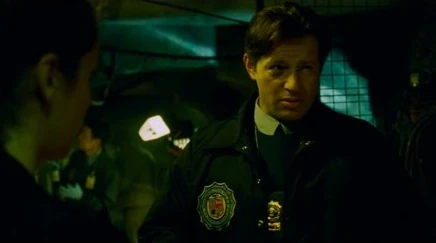

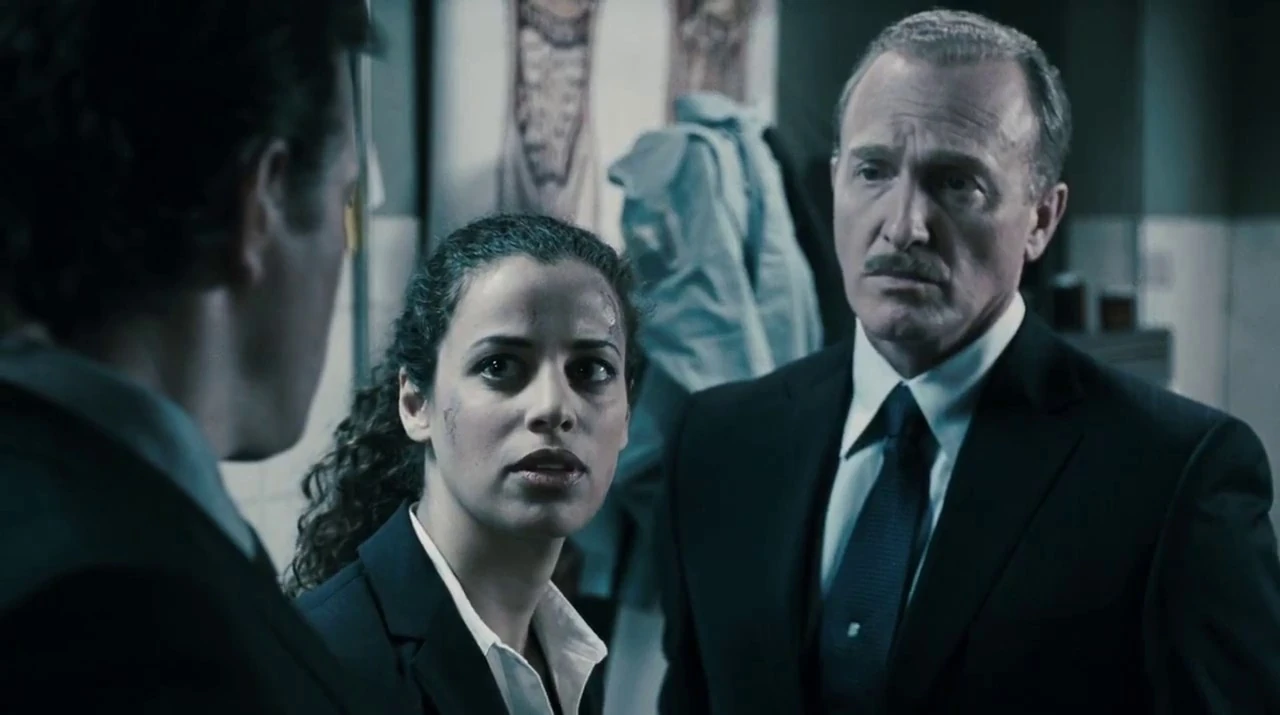
Hoffman meets the agents
He was then informed by one of his colleagues, that two FBI agents wanted to talk to him. Moments later, he made acquaintance with Special Agent Peter Strahm and Special Agent Lindsey Perez. Shortly before her death, Kerry, who was their contact person in the police department, had supposedly sent them a key and a message which merely said: "Open the door and you will find me." When they asked him about these things, Hoffman pretended to have no useful information for them. After that, he led the agents to the corpse of Detective Kerry. Upon doing so, Detective Fisk, who had arrived at the crime scene as well, informed him about the bullet shell which one of the police photographers had found at the corpse. Therefore, Hoffman ordered him to send it to the lab so it could be examined for fingerprints. When Agent Perez found the open lock of the trap she quickly came to the conclusion that this wasn't a Jigsaw trap. However when Hoffman said it was probably a trap by Amanda Young, Agent Strahm negated this as Kerry weighed approximately 130 pounds while Amanda Young weighed only 107 pounds according to her arrest report and therefore couldn't have placed Kerry in the trap on her own, leading to the conclusion that a third yet unknown person assisted her and John Kramer.


Hoffman tells Rigg to go home
Following the discovery of Kerry, Rigg returned to the police station and watched some of the old interrogation recordings of Jill Tuck, as he was sure that she knew something about him and therefore maybe also about the whereabouts of Eric. Shortly afterwards, Hoffman and the agents entered the room. Rigg tried to convince Hoffman to let him continue his work, but Hoffman ordered him to go home once more and take some time off, stating that it was unlikely to find Eric alive after he had been missing for six months. Albeit Rigg initially refused to do so, he ultimately gave in and left the office. When the agents asked him what his problem was, Hoffman replied that everyone connected to Rigg seemed to die, which was the reason for his obsession with finding Eric.
When they were alone, Strahm and Perez discussed the current situation and debated on whether they should tell Hoffman about Detective Kerry's last message, according to which two officers might be in danger. At this moment, Hoffman interrupted them and asked for their progress. On this occasion, Fisk came to him and informed him about the disappearance of a doctor, Lynn Denlon, from the Angel of Mercy Hospital. Upon hearing this, Hoffman told Fisk that he would take care of it. When Perez saw a cuddly toy in his arm, she asked him if it was for a girl or a boy. Hoffman said it was for a girl, leading Perez to the assumption he was married. However, he denied this and left the station to return to John Kramer and Amanda Young's new hideout at the abandoned Gideon Meatpacking Plant at 11235 Blake Drive. (Saw IV)
Daniel Rigg's Trial[]

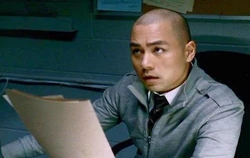
Fisk is informed about the fingerprints
Later that day, a fingerprint from Officer Rigg was found on the bullet shell from Kerry's crime scene. When Detective Fisk informed the Strahm and Perez about this, a young cop told him about a reported shooting at 23 Park Place, the location of Rigg's apartment. Shortly afterwards, the agents entered the apartment with the assistance of a SWAT team led by Lamanna. Upon doing so, they found out that another game had begun. Photos in the apartment revealed to them, that Eric Matthews, who was still alive, and Mark Hoffman, who was seemingly abducted as well, were part of the game, leading the agents to the conclusion that they were the two officers who were in danger according to Kerry. Additionally, they also found several photos of Jill Tuck, the ex-wife of John Kramer. Therefore, they took her to the police station for further interrogation. However, at one point Fisk interrupted them as another victim had been found at the Alexander Motel. Therefore, Strahm and Perez went to the scene and ordered Fisk not to let Jill leave the police station. (Saw IV)

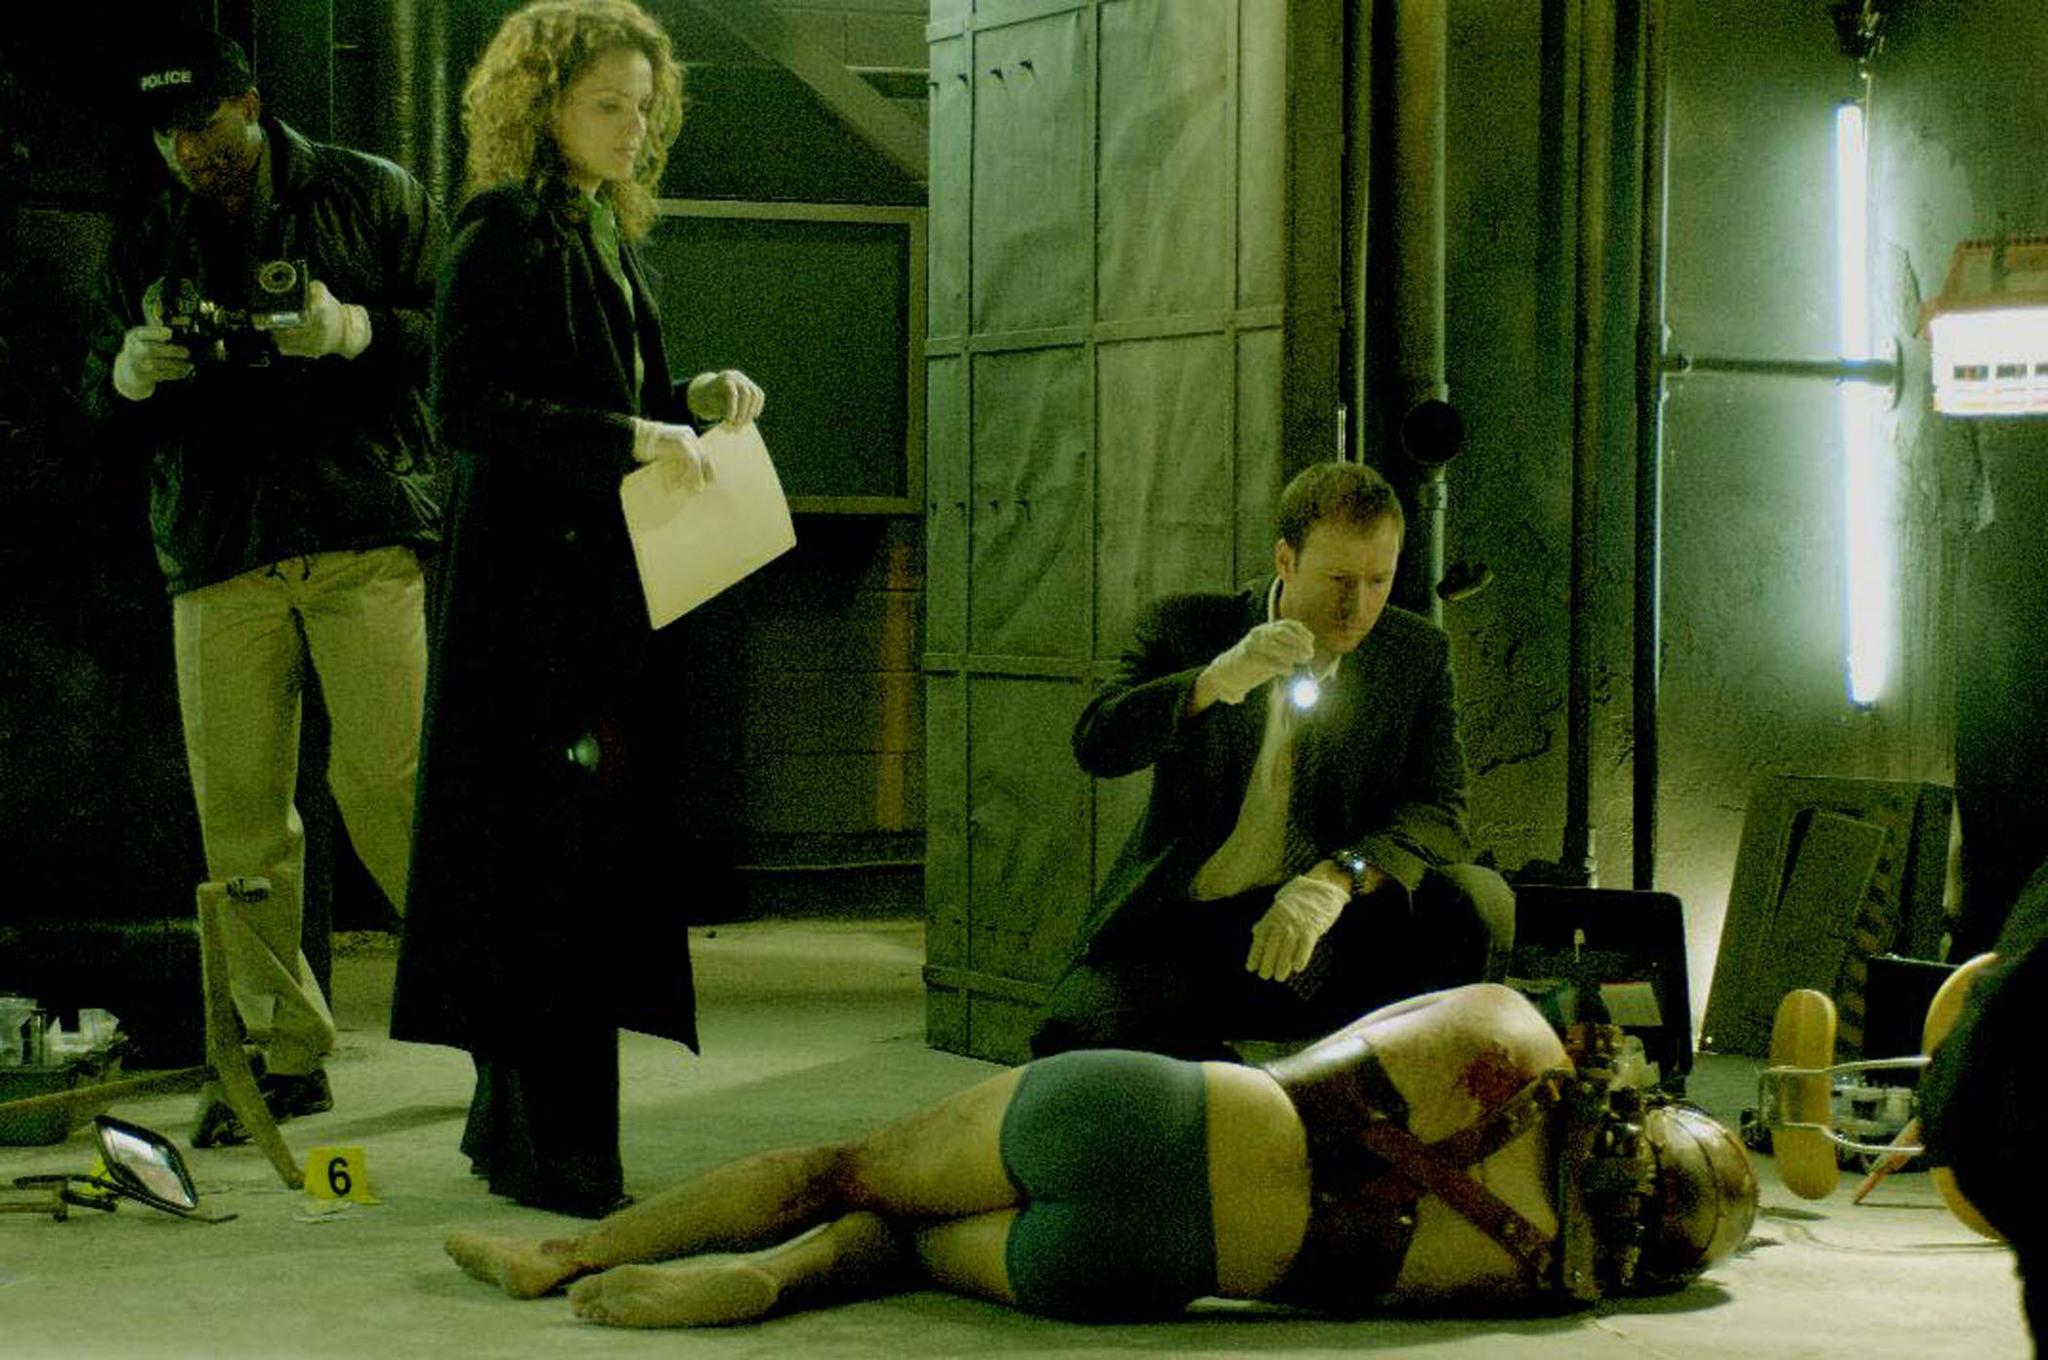
Hoffman and Fisk at the meatpacking plant
Less than two hours later, the police was called to the Gideon Meatpacking Plant. As the police was about to enter and secure the building, Hoffman came out through the delivery entrance along with a little girl, Corbett Denlon. Hoffman, who was in fact another accomplice of John Kramer, had merely pretended to be a victim held hostage at the plant. While the paramedics took care of Corbett, Hoffman was greeted by Detective Fisk who asked him about the whereabouts of Daniel Rigg. Hoffman told him that Rigg had died while trying to help and also claimed that there were no other survivors. Therefore, he was unpleasantly surprised when another team of paramedics suddenly came out of the building with Strahm, who lay on a gurney, severely injured but nonetheless alive after he had entered the building and was put in a trap, which he was able to escape from. (Saw IV, V)
Message from the Grave[]

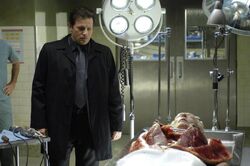
Hoffman at the morgue
After the Gideon Plant had been secured, all the dead victims as well as the corpses of John and Amanda were taken to the morgue, where Dr. Adam Heffner performed the autopsy on every single one of them. Upon the obduction of John Kramer, he found a wax-coated audio tape in his stomach and therefore ordered his colleague to call for the homicide division. Shortly afterwards, Hoffman arrived at the morgue and ordered the pathologists to cut the tape from the wax. After doing so, they gave the tape to Hoffman. The recording contained a message for him, which warned him that the games had just begun and that he wouldn't get away untested. (Saw IV)
Mark Hoffman's Promotion[]


Hoffman gets promoted
Despite this unnerving message, the Chief of Police gave a speech to the police and the press during a memorial ceremony for Hoffman as well as his deceased colleagues and thereby proudly announced that the Jigsaw killings had come to an end. Additionally, he Hoffman to the rank of a Detective Lieutenant and thereby handed him an honor plaque for his efforts in the case. Hoffman gave thanks to him for this honor and also gave a speech to the press as well, claiming that he and his colleagues had done their best to serve true justice. (Saw V)
Lindsey Perez' Death[]

Hoffman condoles on Perez' death
After the memorial, a young officer came to him and informed him that the hospital had called for him as Lindsey Perez had died, after she had been heavily injured during her attempts to stop Rigg's game. When he learned about her death, he went to the Saint Eustace Hospital and entered her room where he found a depressed Strahm, who had been taken to the same hospital and sat at her bed. Hoffman condoled with him on the death of Perez. Strahm however reacted angrily and told him that her last words had been "Detective Hoffman", which further fueled his suspicion towards him. Therefore he confronted him with the events at the Gideon Plant, stating that he didn't believe Hoffman's story according to which he had escaped when his arm straps broke. Irritated by Strahm's accusations, Hoffman angrily left the hospital. (Saw V)
Cooperation[]

Erickson shows the fingerprints to Hoffman
Throughout the next days, Hoffman continued Jigsaw's games and thereby killed Strahm in a trap. Furthermore, he had placed evidence against him at the crime scene of another game, and used his hand to place his fingerprints at future crime scenes. Shortly afterwards, Hoffman was called to an abandoned factory, were Eddie, the victim of another game had been found. Upon his arrival, a female officer informed him that the FBI was now in charge of the investigation and had asked for Hoffman to come to the crime scene as soon as possible. When he entered the room, he was surprised to see Strahm's supervisor, Special Agent Dan Erickson. The agent told him about the fingerprints and showed them to him with a black light. Furthermore, he informed him that the fingerprints had already been identified as those of Peter Strahm, while voicing his surprise and dismay of this new situation. However, he also stated that they had prepared a surprise for Strahm on their own and led Hoffman to the next room. Hoffman was shocked, when he saw Lindsey Perez standing before him. Erickson revealed that they had staged her death in order to guarantee her safety until they knew more about Jigsaw's unknown apprentice. During their conversation, Perez informed Hoffman that she and Strahm had worked on an arson case connected the victims of the latest game, where Hoffman had placed the evidence against Strahm. However, the charges were dropped when the only witness unexpectedly disappeared. This led them to the conclusion that Strahm had chosen them in order to take revenge. As they now believed to know that Strahm was the secret accomplice of Jigsaw, they asked Hoffman to work together. Hoffman initially hesitated as the agents hadn't informed him about Perez' faked death earlier, but ultimately accepted the offer when Erickson promised him to inform him about all future information and FBI activities regarding the Jigsaw Case. (Saw V, VI)
Hoffman talks to Simone
Following his visit of the crime scene, Hoffman went to the hospital for a first interrogation of Simone. When he left the elevator that took him to her floor, he was already expected by Pamela Jenkins, an investigative journalist who was well-known for her sensational reports about the Jigsaw investigation. During their discussion, Hoffman confronted her with her lurid twisting of facts for the sake of a better story, calling her irresponsible for it. Pamela, who claimed to report only facts to the public, claimed to know more about John Kramer than he might have thought and revealed to him that she had been at the probate court where she had learned about a black box left to Jill Tuck after the death of John. Seemingly annoyed by her obtrusive attitude, Hoffman acted unimpressed by her knowledge and asked her what she wanted. Pamela asked him to arrange an interview with Jill Tuck and in return promised to dial down her sensationalism. To fob her off, Hoffman told her that he'd see what he could do before he entered Simone's room and closed the door before Pamela. Simone, whose wounds had been treated by the doctors, told Hoffman about her game and her and Eddie's actions which had got them targeted in the first place. However, when Hoffman asked her if she was able to learn anything from her game, Simone became angry and told him to look at her arm stump, furiously asking him how anyone could learn from a gruesome experience like hers. As the doctors tried to calm her down, Hoffman left the room again. (Saw VI)
Reopening the Seth Baxter Case[]

The agents and Hoffman discuss the situation
After visiting the hospital, Hoffman was called to the morgue, where Dr. Adam Heffner had found something interesting during the obduction of Eddie. When he arrived, Perez and Erickson were already waiting for him as well. Heffner showed him some photos of the jigsaw pieces cut from the skins of previous victims and told him that they had been cut off with a plain scalpel, while the killer of Eddie had used a knife with a tined blade. Upon comparing this case with other previous cases, the agents had found out that the tined blade had only been used once before, to cut the jigsaw piece from the body of Seth Baxter, the murderer of Hoffman's sister. As a different knife had been used, Perez and Erickson had ordered to further analyze the video tape found at Seth's crime scene, thinking that it might have been recorded by someone else as well.

Hoffman talks to Perez
Later that day, Hoffman received a call from Erickson, who asked him to come to the FBI Headquarters as soon as possible. When he arrived there, he was greeted by Erickson and Perez, who informed him about an anomaly found in Strahm's fingerprints. Perez told him that they had found traces of Freon, more explicitly Dichlorodifluoromethane R-12, a chemical substance which wasn't produced anymore since 1994. In order to find out if the crime scene of the latest game was polluted or if Strahm's fingerprints were already contaminated with the substance before, Perez and Erickson planned to find out what was formerly produced in the building where Simone and Eddie's game had taken place. Erickson was then interrupted by a phone call from the FBI's technical lab. Hoffman asked Perez if there were any news about the Seth Baxter tape, which she confirmed. Despite the fact that the tape was in a bad state, they were able to authenticate that the voice on the tape wasn't John Kramer's voice. Therefore, they had sent the tape to the technical lab to rectify it so they could hear the original voice. When she told Hoffman about it, she realized that his stopwatch was running and asked if he was timing something, to which he responded that he did before receiving the call from Erickson. Moments later, Erickson told them that the original voice on the Seth Baxter tape was soon going to be decrypted and told Hoffman and Perez to accompany them to the external lab.
Hoffman kills Perez
The group reached the lab soon afterwards. When they came in, FBI technician Sachi was still working on the tape. As they had to wait some more time, Hoffman took a cup of coffee from the machine in the room. Noticing Hoffman's increasing nervousness, Perez tried to put him under pressure and began to discuss Strahm's motivation for helping Jigsaw and stated that she had never suspected him to be mentally unstable during the five years she had worked with him. Erickson then talked about the possibility that Strahm had killed Seth Baxter to throw suspicion on Hoffman. However there was still some detail that didn't fit the picture and therefore he finally revealed to Hoffman, that Strahm, judging by the analysis of his fingerprints, must have already been dead by the time he left his prints at the crime scene of Simone and Eddie's game. Seconds later, Sachi restored the tape, finally revealing the voice to be that of Mark Hoffman. However, before the agents could react, Hoffman quickly pulled out a knife from his pocket, slashed Erickson's jugular vein and threw the hot coffee in Perez' face. Then, he cut off the power and grabbed Sachi, who was shot in the back three times by Agent Perez as Hoffman used her as a human shield. Upon doing so, Hoffman was able to approach Perez and stabbed her multiple times in the abdomen with his knife. He then asked her who else knew about him, to which she responded with her dying breath that everyone knew about him. Calling it a lie, Hoffman stabbed her one final time, killing her in the process.


Hoffman sets the lab on fire
Following the massacre, Hoffman threw away his knife and ran out of the lab. Seconds later, he returned with the severed hand of Strahm, which he had kept in a cooling box in his car trunk, and a gas canister. He placed Strahm's fingerprints all around the room and also on Perez' gun as well as the screwdriver which he had used to cut off the power. Afterwards, he poured the gasoline all over the floor, the corpses and the technical instruments. When he approached Erickson, he briefly hesitated and smiled when he saw that the latter was still alive, before he poured the fuel over him as well. Then, Hoffman set the lab on fire before finally fleeing the scene. (Saw VI)
Article 8[]
Sometime after the end of the Jigsaw murders, a law known as Article 8 was passed. This legislation expanded the powers of law enforcement in order to fight crime. Many corrupt police officers and detectives, including Peter Dunleavy, Fitch, and Marv Bozwick took advantage of Article 8 in order to get away with brutality, up to and including murder. Police Chief Marcus Banks and head of homicide Angie Garza were actively involved in covering up these crimes and shielding their officers from punishment. However, the scandal was ultimately uncovered when Banks' son, Officer Ezekiel Banks exposed his partner, Peter Dunleavy, for murdering an innocent man named Charlie Emmerson to prevent him from testifying against another corrupt officer. (Spiral)
Internal Affairs Investigation[]
Ezekiel Banks exposed his partner, Peter Dunleavy and took action by filing a complaint against him, for murdering an innocent man named Charlie Emmerson to prevent him from testifying against another corrupt officer. The complaint opened up an IA investigation that found Dunleavy guilty. He was stripped of his badge and forced to become a civilian. He was bitter and angry at Banks for turning him in, and the ramifications of Banks's actions made him an outcast amongst his fellow officers. (Spiral)
Backup Call[]
One day Ezekiel Banks had to deal with, a criminal Zeke requested backup but Fitch and Drury refused to help him due to his snitch status, resulting in Zeke getting shot, the Paramedic arrives to help Zeke and Police Chief Marcus Banks arrives to find out who refused to help his son, He later found out it was Fitch and beat him for it. Some time later police chief Marcus Banks then retired, and Ezekiel Banks became a homicide detective. (Spiral)
Edgar Munsen's Test[]

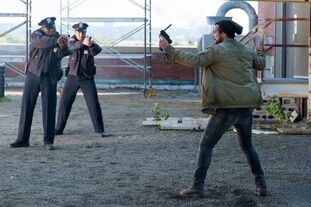
Ten years after the death of John Kramer as known as jigsaw, the police are in pursuit of criminal Edgar Munsen. As the latter sped through the streets in his car, officer Solomon several of his colleagues including Palermo set up a road block and thereby finally managed to stop his car. Edgar left his car and continued on his flight by foot. The officers pursued him to an abandoned warehouse and up to the rooftop, where they eventually managed to corner him. However, as they aimed their guns at him, he raised a remote. Even though Solomon ordered him to drop the device, Edgar refused to do so, stating that they "could not stop it." Instead of dropping the remote, he desperately told them to call Detective Brad Halloran as five other people were going to die if Halloran didn't arrive within 17 minutes. Eventually, Solomon consented to it and called the detective. Shortly afterwards, Halloran arrived at the scene, along with Detective Keith Hunt. In his attempt to find out what was going on and who was responsible for it, Halloran questioned Edgar, while his colleagues still held him at gunpoint. Edgar claimed that he himself was going to die if he didn't activate the remote. Therefore, Halloran ordered the officers to aim for the remote and shoot it if Edgar pulled the trigger. As the time was running out, Edgar lost his composure and activated the device, causing the officers to instantly shoot and destroy the remote. However, a bullet hit his chest and Edgar collapsed severely injured. Afterwards, the officers lowered their guns, while Halloran angrily asked which one of them shot Edgar in the chest against his orders. (Jigsaw)
Investigating the Jigsaw Murders Ten years later[]
After the uncovering the body found at an park with jigsaw piece cut from them, seemingly belonging to the unnamed man killed in the first room. Halloran and his partner, Keith Hunt, begin to investigate the 'game' more seriously. Edgar, who had been put into a forced coma in order to heal properly from his injuries, is shown being kidnapped from the hospital by an unseen assailant. Edgar was taken to the St. Peter's Hospital, where he had to be put in an artificial coma. Some time later, he was briefly revisited by Halloran, who wanted to look after him after the mutilated corpse of a woman had been found before the entrance of the hospital. When he left again, Officer Canter remained at the hospital and guarded the door to Edgar's room. (Jigsaw)
Edgar Munsen's death[]
However, when Canter fell asleep, Logan entered the room and injected a medicament into Edgar's infusion bag, causing him to wake up. Afterwards, Logan abducted him and eventually killed him by slicing his throat. After examining the body, she told Logan she found that there might be a way she be able to find the place of death, but they were interrupted when a second Jigsaw victim was found. Following his death, Logan cut a jigsaw piece from Edgar's cheek. Afterwards, he put his corpse into the coffin of John Kramer, before burying it again. The next day, the police commissioner ordered John's corpse to be exhumed in order to calm down the public after the recent murders. In the presence of several reporters and under Detective Keith's watch, the grave was dug up again and the coffin was opened. When Keith recognized Edgar Munsen, he immediately informed Detective Halloran. Later on, Halloran ordered Keith to arrest Logan as he had started to suspect him. Logan, however, told Keith that Halloran was actually the killer and the one responsible for shooting Edgar on the rooftop. Keith gave him the opportunity to prove his theory and accompanied him to the morgue. Logan removed the projectile from Edgar's chest and put it into a cleaning solution. Unnoticed by Keith, he replaced it with a bullet of a Glock 17, the gun used by Halloran. Therefore, he finally convinced Keith that Halloran had killed Edgar. (Jigsaw)
Raid on Eleanor's Replica Lair[]
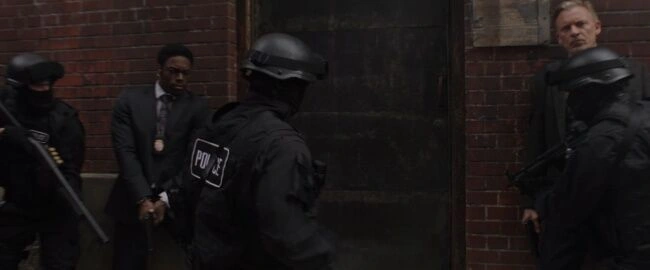
Halloran, Keith, and the SWAT team raid Eleanor's studio
Halloran becomes suspicious of forensic pathologists Logan Nelson and Eleanor Bonneville, specifically Eleanor. Though in turn Logan, a military veteran whose wife was killed two years prior, is suspicious of Halloran's motives in investigating the case. The police captain orders John Kramer's grave to be exhumed in order to put an end to the rumors that the 'game' is really another Jigsaw game, and that somehow John is still alive, inside the coffin is instead Edgar's body, with a jigsaw piece cut out of his cheek. Logan and Eleanor speak in a bar about their distrust of Halloran, before Eleanor takes Logan to her "studio", revealing that she is an obsessive fangirl of the Jigsaw case and has built many replicas of his previous traps, which she worries could incriminate her. Hunt has followed them and takes photos of her studio, which he shows to Halloran. Halloran, Hunt and an SWAT team then raid Elanor's lair upon doing so they find a body. Halloran orders the two to be arrested, though Logan is able to convince Hunt, an old friend, that Halloran is actually to blame, as he had past dealings with Edgar. (Jigsaw)
Undercover Robbery[]

With his fellow officers against him, Zeke became hardened and distanced himself greatly. He refused to work with any new partners and instead, investigated murders. At an Apartment Complex, Zeke, A homicide detective working undercover with three gang bangers that plan to rob drug dealers there. After Zeke and the three gang bangers completed the robbery they went to their to leave the place when they were caught by the police including officers Barrett and Pat Jones. He was reprimanded by the new police chief and family friend Angie Garza. Garza was angered that he went undercover without any backup, though Banks was sure he couldn't trust anyone. Garza refused to believe that and instead gave him a new partner, an idealistic rookie, though Banks tried to argue against the assignment. He didn't want to babysit someone, though Garza didn't give him a choice. She assigned him, and his new partner, to the homicide division once again.
Marv Boswick's death[]

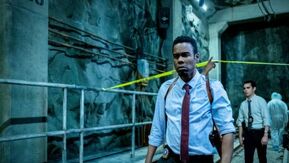
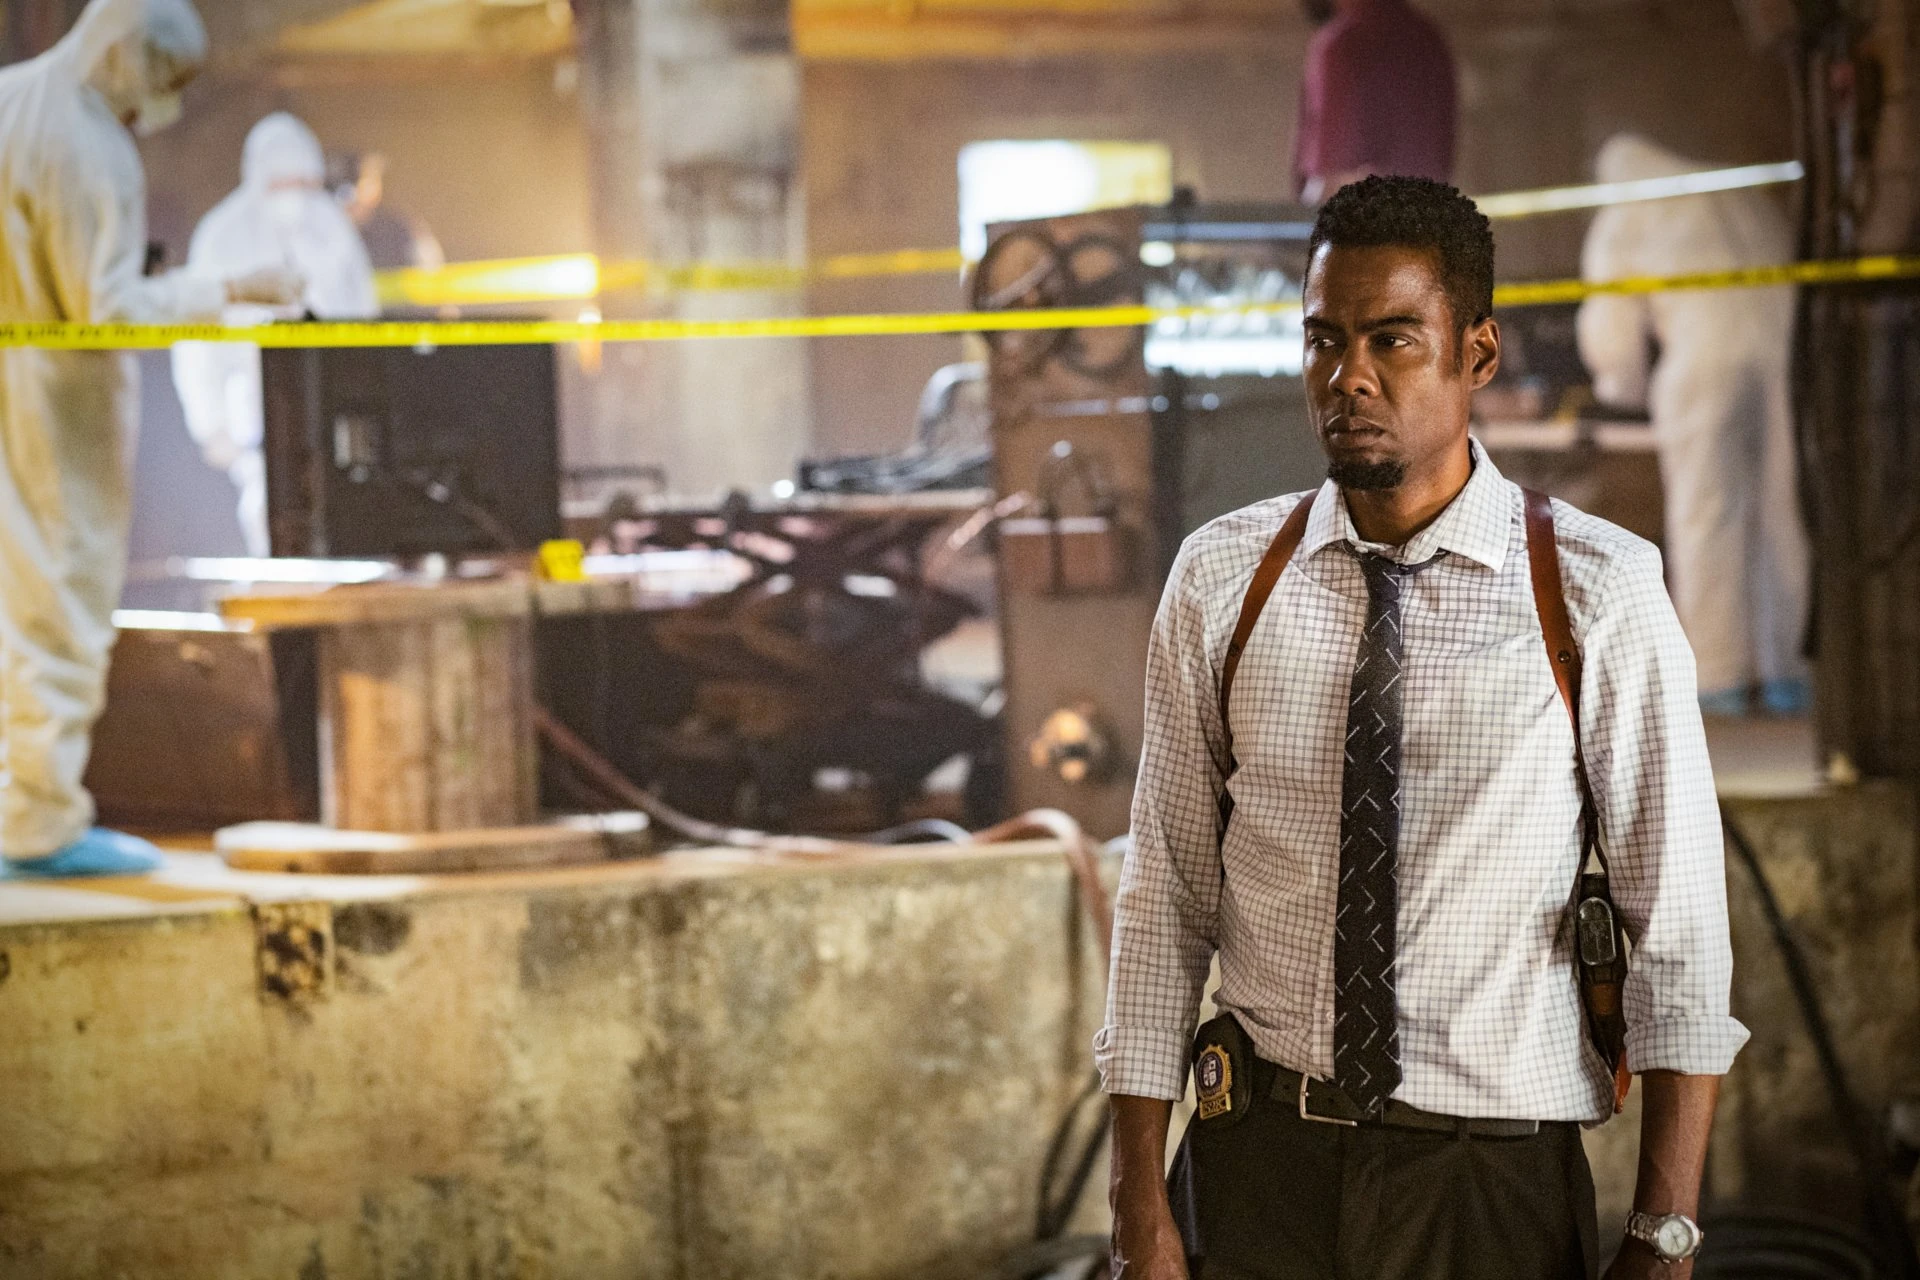
Zeke and William at the crime scene
When off-duty detective Marv Bozwick is gruesomely murdered in the subway tunnel, believing that it was a homeless man the one who was run over. After various cops including Livingston and Grant went there to see what happened and secured the scene in order to take evidence, Captain Angie Garza informed Detective Ezekiel Banks and his new partner William Schenk (who was actually the killer using a different last name) about this and told them to go there in order to investigate. Once Ezekiel and William arrived at the subway where the game was played, they found various police officers examining the scene, taking pictures and evidence. Zeke asked Livingston who was securing the scene what happened, to which he told Zeke to see it for himself.
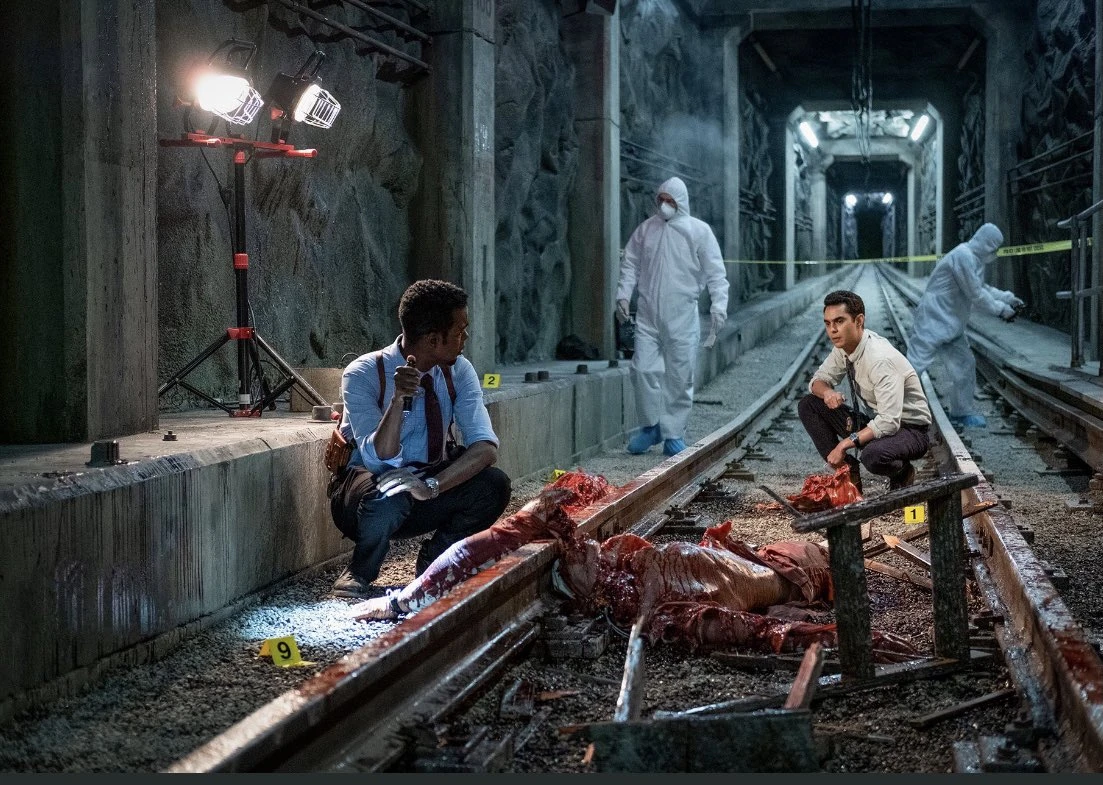

Zeke and William passed the security tape and observed the remains of Bozwick while William pretended to be disgusted and wanting to vomit. Ezekiel told William that if he wants to vomit to not do it in the evidence, to which William replied that he will not, as he's been waiting to do this since he was twelve years old. While Ezekiel was lighting the remains of Bozwick with his flashback, William saw the TV, which was destroyed when the train arrived and asked if TV sets are in subways, to which Zeke replied telling him that lots of things appear in subways. William then said that it will be difficult to identify Bozwick, who was still believed to be a homeless man, but Zeke wasn't sure of the victim being a homeless man, due to noticing a step counter watch in one of Bozwick's arms. He was also able to identify that Bozwick was married and was wearing a Fitbit. (Spiral)
USB Message[]

The USB drive sent to Zeke from William
At the police station Angie Garza, Fitch, Kraus, Drury, O'Brien, and Morgey try to find out who killed Boz. Zeke revives a box from the killer with USB in it Zeke plugs it in. They find the first video tape from the killer, who identifies the murdered man as a police officer. The killer plans to reform the Metro PD and remind them of the oath they took to the city. Schenk, Banks, and Detective Fitch piece together that the Jigsaw Killer has a new copycat. Once Zeke saw the video that Schenk anonymously sent to him in the form of an USB, he recognized the courthouse that appeared in the video, went there along with William and found the red spiral. Suddenly, two other cops that also watched the video, Fitch and Kraus. Zeke and William arrived at the crime scene, Detective Fitch and Detective Kraus, arrived at the scene too. William asked what they were doing there to which Fitch replied telling that they thought they would need some backup. Ezekiel insulted Fitch, telling him this wasn't his case. William told Zeke about the box that was in the metal bars of the windows of the building. Zeke leaped, grabbed the box and unpacked it. After opening it, inside they found Bozwick's tongue along with his plaque. All of them reacted with disgust, except for William who was once again faking it. Zeke then grabbed the police plaque and read the numbers. William asked Zeke who was the officer 4-5-3. Zeke got shocked after recognizing the numbers from the plaque and it was confirmed to him and the rest of the Metropolitan Police Department that Marv Bozwick was the one who was killed in the trap. (Spiral)
Fitch's Death[]

Detective Fitch and Detective Deborah Kraus went to the pawn shop witch when he did the owner told Fitch they were closed Fitch showed him his badge the man then let Fitch inside to look at the security cameras Fitch saw Boz chasing a man dressed as uncle sam and realized the man was Benny Wrights and that he lived at a bread factory. Fitch decided that he would go there and look for Benny Kraus asked if Fitch if they should tell Zeke about this Fitch replied and told her not to. She then left the pawn shop Fitch asked the owner if he could see one of the guns and took it with him Detective Fitch is abducted and later put into a trap were he must rip off their fingers before the water made contact with the exposed wires, or else he would be electrocuted to death. Fitch didn't rip his fingers off in time before the water made contact with the exposed wires and was then electrocuted to death. Zeke, Will, Kraus and Drury then find Fitch's corpse at bread factory the location of the crime scene. Detective Drury suspects that Banks is involved since both Boz and Fitch had connections to Banks. Schenk, however, agrees with Banks that someone else is pulling the strings and puppet mastering the events around them. William remains the only cop who believes Banks.
Questioning Speez[]
After the Metro Police found out that Benny Reitz was the man dressed as Uncle Sam and was a crackhead. Detective Ezekiel Banks and Detective William Schenk decided to go find the drug dealer Speez who gave Benny his drugs. they decided to go to his apartment to ask him some questions about Benny. Speez's apartment was located at a meth house which Zeke and William had to go through to get to Speez on their way through the meth house Zeke and William had stopped cause a Man with a Pitbull couldn't control his dog eventually they got passed the man and his dog and made it to Speez's apartment.

Zeke and O'Brien at the crime scene
Schenk's Death[]
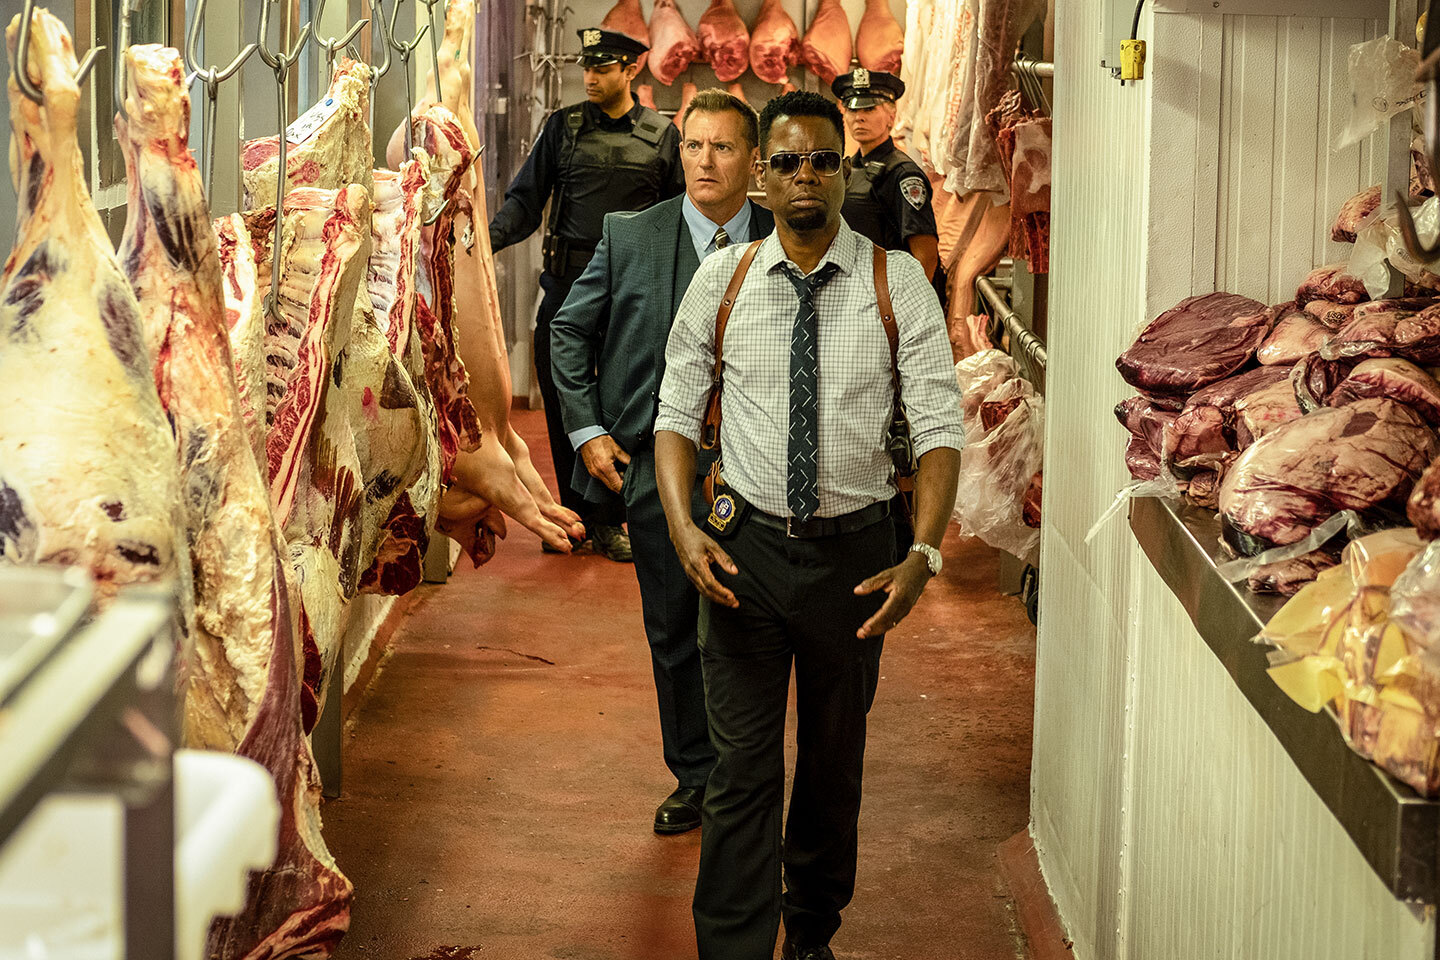
A box is later delivered to the station with a taunting note asking Banks if the killer was getting under his skin. Inside the box is a piece of Schenk's skin inside, identified via a distinctive tattoo. Also inside is a vial that directs the new batch detectives to a butcher shop. Banks recognizes the place as a hobby shop that he and his father visited when he was younger. After getting to Constantine, Ezekiel and O'Brien entered the room where Benny's body (Who was still believed to be William's) was being examined by Jeannie Lewis and other cops that reacted with horror and disgust after seeing the corpse. Ezekiel waited outside of the room for a few minutes and when he went back into it, he asked a forensic about evidence. The forensic told him that they have been analyzing the tape recording and they were able to find out not only that Benny was skinned but also how the body was scored in order to remove the pieces in larger strips first and that the defensive wounds mean he tried to fight back, explaining the deeper gashes. After hearing all of this, Ezekiel was close to cry, due to not believing the fate allegedly his new partner and friend met. This upsets Banks more then he anticipated, though he begins to piece together clues from the investigation that he doesn't share with the other detectives
Angie Garza's Death[]
Sometime at a shop one day Officer Barrett was attacked by a Figure in a Pig mask and was stabbed in the arm. He was later found by fellow officers and informed Detective Ezekiel Banks. Barrett's attack was used as a distraction to get the officers out of the precinct so that the killer could capture Captain Angie Garza. Garza is abducted and placed under the police station. Banks realizes she's been abducted and is next on the copycats kill order, and tries to find her. He doesn't arrive in time and discovers her corpse; her face is covered in wax, while her spinal cord is severed. Her death devastates Banks, but also gives him a lead. He realizes that the killer must know intimate knowledge of the police station to pull off the abduction. Banks also learns that his father, Marcus Banks, is officially missing as no one can locate him. Detective O'Brien suspects that Marcus is working with the copycat killer. (Spiral)
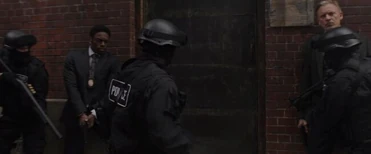
Raid on the Soap Factory[]


The SWAT officer cuts down the door
Unable to lose his father, Banks shoots the target to free Marcus. After Marcus was released, he told Ezekiel to go after William, when his son started beating the killer, an arriving SWAT team found and cut open the door of the room they were in. When the SWAT team finally kicked down the door, they held Ezekiel at gunpoint due to his hostile actions against William. The trap moved Marcus to it's final phase. Marcus restraints yanked him upward again, thanks to the wire mechanism the SWAT team unknowingly severed when they cut the door open. The search lights behind him were turned on, a shotgun barrel was protruded, and Marcus's right arm was raised, giving the SWAT team the impression that he was going to shoot them. Since a gun affixed to his hand, the team mistakes Marcus for a threat and the SWAT team opens fire shooting Marcus to death. (Spiral)
Saw: The Video Game[]
The events surrounding Steven Sing's death and David Tapp's discharge are frequently mentioned by Jigsaw and Tapp throughout Saw: The Video Game. Additionally, Tapp found several newspaper articles written by Globe Staff writer Oswald McGillicutty, in which the latter frequently mocked and criticized the work of the police and especially Tapp in the Jigsaw Case.
Saw II: Flesh & Blood[]
The investigation in the Jigsaw Case to the point of Tapp's discharged were frequently mentioned by Tapp in several documents and audio tapes in Saw II: Flesh & Blood. Also mentioned in the files were previous cases, such as the Bilson Murders, where he worked together with Sing for the first time, or a mass execution of members of K2K, a small gang, which had been brutally murdered by the local Yakuza.
Appearances and References[]
| Films | |||||||||
| Saw | Saw II | Saw III | Saw IV | Saw V | Saw VI | Saw 3D | Jigsaw | Spiral | Saw X |
| Flashback & Mentioned | Appears | Appears | Appears | Appears | Appears | Mentioned | Appears | Appears | Absent |
| Other Media | |||||
| "Saw" (2003 Short) |
Saw: Rebirth (2005 Comic) |
Full Disclosure Report | The Scott Tibbs Documentary | Saw: The Video Game | Saw II: Flesh & Blood |
| Appears | Absent | Mentioned | Appears | Mentioned | Appears |