| “ | To truly succeed, you will need to not simply do what you are told. You will need to investigate your surroundings, like the reporter you claim to be. | ” |
— Jigsaw introduces Michael to his game[src]
| ||
Michael's Trial is one of Jigsaw's games in the Saw franchise, occurring in Saw II: Flesh & Blood.
History[]
Preparation[]
The primary victim of this game was Michael Tapp a reporter who had destroyed the reputation of his estranged father, David Tapp, a discharged detective who had formerly investigated the case of serial killer John Kramer, better known as the Jigsaw Killer. Eventually, Michael was abducted by Pighead II, one of Jigsaw's accomplices, who took him to the abandoned Holmes Hotel. (Saw II: Flesh & Blood)
First Test[]
| “ | Hello. Rise and shine. Michael, Solomon - each of you have an opportunity to escape this room. The first one to move their cage to the door will be freed. However, there is no price for second place. Oh, and watch your step. The floor is covered in broken glass. You like stories, don't you? Well, here's the first one: the tortoise and the hare. Let the game begin. | ” |
— Michael Tapp and Solomon Bates' tape[src]
| ||
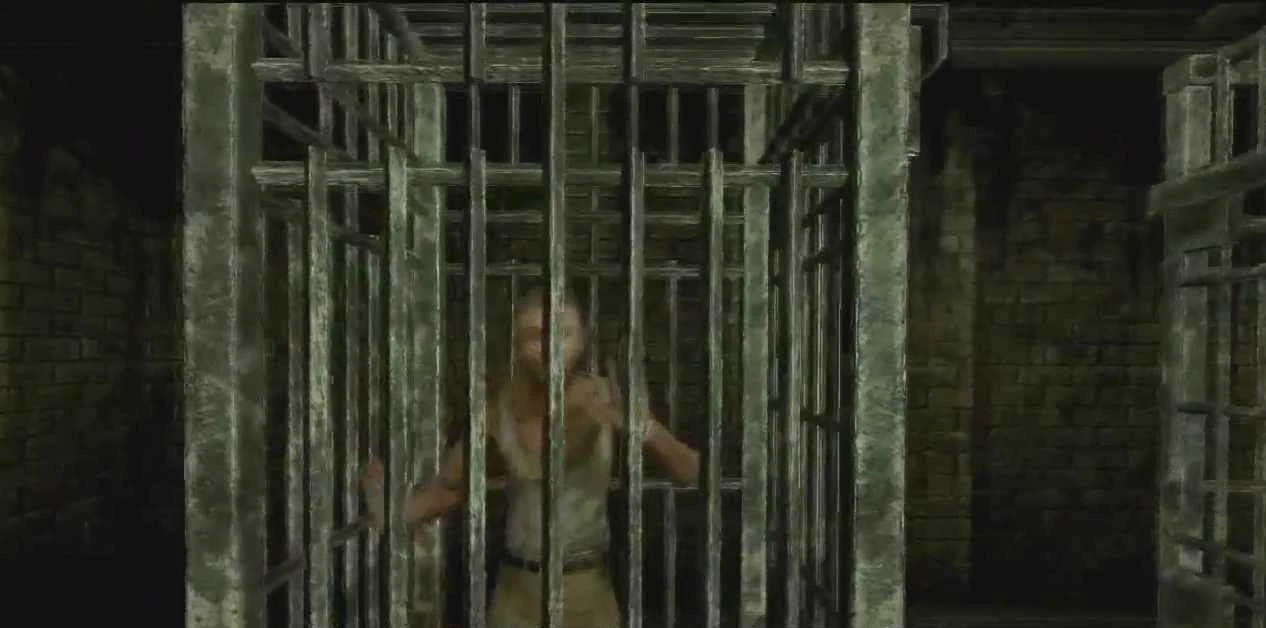
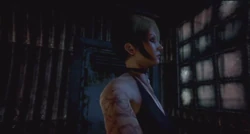
Solomon in his cage
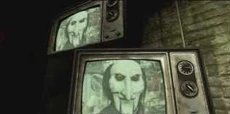
When he woke up again, he found himself trapped in a cage connected to a track on the floor. Another man, an accountant named Solomon Bates, woke up right next to him in the same situation. As both of them came to their senses, a TV turned on in front of them. A mechanical ventriloquist puppet appeared on the screen and explained the rules of their game to Michael and Solomon. Each of them would have to push their cage forward and try to reach the end of the track as soon as possible. Additionally, both of them were barefoot and the tracks were covered in broken glass.
| “ | You've failed, Michael. But I'm giving you a second chance. You are a reporter. The public trusts the news you give them as the truth. But the truth is that you write stories for your own benefit. Sons often suffer the sins of their fathers. But your father suffered your corruption. To escape this place, you will have to free those involved with your father's death. To truly succeed, you will need to not simply do what you are told. You will need to investigate your surroundings, like the reporter you claim to be. Save their lives and find the story of your father's death. Discovering the truth will set you free. | ” |
— Michael receives his second chance[src]
| ||
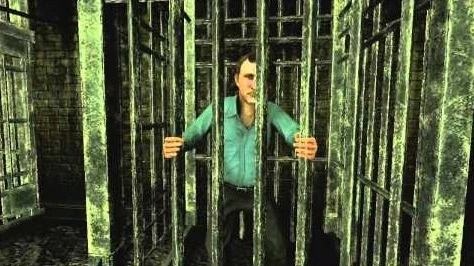
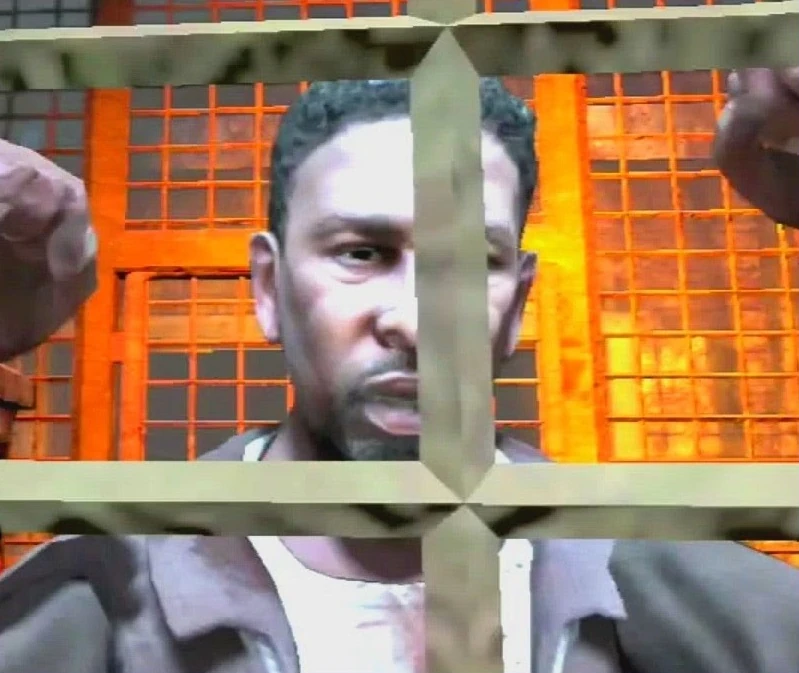
Michael in his cage
When the TV turned off again, two metal bars, which blocked the cages' paths were lifted. Solomon embraced the opportunity and immediately began to push the cage forward. Michael tried to move forward as well in his attempt to catch up with his opponent. However, Solomon reached the end of track first and was freed from cage. At the same time, another door was opened and Solomon fled the room. Afterwards, Michael made it to the end of his own track and was freed from the cage as well. The TV turned on again and the puppet offered him a second chance at survival by facing another game. (Saw II: Flesh & Blood)
Sins of the Father[]
As Michael looked around the room, he pushed a crate with mattresses out of the way and thereby found a hidden gap in the wall, through which he was able to leave the chamber. However, the next obstacle was already waiting for him. Before him was a door, secured by a combination lock. A table was written on one of the walls. The first row contained the letters A to M, while the row below contained various numbers. Through a peephole, Michael read the message "Prove you deserve a second chance" on a wall of the next room, with the letters S, O and N highlighted and underlined. When he turned off the light, another table with the letters N to Z appeared, as it had been painted with a special fluorescent color. Thereby, Michael was able to find out the correct combination, 732, and opened the door. Behind it, he found another door. However, as he opened it, he was almost killed by a shotgun positioned above it. After barely escaping the shot, he found himself in the room, which Solomon must have passed after escaping from his cage. Michael then entered an elevator and rode up.
| “ | Throughout your father's career, he put many criminals in prison. As his son, they will not be happy to see you. | ” |
— Jigsaw warns Michael of the other prisoners[src]
| ||
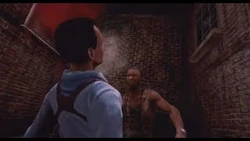
As he left it, he was greeted by the puppet, who appeared on numerous TV screens positioned around a heavy metal door. The puppet told him that many of the criminals, who were arrested by his father during his career, were trapped in the hotel as well and warned Michael that they wouldn't be happy to see him. This warning turned out to be justified, as only moments later, one of these prisoners entered the room and immediately attacked Michael with a nail-studded baseball bat, stating that he had to take up his father's debt for arresting him. Therefore, Michael was forced to kill the man in self defense. After doing so, he searched his corpse and found a fuse, which he took with him. With this fuse, he was able to power a nearby panel and passed through the metal door. (Saw II: Flesh & Blood)
The Bomb Chair[]
| “ | Save this man to see his sign. But hurry, he doesn't have much time. | ” |
— Jigsaw tells Michael to save Griff[src]
| ||

Griff in his trap
Upon continuing his way and passing a number of abandoned hotel rooms, he saw the message "Follow the rules" written on a wall before him. Moments later, he noticed a hole in another wall, through which he could see a man named Griff, a rapist, who was strapped to a chair with a bomb attached to it. Anoter TV turned on in front of him and Jigsaw's puppet appeared on screen, telling Michael that he was the only one who could save Griff, but didn't have much time to do so. Afterwards, a 30-second-timer started to count down. Right underneath it was a row of four small combination locks. Before the timer expired, Michael had to bring the four numbers in the right order, starting with the smallest number and concluding with the highest. If he failed to do so, Griff was killed by the bomb attached to his chair. However, if he brought the digits in the right order in time, Griff was freed from his restraints and had to open the combination lock of the next door, which would allow him to escape the room before the explosion. The necessary numbers appeared on the same TV screen as the puppet. (Saw II: Flesh & Blood)
The Way to the Ballroom[]
Jigsaw tells Michael about Henry
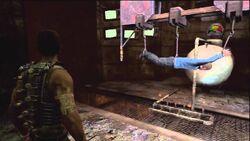
After facing this test, Michael continued his way. He proceeded through a number of rooms and hallways, climbed down to the lower level of the building through holes in the walls and floors and had to face several dangers, such as unstable floors, which caved in under his weight, or more of Jigsaw's bobby traps. Thereby, he finally reached the hotel lobby. As he went down the stairs, he came across Jigsaw, who stood behind a fence and had already been waiting for Michael. He told Michael that Henry Jacobs, the chief of the Metropolitan Police Department, was trapped with him in the ballroom and hinted at a secret, which had shattered his father's trust in Jacobs. Jigsaw then left the room, with Michael being unable to pursue him.
Therefore, he tried to find another way and eventually entered a hallway, with several plates on the floor, each one with a symbol. A TV showed him the order in which he had to step on the plates in order to pass the hallway without being fatally electrocuted. After getting to the end of the hallway, he found himself in another room with a door secured by a combination lock. Right in front of it, the words "Time is on your side" were written on the floor. Michael looked around the room and thereby noticed three clocks hanging on the wall. They looked all the same, except for a red jigsaw piece, which was painted on one of them. The position of its clockhands, which showed 8:26, eventually told Michael the right combination.

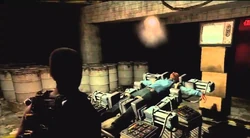
The pig carts
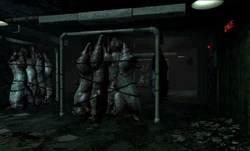
As he opened the door, he entered a large hall. In the middle of it, there was a man trapped in a metal cage. Just as Michael came closer, the cage was lifted up by a chain, allowing the man to escape and attack Michael. Again, Michael killed his opponent in self defense and obtained a key from his dead body. With this key, he was able to enter the stairs and went to the upper floor. In one of the rooms, he found a fireman's axe, which he used to cut the chain holding the cage. Thereby, the cage fell down and broke through the floor. As Michael jumped into the hole and searched the basement, he was suddenly trapped inside a room along with several pig carcasses hanging from metallic carts. All around him were nail bombs, which would detonate after three minutes. Michael had to push and pull the carts in the right order and direction and was thereby able to push the last cart against a pressure plate, which stopped the timer and opened the next door. (Saw II: Flesh & Blood)
The Razor Box[]
| “ | Sometimes, moving forward in life means pain. Each of you has half the means to free yourselves. Michael, you have the information that Zeke needs to solve his puzzle. Giving him the information he needs to live will cause him a great deal of pain. But ignore the problem and you both go nowhere. Good luck. | ” |
— Jigsaw tells Michael how to save himself and Zeke[src]
| ||

Zeke in his trap
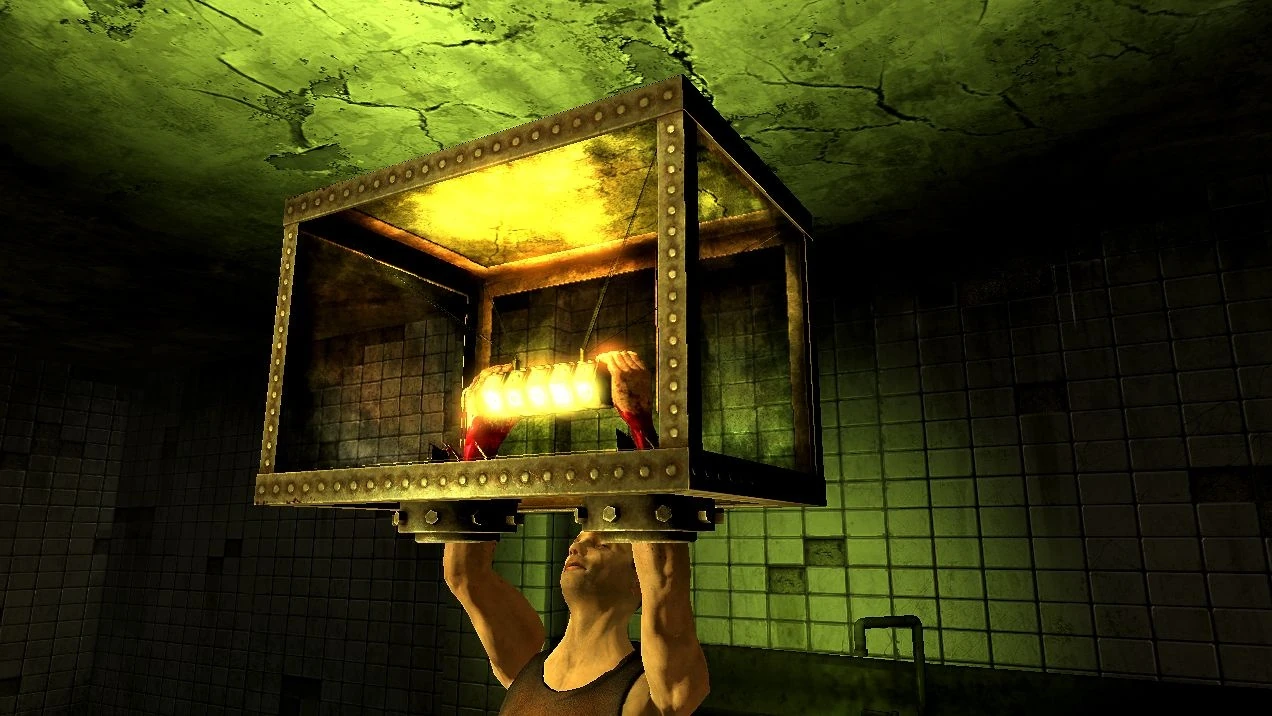
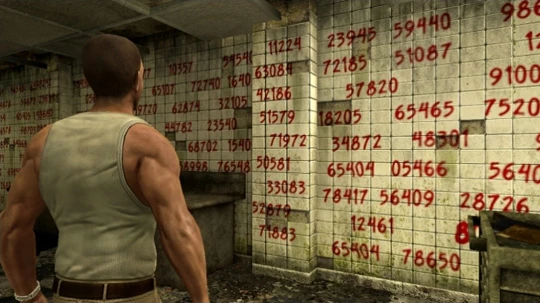
Michael went on and eventually reached the kitchen of the hotel. Upon entering it, he saw a man, Zeke, whose arms were trapped in a glass box suspended from the ceiling in an adjacent room. Due to several razor blades cutting his wrists, he was unable to pull his arms out. A TV turned on, showing the puppet, which told the two of them how to escape the room alive. There were numerous mannequins with numbers written on their backs all around the roomm, as well as several numerical sequences written all over the wall. Michael had to choose the right combination from the wall and then had to press a button attached to each mannequin in the right order. At the same time, Zeke had to enter the combination to open a combination lock, which would allow him to escape from the box.
Michael looks for the combination
When the tape ended, Michael told Zeke to hold on while he tried to figure out the right combination. Zeke however started to panic and frantically yelled at him to hurry up. As he looked around the room, Michael quickly noticed that one of the walls had several numerical frequences written all over it. His only clue was the fact, that the combination he was looking for started with "8". Thereby, he was able to find the right combination and pressed the buttons on the mannequins in the right order. After entering the combination "80647", Zeke was released from the box, but collapsed and lost his consciousness due to the immense loss of blood.
| “ | Don't feel too bad for Zeke. Those hands used to touch little girls. Now they'll just touch the bottom of a trash bin. | ” |
— Jigsaw informs Michael about Zeke's crimes[src]
| ||
As Michael approached, he saw through a window how Zeke's unconscious body was dragged away by Pighead, who had abducted Michael earlier. At the same time, another TV turned on, showing the puppet, which told Michael not to feel sorry for Zeke and told him that he was in fact a child molester, who had ruined the childhood of numerous little girls before his conviction. Afterwards, Michael was allowed to go on. As he was about to leave, he finally found the key to the ballroom. (Saw II: Flesh & Blood)
Henry Jacobs' Salvation[]
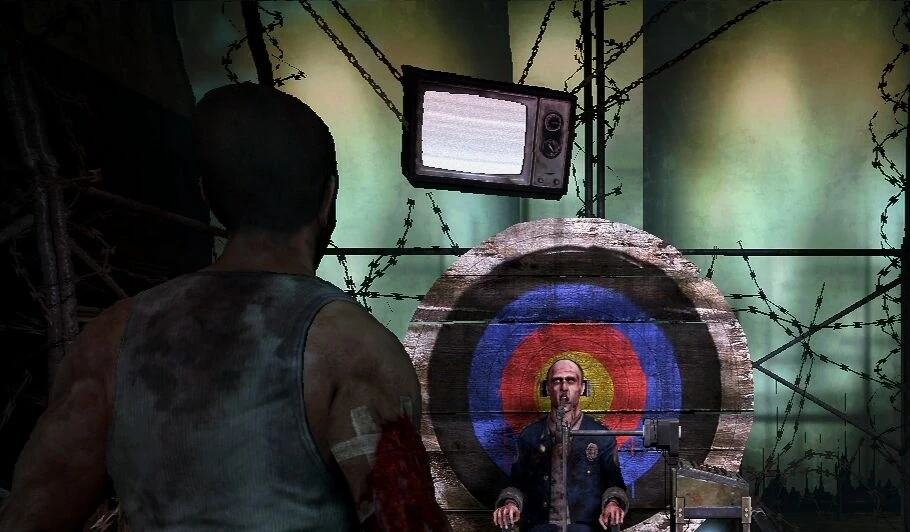
| “ | Hello, Henry. When you were promoted to chief of police, you vowed to rid the streets of drug abuse. But like any politician, you have become part of the problem, instead of the solution. You have defiled the oath you made to protect the public. Now usually, when an officer of the law falls as low as you, they take their own life - they eat the gun. Allow me to help you with that. You must switch off each panel of lights, but be careful - each button pressed brings the gun closer to firing. Switch off all the lights on each panel or it's lights out. Detective Tapp shot himself because he couldn't see the light. This is your chance to see the light - by turning them off. Live or die, Henry. | ” |
— Henry Jacobs' tape[src]
| ||

Michael finds Henry
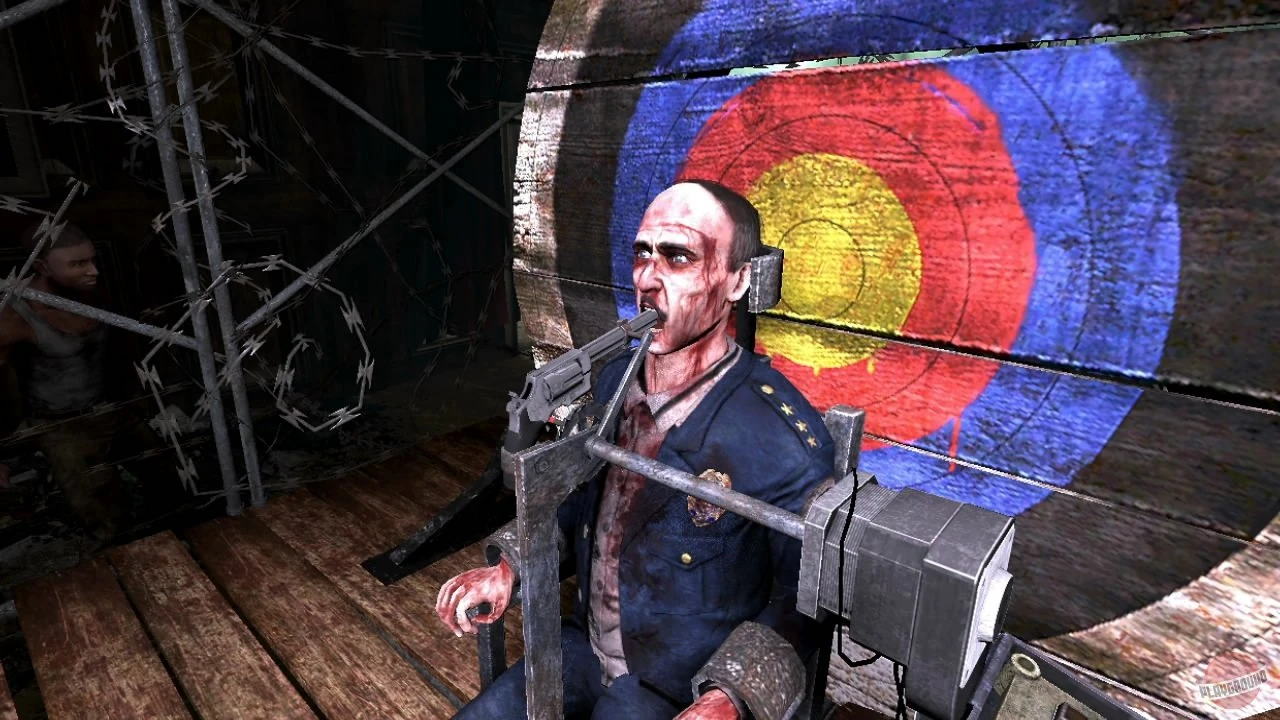
With the key, Michael returned to the lobby and opened a door in the fence, where he had previously encountered Jigsaw. As he entered the ballroom, he found Henry Jacobs, who was strapped to a chair in front of a target, with a gun aiming in his mouth. The next TV turned on above him, showing the puppet yet again. It confronted Henry with his corruption as well as his involvement in a drug cartel, despite his promises to rid the city of drug-related crimes. Furthermore, the puppet informed him and Michael about the rules of the game, saying that Henry would die if they didn't manage to switch off all the lights on a panel next to him.
Henry in his trap
When the tape ended and the TV turned off again, Michael had to click the glowing buttons on the panel in the right order in order to turn off the lights. Eventually, he managed to do so and the metal pole holding the gun aiming in Henry's mouth fell back to the floor. Seconds later, Henry was released from his shackles. Afterwards, he told Michael that Jigsaw had abducted several other people, who were somehow involved in Michael's father's suicide. Despite some initial hesitation, Michael ultimately decided to go on to save the others, while Henry tried to make it to the entrance to find help. After that, the two of them separated, leaving the deadly trap behind. (Saw II: Flesh & Blood)
The Shotgun Vest[]
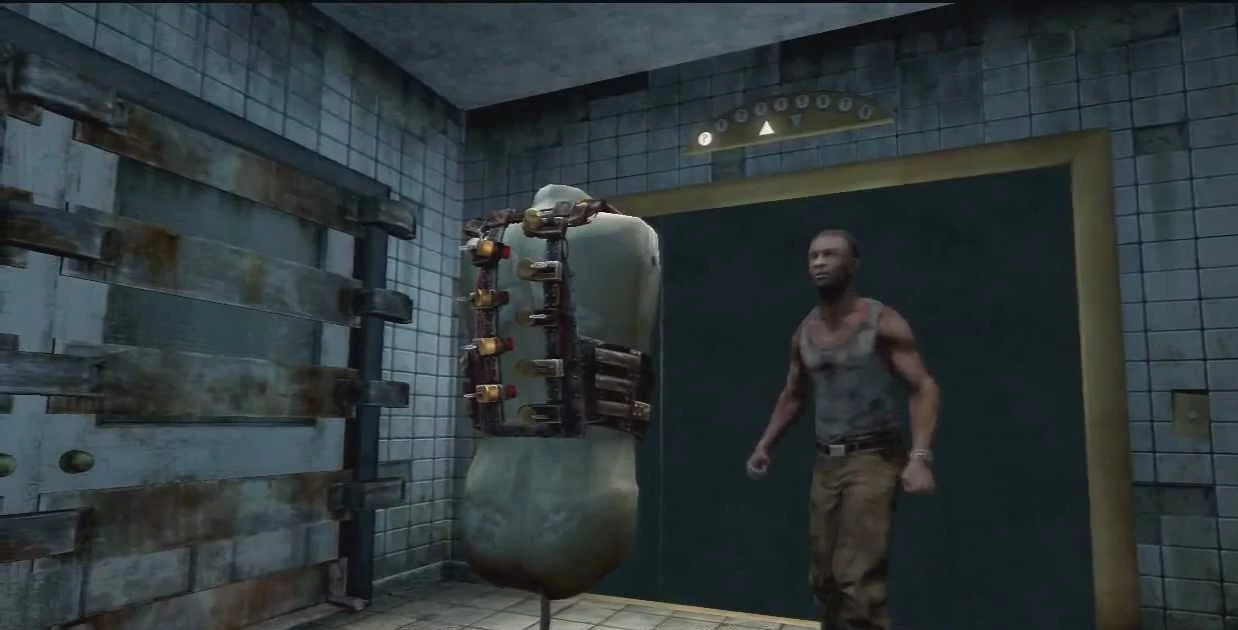
| “ | The truth is often concealed in darkness. The vest in front of you holds a light that will aid in your game. But be warned. If you stray from the path, the vest will make sure you do not get very far. | ” |
— Jigsaw informs Michael about the vest[src]
| ||

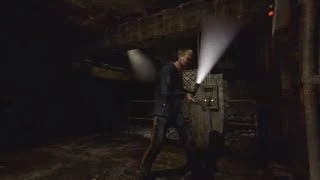
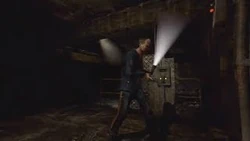
Michael finds the vest
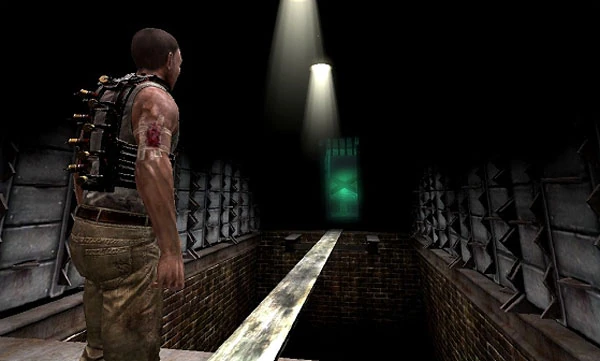
Michael then entered an elevator and rode down to the pool area. Right after leaving the elevator, he found a mannequin in the middle of a small room, wearing a strange vest with a flashlight as well as several shotgun shells attached to it. Written on the floor before it were the words "Live or die. Make your choice." Another video recording of the puppet informed him that he would need the flashlight in order to progress. However, the shotgun shells would kill him if he strayed from his path and stayed in certain areas for too long. Seeing no other possibility than following the rules, Michael quickly decided to put the vest on. (Saw II: Flesh & Blood)
The Pool Pump[]
| “ | Before you are two obstacles - water and electricity. At this voltage the combination is deadly. Drain the pool and shut off the electricity and you might be able to save this woman's life. | ” |
— Jigsaw tells Michael how to save Sarah[src]
| ||
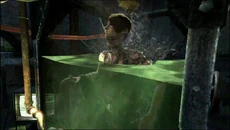
Just after he did, the next door was opened and Michael entered a hall with a large swimming pool. In the center of this pool was a large cage and on top of it was a glass tank, in which a woman, a drug addict named Sarah Blalok, had been locked up. As Michael approached her, another TV turned on in front of him and the puppet appeared on the screen, warning Michael that the water before him was energized. Sarah frantically begged Michael to save her. Therefore, he tried to calm her down and continued his way to find the water pump so he could drain the pool and reach her.


Jigsaw tells Michael about Gideon
Michael looked around and tried to enter the next room. However, just as he was about to do this, his vest suddenly made a beeping noise, causing him to back off. Seconds later, Jigsaw entered the room and calmly warned him not to get closer as there was a sensor on the wall, which would activate Michael's vest and kill him if he entered the room. During their brief conversation, Jigsaw told Michael about Gideon, his son, who died before his birth due to a miscarriage. At the same time, Pighead shoved the water pump into an elevator, moments before Jigsaw followed him.
Once he was alone, Michael deactivated the sensor with a nearby panel. With his next target being the recovery of the pool pump, he went on and thereby entered the laundry, where he found a gear in one of the washers. With this gear, he went up to next floor and used it to repair a machine. Thereby, he was granted access to a key, which was located behind several tanks. By avoiding hot steam coming from from numerous pipes all around him, Michael obtained the key and made his way back to safety, only seconds before the tanks exploded due to the increasing pressure.
| “ | The pump is to heavy to carry. Use the elevator to bring it down. | ” |
— Jigsaw's next instructions[src]
| ||

Michael proceeds through the hotel rooms
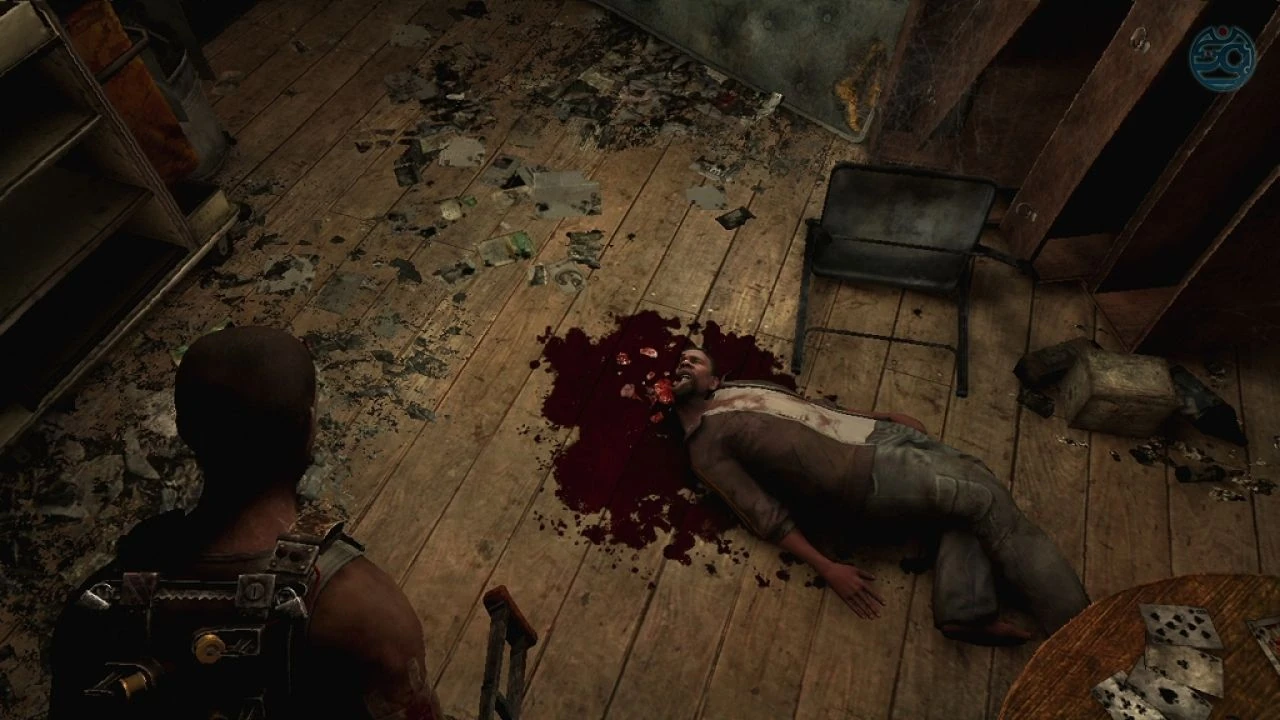
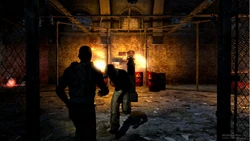
Michael then went further upstairs and used the key on another door. Only a few moments later, he finally reached the fire exit and found himself in a dark backstreet. As he looked up, he saw a man on the fire exit stairs above him, who was brutally pushed through the door and eventually thrown down the stairs by Pighead. After witnessing his death, Michael immediately climbed up the stairs. However, as he reached the top, Pighead had disappeared. Michael progressed through another number of rooms and eventually came across another TV. The puppet on the screen told Michael that he the pool pump was nearby. It was, however, too heavy to carry. Therefore, the puppet advised him to use the elevator to bring it back down to the lower floor. As he made his way to the pump, he briefly witnessed how Barry, another prisoner, burned one of the other victims alive by throwing a molotov cocktail at him. However, he disappeared without noticing Michael, allowing the latter to reach the pump unharmed. (Saw II: Flesh & Blood)
Patrick's Test[]

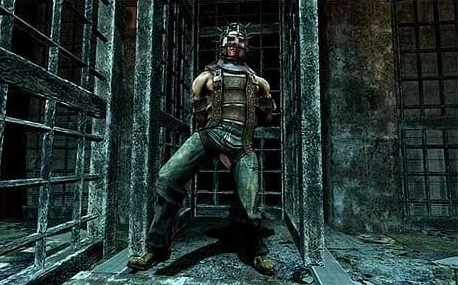
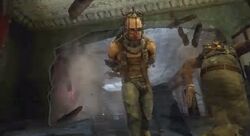
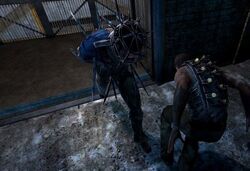
Patrick breaks through the wall
After he finally reached it, Michael shoved the pump through the hallways and thereby had to evade and withstand numerous dangers and obstacles, such as locked doors, hostile prisoners, collapsing floors and ceilings as well as more of Jigsaw's booby traps. However, his greatest obstacle was Patrick, one of the other victims, who wore a cage-like device with several pointy spikes on his head and had his hands tied up behind his back. As Michael progressed through the rooms, he saw Patrick through a hole in a decayed wall. Upon noticing his presence, Patrick ran forward and broke through the wall which separated them from each other. Despite the pain caused by the device he was wearing, Patrick rushed towards Michael and tried to kill him. As he evaded his attacks, Michael saw the words "X marks the spot" written on the floor in front of another decayed wall. Therefore, he made Patrick run against the wall. After the third time, Patrick suddenly broke through the wall and fell into a deep, dark pit, screaming in fear as he fell to his death. (Saw II: Flesh & Blood)
Henry Jacob's Betrayal[]

Sarah in the tank
Shortly afterwards, Michael finally reached the elevator and returned to the pool area. There, he pushed the pump back to its original position and was thereby able to drain the pool. However, he still had to disconnect the power to the cage. As he passed by, Sarah angrily told him to hurry up, which resulted in a brief argument between the two of them. Michael then continued his way and went up the next staircase. Thereby, he unexpectedly came across Henry Jacobs and Detective Joseph Poltzer and went into hiding. As he listened to them, Henry ordered Joseph to find and eliminate Michael as he was afraid that Michael knew the truth about the drug cartel they were involved in. Even though Poltzer didn't see him as a threat, as Michael had helped them to avoid being discovered, he agreed to obey Henry's orders.
| “ | You claim to be a reporter. But can you remember the simple details? These will save your life. | ” |
— Jigsaw tells Michael how to escape the room[src]
| ||
After they disappeared, Michael carefully went on. Some time later, he suddenly found himself trapped in a room along with a number of nail bombs. Another recording of the ventriloquist puppet gave him a clue of how to escape the room and asked him if he could "remember the simple details?" After that, a 90-second-timer started to count down. There were 16 monitors, each one with a different picture on screen. Michael had to play a matching game and had to choose, which two pictures fitted together until all eight pairs were found. He ultimately managed to do so in time, which stopped the timer and allowed him to leave the room.


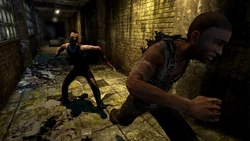
Henry, about to attack Michael
Following his escape, Michael went on and thereby came across a large hole in the floor. As he jumped down into the room below, he encountered Henry, who had somehow obtained a gun and shot at him without a warning. Michael quickly took cover, while Henry shot at him again and again. As he did, he tried to justify his betrayal by claiming that he had no other choice. With no other choice but moving forward, Michael carefully ran from cover to cover, while avoiding the gunshots. As he got closer and closer, Henry eventually decided to flee. Once he was alone, Michael looked around and found another panel with glowing buttons, similar to the one from Henry's trap. By solving the next riddle and deactivating all the lights, Michael finally shut off the power and went on to the next elevator. (Saw II: Flesh & Blood)
Sarah Blalok's Salvation[]
| “ | Hello, Sarah. I want to play a game. You pollute your body with drugs and you sell your morals on the street corner for whatever you can get. Detective Tapp gave you a second chance, an escape from your addiction. But after his death you slipped back into your old ways, didn't you? You are drowning in your own self pity. Drain the water from the box by aligning the release pipes. But you'd better hurry. I don't think she can hold her breath forever. | ” |
— Sarah Blalok and Michael Tapp's tape[src]
| ||
When he returned to the pool, Sarah, who was still trapped in the tank, became more and more impatient. Michael then entered the cage in the middle of the pool and climbed up a ladder, thereby finally reaching Sarah. Just as Michael reached the top of the cage, another TV turned on, showing the puppet, which confronted Sarah with her drug addiction and her relapse after having been offered a chance to overcome her addiction. Furthermore, it also told Michael that he had to align a few pipes outside the tank in order to save her.

The tank is filled with water
When the tape ended, the tank immediately started to fill with water. Therefore, Michael tried to align the pipes. After a while, he finally succeeded and the door of the tank opened. As Sarah stumbled out of the box, Michael asked her if she was okay and knew her name, which she affirmed. Thereby, she also told Michael that she had worked as an informant for his father. When he asked her about the second chance his father gave to her, Sarah got angry, accusing Michael of ruining his father's life and driving him to suicide. After that, she climbed off the cage and ran away, leaving the room and Michael behind. Michael, however, followed her through the now opened exit door and finally left the hotel for good. (Saw II: Flesh & Blood)
The Elevator[]
| “ | The police are like a family, a family your father left you and your mother for. If you think about it, you are practically related, bound by blood. Better save him before the blood is squeezed from him. | ” |
— Jigsaw introduces Michael to Joseph[src]
| ||
| “ | The elevator requires two pieces to function: a lever and the control device to use it. Find the pieces to control the elevator. But hurry, before your friend below succumbs to his vises. | ” |
— Jigsaw tells Michael how to activate the elevator[src]
| ||
Only moments later, Michael entered the loading dock area of another building, an abandoned chemical plant right across from the hotel. Through a door, he quickly left the area behind and found himself in a large hall, where he saw Joseph Poltzer, who was trapped in one of Jigsaw's deadly contraption and was taken to the lower floor by an elevator platform. A TV turned on in front of Michael, showing the mechanical puppet, which told Michael that he had to find a way to Joseph in order to save him. To get down to him, he had to use another elevator. However, it wasn't functional yet and a second recording of the puppet informed him that he had to find a lever as well as a control device to use it, while also advising him to hurry up before Joseph would be killed by his trap. (Saw II: Flesh & Blood)
The Acid Vat[]
| “ | The next room holds a criminal released by your actions. He holds a key that you need to progress. But be careful, he doesn't play nice. | ” |
— Jigsaw introduces Michael to Anton[src]
| ||
Anton in his cage
Michael went on to find the things he needed. As he entered the next hall, another TV turned on in front of him, showing the puppet yet again. The puppet informed him about Anton, a brutal mercenary, who used to attack his victims by throwing acid in their faces, but was released from prison due to Michael's actions. He was trapped in a cage, which was located right in front of a large vat filled with acid. There was an acid drip suspended above a chain, which was strung over the vat and across the room and secured the door of his cage. This chain had to be destroyed by Michael in order to open the door. Furthermore, the puppet informed him that Anton held a key, which Michael needed to progress. However, to activate the drip, he first had to find a valve somewhere in the area.
While looking for it, Michael entered a storage area, where he saw a freight elevator. However, as he approached it, a large container was dropped from the ceiling and blocked his way. As he looked for another way, he entered a toilet room, where he saw the words "Darkness illuminates" written on the door of one of the cabins. Michael turned off his flashlight attached to the explosive vest. Thereby, he was able to see three numbers written on the walls with fluorescent color. With these numbers, 620, he opened a door secured by a combination lock and entered a stairwell, which led him up to a control room. With a panel, he was able to control a crane, which he used to move the large container out of his way. After doing so, he finally entered the freight elevator, which took him to the upper floor.
Henry in the basement area
As he went on, he found himself on a catwalk above the room where Anton was trapped. He told Anton to hit a switch in his cage, which caused a bridge to be lowered down and thereby enabled Michael to go on. Afterwards, he went down a stairwell to a basement area, where he found the valve, which was hanging from a rope. However, he wasn't alone as Henry was there as well and once again tried to shoot him. By running from cover to cover, Michael managed to evade his gunshots and reached a room on the upper floor. By hitting a switch on a control panel, a wooden crate was dropped above Henry and barely missed him. However, as the crate hit the floor and shattered, some kind of gas leaked from the chemicals inside and forced Henry to flee the area. Afterwards, Michael took the valve and returned to the room, where Anton was still trapped.
| “ | Acid corrodes metal as well as flesh. Whatever happens to this man is a result of how you direct the acid. | ” |
— Jigsaw warns Michael about the usage of the valve[src]
| ||
With the valve, he directed the acid from the drip above the chain. Depending on the player's choice, there were two different outcomes. If Michael turned the valve too fast, the acid from the drip would cause the acid from the pool to splash over, thereby scarring Anton. This would cause him to attack Michael, who would then be forced to kill him in self defense. However, if Michael turned the valve slowly and carefully, the acid from the drip would destroy the chain and free Anton from his cage. Afterwards, Anton would thank Michael for his salvation and hand him the key. Then, he'd kneel down, praying for the well-being of his brother, who had been abducted by Jigsaw as well. (Saw II: Flesh & Blood)
The Lacquer Studio[]
Michael went on after obtaining the key and finally found the control device necessary to activate the elevator to Joseph and immediately used it. As he was about to continue his way, he witnessed Sarah, who desperately begged another prisoner, a doctor named Carla Song, for drugs. After some initial hesitation, Carla took her with her to give her what she desired. When they disappeared, Michael went on and used Anton's key to enter the lacquer studio. On the back wall, there were two large pressure plates marked with "X" signs, while a message written above each of them said "X marks the spot". Michael had to shove two heavy motors against the plates in order to open the next door. However, there was a slowly rotating contraption, which resembled a giant rotary clothesline. A bomb was hanging from a wire attached to each of the four metallic arms. While pushing the motors forward, Michael had to avoid the bombs, which he eventually did successfully. (Saw II: Flesh & Blood)
Dwayne's Test[]
| “ | Watch your step, Michael. Some of the chemicals in this place have not been properly contained. | ” |
— Jigsaw warns Michael about the acid[src]
| ||
Afterwards, he proceeded through a large area filled with hazardous gas and passed it only moments before suffocating. Then, he went through the machine assembly area until his path was blocked by another door secured by a combination lock. In a small room nearby, Michael noticed various red lines drawn all over the walls. From the right perspective, these lines formed the numbers 452, which he used to open the lock. In the next area, he found the corroded corpse of a man, who was surrounded by leaking acid barrels. Over the loud speakers, Jigsaw warned him to avoid the chemicals. As he made his way forward, he evaded several puddles of acid coming from leaking or upset barrels.
After passing the area, Michael found himself in another storage hall, where a roller door blocked his path. When he opened it by pushing a button, he was attacked by Dwayne, another prisoner, who wore a cage-like device on his head, similar to Patrick in the hotel. Michael managed to evade his attacks as Dwayne repeatedly rushed towards him in an attempt to kill him with the spikes of his cage. By dodging his assaults, Michael caused Dwayne to run into another adjacent room with a second roller door. Afterwards, he pushed the button once again, thereby closing the door and trapping Dwayne inside. (Saw II: Flesh & Blood)
The Conveyor Belt[]

The puppet explains the next task
| “ | The box on the nearby conveyor belt holds one of the pieces you need to progress. Make sure nothing obstructs its path. Oh, by the way, the box is packed with explosives. Try not to make a mess. | ” |
— Jigsaw explains the next task[src]
| ||
Michael continued his way through the machine assemby area and eventually came across a large glass box standing on a conveyor belt with a pressure button mounted to its front part. A set of TVs turned on and Jigsaw's puppet told Michael that the box contained the lever he needed to activate the elevator to Joseph. However, it was also filled with explosives, which would detonate once the pressure button hit any obstacle in its way. Michael started the conveyor belt and then ran through the next rooms as fast as he could and thereby had to pull several carts away, which blocked the way of the box.
| “ | You have everything you need to lower the elevator and release your colleague. Hurry. | ” |
— Jigsaw tells Michael to save Joseph[src]
| ||
Eventually, he found himself back in the room above Joseph and the box arrived there unharmed as well. Michael opened it and picked up the lever. Over the loudspeakers, Jigsaw confirmed that he had now all the means necessary to activate the elevator. Therefore, Michael immediately attached the lever to a nearby panel and then entered the elevator, which took him down to Joseph. (Saw II: Flesh & Blood)
Joseph Poltzer's Salvation[]
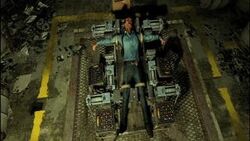
| “ | Hello, Joseph. You are the lead vice detective, in charge of investigating crimes involving prostitution and narcotics. But you don't put drug dealers in jail. Instead you squeeze them for every penny, forcing them to work for you. You pollute the city you swore to protect. At each of your limbs are mechanical devices, that, when triggered, will close one by one. The last vice will crush your skull. As an officer of the law, you have betrayed your badge. You have controlled people by taking advantage of their vices. Now those vices will control you. Let the game begin. | ” |
— Joseph Poltzer's tape[src]
| ||

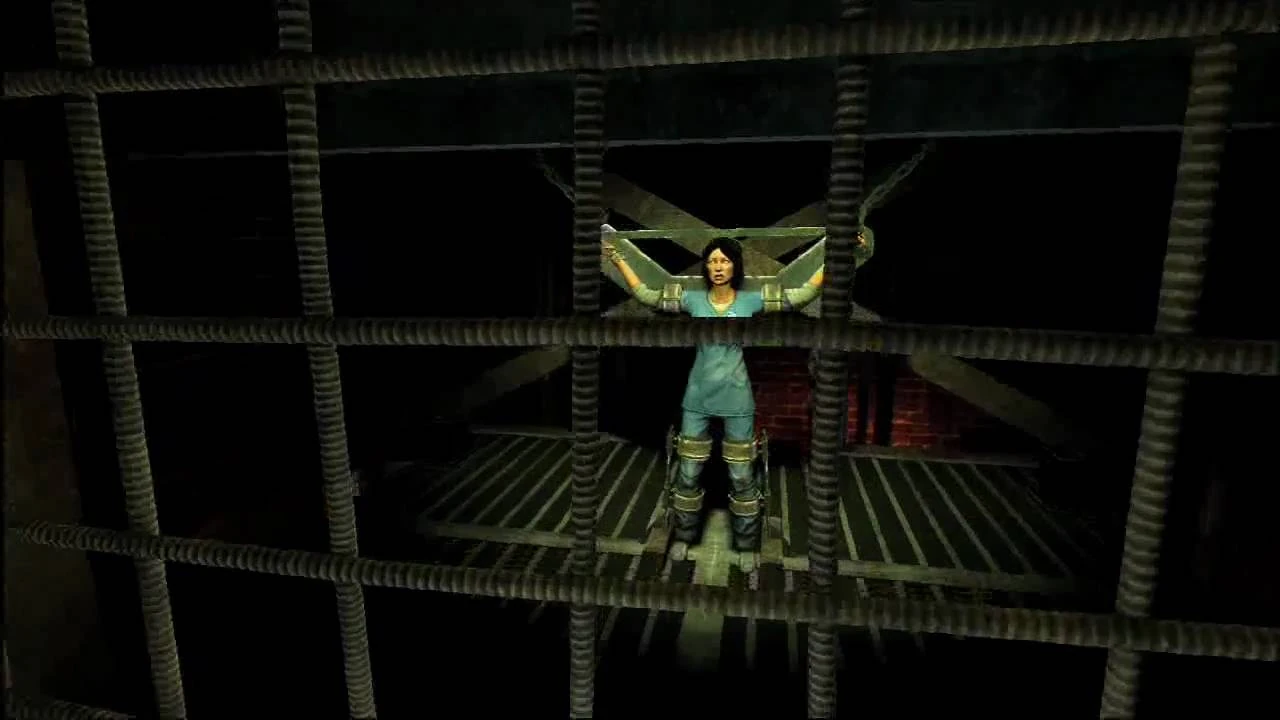
Joseph in the trap
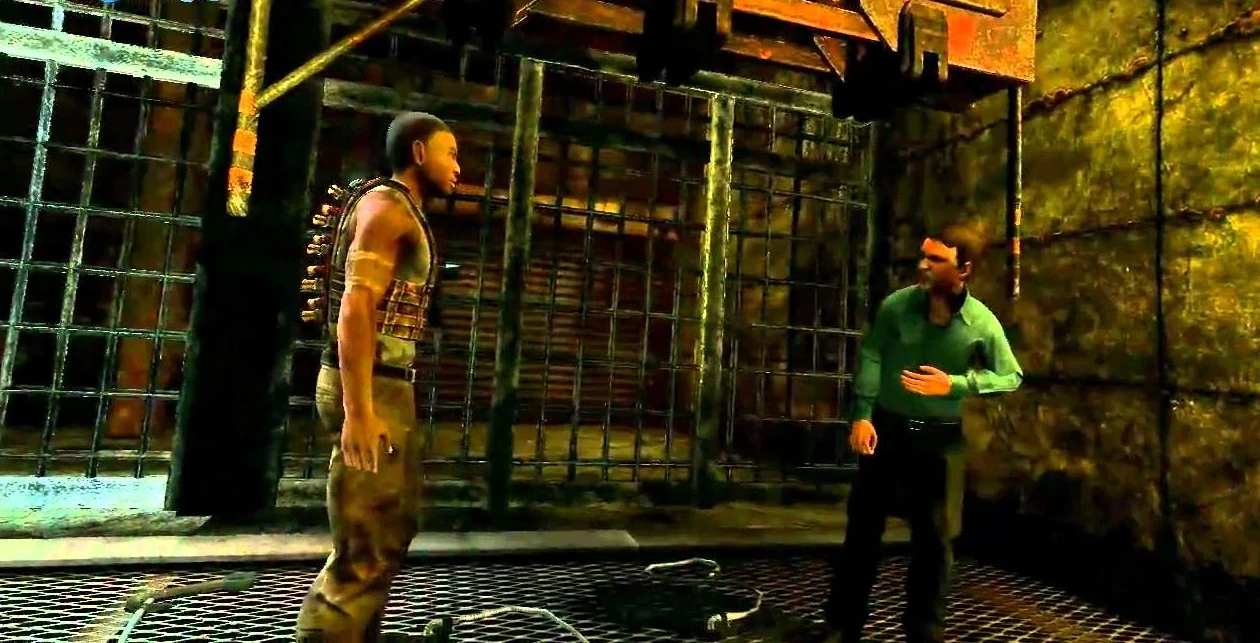
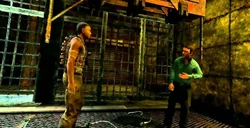
The detective was still in his trap, which resembled a metal table. Each of his limbs, as well as his head, were held in place by mechanical vices. As Michael approached him, he told him to save him. Moments later, a TV turned on in front of them and the mechanical puppet appeared on the screen. It confronted Joseph with his crimes and his involvement in the same drug cartel as Henry Jacobs, despite his promises to protect the city. Furthermore, it informed him and Michael about the rules of the game, saying that Joseph would die if Michael didn't manage to save him.

Michael tries to save Joseph
There were four panels around the table, each one with nine dials. Michael had to turn these dials in the right way to keep the hydraulic pressure low. There were different colours above, below and on both sides of each dial, which helped the subject to see in which way the dials had to be turned. The adjacent colors between two dials had to match. Eventually, he managed to accomplish his task in time and Joseph was released from the table. When Joseph got up, he was slightly surprised that Michael had saved him. Michael, however, confronted him with his crimes, to which Joseph merely responded that he had to make a living and also told Michael to stay out of his way. Michael told him that he'd put him in prison if they ever escaped the plant. Joseph insulted him, stating that he wouldn't go to prison, before he rode up the elevator and left Michael behind. (Saw II: Flesh & Blood)
The Generator Room[]
| “ | A stranger, a woman you have never met, is trapped above. The only way to save her is to first restore the power to the freight elevator. But you better hurry or she may remain a stranger forever. | ” |
— Jigsaw tells Michael about Carla[src]
| ||
Michael went in a different direction and thereby entered another area of the plant. As he went on, Jigsaw informed him over the loudspeakers that another victim needed his help. Just a few moments later, he witnessed Pighead, who strapped Carla Song to an elevator. When Michael tried to save her, the doors were closed, separating them. Another recording of the puppet told him that Carla was taken to the upper floor. In order to save her, he first had to restore the power to the freight elevator. While Michael looked around to find a way to proceed, he noticed that one of the bottom panels was connected to a big winch through a chain. With a handle found in an adjacent room, Michael was able to use that winch and suspended the bottom panel, which allowed him to enter the room below through a hole in the floor.
As he traversed the lower area, he soon reached the elevator. However, his path was blocked by a barrier made of wooden beams and razor wire, thereby forcing him to find another way. In the next room, he saw an electronically locked door. To open it, he had to push a cart against a pressure plate. Unfortunately for him, there were several bare cables lying on the floor between the cart and the plate. Therefore, Michael first had to deactivate a nearby generator before he was able to open the door unharmed. In the next room, there were several more carts, which blocked his way and which he had to push and pull in the right way to free his path. However, he couldn't stay in the area for long as there were sensors that activated his vest. Because of that, he either had to hurry up or retreat occasionally. Furthermore, Barry, the insane pyromaniac he had already briefly encountered in the hotel, appeared on a catwalk above him and attacked him with molotov cocktails.
Nonetheless, Michael managed to overcome this obstacle and fled to the next room. Barry, however, followed him and continued to attack him from above. While evading his attacks, Michael noticed fire coming from a pipe. With a valve, he was able to redirect the gas, causing it to escape from another pipe above him. As Barry ignited his next molotov cocktail, he also accidently ignited the gas. In doing so, he caught fire and eventually died, while screaming in agony and perverted satisfaction.
| “ | You've managed to restore the power. Good. Now hurry up, there isn't much time left. | ” |
— Jigsaw advises Michael to move on[src]
| ||
With the fire posing no threat anymore, Michael went on and finally reached the generator room. With a coupler found in a small adjacent room, he successfully activated the generator. Over the loudspeakers, Jigsaw congratulated him for his success, but also told him that he didn't have much time left to reach Carla. Michael passed another door and climbed up a ladder, leaving the generator room behimd. (Saw II: Flesh & Blood)
The Steam Maze[]
| “ | Hurry, or be trapped here forever. | ” |
— Jigsaw's next orders[src]
| ||
In the upper area, he entered another room and already encountered the next trap. One wall of the room, with sharp, pointy blades attached to it, started to move towards Michael. In order to open the doors and escape, Michael had to correctly adjust another dial panel, similar to the ones from Joseph's trap. He did so successfully and was allowed to leave the room, while the wall slowly moved back into its original position.
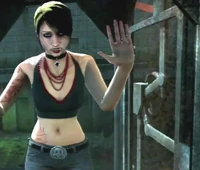
Sarah talks to Michael
A few moments later, Michael crawled through a vent and found himself in another room. On the lower level, he saw Sarah, who screamed for help as her path was blocked by hot steam. Michael mocked her for her unfriendly attitude back at the hotel, which resulted in a brief argument between the two of them. Nonetheless, he eventually decided to help her and redirected the steam via a valve. His own path, however, was blocked as well. By slowly moving forward and using the valves on the upper and lower level of the room, Sarah and Michael helped each other in turns. This ultimately allowed Sarah to climb up a ladder to the catwalk where Michael was. Despite her initial hostility towards him, she was grateful and called Michael a good man, just like his father. However, when he responded that she didn't know his father, she slapped him in the face and told him that his father still loved him despite having abandoned him as a child. Unwilling to talk about his father, Michael turned away. Unnoticed by him, the door behind Sarah was opened and Pighead grabbed her. As he witnessed how he carried her away, Michael tried to help her, but was held back when the door was closed again. (Saw II: Flesh & Blood)
The Gate[]
| “ | You must be willing to do whatever it takes to save a life of a stranger. While you're completing this challenge, ask yourself this: Why are you willing to sacrifice so much for a stranger, while you are willing to betray your own family? | ” |
— Jigsaw confronts Michael with his betrayal[src]
| ||
Michael then continued his way through another door and headed back for the main hall. While doing so, Jigsaw spoke to him over the loudspeakers, asking why he was willing to make so many sacrifices to save the life of a stranger, while he barely hesitated to betray his father and destroy his reputation. Shortly afterwards, Michael reached the main hall and from there went on to the storage warehouse.
| “ | Not all problems are solved with subtlety and intelligence. Often force is required. These doors can only be opened with explosive force. Careful, we wouldn't want any accidents. | ” |
— Jigsaw tells Michael to destroy the gate[src]
| ||
| “ | Before you are two cylinders. Each liquid is mostly harmless by itself, but when combined, they make a powerful explosive. Use the device to fill the chemicals into each cylinder until full. Be warned: If you mix the chemicals before the device is full, the explosion will occur prematurely. I don't need to tell you what happens then. | ” |
— Jigsaw explains Michael how to built the bomb[src]
| ||
As he entered it, he found a closed roller door. Jigsaw informed him that the only way to open it was by destroying it with a bomb. After facing several more obstacles, such as an electrified floor and a chamber filled with gas, Michael found a room with a machine. Jigsaw explained that he needed to fill the two cylinders of the machine with chemicals and then had to mix them in order to create a bomb strong enough to break the door. However, he also warned him that the explosion would occur prematurely if he mixed the chemicals before the cylinders were filled completely.
Michael went up a stairwell to another room. Through a large grate on the floor, he spotted a storage room. By correctly using another panel with glowing light buttons, he opened the grate and jumped down back to the lower floor. In the numerous shelves, he found bottles of ammonia and paint thinner. With these chemicals, he returned to the machine and started to fill the cylinders. Afterwards, he mixed the ammonia with the paint thinner and successfully built the chemical bomb. He then went back to the gate and attached the bomb to it, before taking cover. As expected, the gate was destroyed by the explosion, allowing Michael to go on. (Saw II: Flesh & Blood)
The Cage Fight[]
| “ | You remember Dwayne, don't you? I told you I believe in second chances. Though for one of you, it will be your last. | ” |
— Jigsaw opens the cage fight[src]
| ||

Dwayne enters the cage
Moments later, Michael entered a big cage. When he hit a button, the doors were closed and a smaller cage was moved in. To Michael's surprise, Dwayne was trapped in the cage. Still furious because Michael outsmarted him during their last encounter, he immediately attacked him again once the door of his own cage was opened. At the same time, Jigsaw spoke to them over the loudspeakers and told them that only one of them would survive this final fight. Just like before, Dwayne tried to kill Michael by aggressively rushing towards him to ram him with the device on his head. However, the walls of the cage surrounding them were divided into separate segments, which were energized by turns. By evading his attacks, Michael caused Dwayne to run into these walls often enough until the latter was killed by the electric shock. (Saw II: Flesh & Blood)
Zeke[]
| “ | You helped Zeke pass his test, but at the cost of his hands. He is free to go, but for some reason wants very badly to kill you. If he catches you, he will. | ” |
— Jigsaw tells Michael about Zeke[src]
| ||

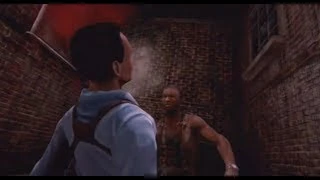
Michael flees from Zeke
Michael searched Dwayne's corpse and thereby found a key to the freight elevator. However, as he couldn't go back the same way he came, he went through another door and traversed a hallway, where he met another familiar face. Zeke, the pedophile he had saved from a trap back at the Holmes Hotel, had been waiting for him. A video of Jigsaw's puppet told Michael, that after losing his hands due to his injuries, Zeke held a grudge against him and wanted to kill him, despite having been offered to leave. With two blades, which were attached to his arm stumps as replacements for his hands, Zeke attacked him, forcing Michael to run away. By throwing several obstacles in his way, such as a dumpster and a trash can, he managed to keep Zeke at distance and ultimately escaped by jumping over a large hole in the floor. Unable to follow him, Zeke jumped into a nearby vent and disappeared. (Saw II: Flesh & Blood)
Carla Song's Salvation[]
| “ | Hello, Carla. You are a doctor at a free clinic, pretending to help people in need. This would be admirable, except for the fact that you steal pharmaceuticals and you sell them on the street. Your legs are attached to an elevator and your arms to the ceiling. Balance the numbers, using as few moves as possible. If you fail, the elevator will fall, tearing you in half. You feed off the addictions of the desperate and the destitute, perpetuating a cycle of addiction that is difficult to break. Well, let's see what your breaking point is. | ” |
— Carla Song's tape[src]
| ||

Carla in her trap
With the key in his possession, Michael returned to the main hall and was finally able to enter the elevator next to the one where Carla was trapped. After riding up to the upper floor, he left it again and witnessed how the doors of Carla's elevator were opened as well. As he approached her, several TVs inside the elevator well turned on. The mechanical puppet appeared on the screens and confronted Carla with her crimes, as he had stolen medics from the free clinic where she worked. Furthermore, the puppet also told Michael how to save her from the elevator. Carla's arms were shackled to a metal contraption, which was suspended from the ceiling by two chains, while her legs were shackled to the top of the elevator. The elevator was held in position by four clamps, which were attached to four metallic bars. Outside the elevator well was a panel with two vertical rows of combination locks. Michael had to arrange the four upper locks of each row and add them togethr, so the two lowest locks had the same number. Doing this correctly would eventually result Carla being released from her shackles. However, if Michael failed his test, all of the clamps holding the elevator were opened one by one and the elevator would fall down the well, thereby tearing Carla in half.
When the tape ended, Michael tried to arrange the numbers on the panel in the right way, while Carla started to panic and frantically yelled at him to hurry up. Eventually, he managed to balance the numbers and Carla was freed from her restraints. However a large grid prevented Carla from leaving the lift shaft. She begged Michael not to leave her but was separated from him again when the elevator went downstairs with Carla still standing on top of it. (Saw II: Flesh & Blood)
Helping Carla Song[]
| “ | When you first started your game, a man escaped ahead of you. He did not pay attention to my clue and failed his test. You are his second chance. You hold more than his life in your hands, Michael. He is the only person alive that knows the entire truth. And you would ask him some heated questions, wouldn't you? | ” |
— Jigsaw tells Michael about Solomon[src]
| ||
Michael tried to follow her in a second elevator. As he made his way down, Jigsaw spoke to him over the loudspeakers and told him about Solomon Bates, who had escaped from Michael's very first trap back at the hotel. However, in doing so, he had ignored Jigsaw's clue and thereby failed his test. Michael learned that Solomon was trapped somewhere at the chemical plant and was also told that he was the only person alive who knew the entire truth about the cartel and his father's death.
Eventually, Michael reached the lower floor and left the elevator. As he entered a large storage hall, he saw Carla in the room below. After a brief discussion, Carla activated a fuse box and thereby enabled Michael to control a crane. With this crane, he repositioned several large crates and thereby built a bridge, which allowed him to get to the other side of the room. There, he had to correctly adjust another dial panel, which opened a door in the room where Carla was trapped. Even though he told her to wait for him, she ran through the door. When Michael eventually got down to the lower level of the room and followed her, he saw how she was pursued by Henry Jacobs with a gun. However, Michael was unable to follow them because of another door that slammed shut before him. (Saw II: Flesh & Blood)
Chuck's Test[]
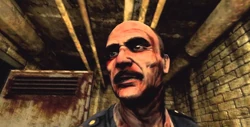
| “ | Ahead is a man chained to a wall. Do not feel sorry for him. He will kill you the first chance he gets. Avoid his grasp. | ” |
— Jigsaw introduces Michael to Chuck[src]
| ||

Chuck attacks Michael
Therefore, Michael had to find another way. He proceeded through a number of offices and smaller storage rooms and ultimately ended up in a sewer area below the plant. As he made his way through the dark tunnels, he reached a ladder and climbed back to the upper area. There, he made his way through another hallway when suddenly, a roller door was opened in front of him. Behind it was a small room, where Chuck, a drug dealer, was chained to a metal column while standing in a puddle of water. The length of the chain around his neck allowed him to move forward to a certain distance of only a few metres. At regular intervals, a mechanism was activated and Chuck was pulled back again. The only way to free himself was to take someone else with him to the column. However, he had several sharp, pointy razor blades pierced through his forearms and therefore had to be careful not to kill Michael. While trying to grab him, he aggressively yelled at Michael and threatened to kill him. As Chuck was regularly pulled back by the chain, Michael embraced his opportunity and reached a set of four small combination locks. By bringing the four numbers in the right order, starting with the smallest number and concluding with the highest, Michael energized the water, which Chuck stood in. Moments later, Chuck was pulled back into the water again, where he was electrocuted. (Saw II: Flesh & Blood)
The Truth[]
After killing Chuck, Michael continued his way and eventually reached the access room. As he entered it, he spotted Jigsaw behind a window. Jigsaw confronted him with his past and played an audio tape, containing a recording of a previous conversation between Michael and another man. While Michael's father still investigated the Jigsaw Case, he and his partner, Detective Steven Sing, had found and raided Jigsaw's hideout without a warrant, which resulted in Sing's death. The other man on the tape told Michael to sell the true story about the raid to the editor of the Herald in exchange for a job, which Michael did and thereby destroyed his father's reputation and led to his discharge from the police force. Angered by this, Michael tried to attack him, but was held back when a roller door slammed shut between them. (Saw II: Flesh & Blood)
The Slicer[]
Zeke ambushes Michael
Therefore, Michael had no other choice but to go on. As he went through another area, Zeke, who was still eager to wreak vengeance on him, broke through a door and jumped at him in an attempt to impale him with his blades. Michael, however, reacted fast enough to evade his assault and thereby caused him to break through another door. Embracing his opportunity, Michael ran away and squeezed through a narrow passage to another room, where he tried to hide from Zeke. However, the latter quickly found him and tried to kill him once more. Again, Michael evaded his attack and caused Zeke to run head-on against a metal pipe, which briefly paralized him. To Michael's dismay, Zeke quickly recovered himself and continued his pursuit.

Zeke's death
Whenever he got the opportunity, Zeke attempted to slice Michael with his blades while taunting him with frightening threats. Eventually, Michael fled to another room and blocked the door by overturning a shelf. However, thereby he was trapped in the room himself. Zeke then tried to enter the room through the only other door. Unknown to him, there was a trap located right behind it, which consisted of a pressure plate and two large contraptions armed with blades. By pulling a lever, Michael repositioned the contraptions just in time. When Zeke finally broke through the door, he jumped on the pressure plate and was crushed by the contraptions, which closed in on him. (Saw II: Flesh & Blood)
Donovan[]
After his death, another door opened behind Michael, allowing him to go on. As he traversed the next area, he witnessed a conversation between Henry and Joseph Poltzer. Henry gave his gun to Joseph and told him that Michael mustn't survive as he knew too much about their involvement in the drug cartel. Afterwards, they separated and Michael went on once he was alone. Moments later, he reached the influent pipes. Upon passing the area, he came across a door secured by a combination lock. He noticed several green, red and blue lines painted on the floor and the walls. From the right perspective, these lines formed the numbers 485, which allowed Michael to open the door.
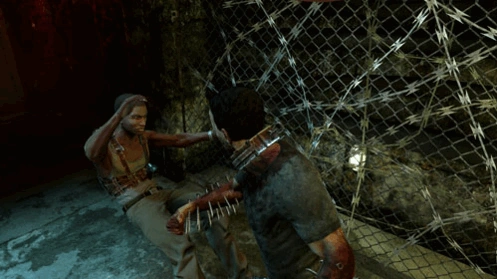
| “ | Watch out, Michael. The spikes from his body will stick into everything, especially you. But that can be used to your advantage. | ” |
— Jigsaw introduces Michael to Donovan[src]
| ||

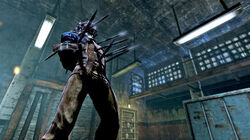
Donovan in the storage hall
Upon going on, he entered another large storage hall. There, he was attacked by Donovan, another prisoner who wore a cage-like contraption on his head. Furthermore, he was forced to wear another device with several even bigger spikes on his body. Donovan tried to prevent Michael from passing the area and ran towards him to kill him. Michael tried to evade his attacks whenever he rushed towards him, thereby causing the spikes to get stuck in the wooden crates all around the area. Afterwards, he used the opportunity and attacked Donovan with whatever weapons he could find and eventually managed to knock him down. When Donovan was unconscious, the exit door opened and Michael left him behind to continue his way. (Saw II: Flesh & Blood)
Loose Ends[]
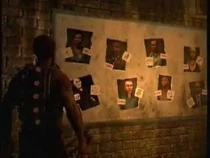
| “ | By now you know that everyone is connected. What happens to one of you affects the other, like ripples in a pond. There is no escaping this web. You must simply make the connections. | ” |
— Jigsaw tells Michael about his connection to the cartel[src]
| ||

Michael finds the photos
Eventually, Michael found himself on a platform above the influent pipes. With a valve, he opened a gate in the area below. As he returned to the lower level, he found a large wooden crate behind the gate and pushed it forward onto a pressure plate. Thereby, another door was opened. Michael went on and ultimately entered a room with several photos on the wall. These photos showed all the persons involved in the drug cartel, as well as Jigsaw's ventriloquist puppet, Michael's father and Michael himself. Over the loudspeakers, Jigsaw explained to him that they all were somehow connected with each other, meaning that everything that happened to one of them inevitably affected the others. Afterwards, Michael had to solve another one of Jigsaw's riddles. Each of the persons on the photos, including the puppet, had a certain symbol assigned to them which illustrated their role in the cartel as well as the game. There were 16 monitors, each one showing either a name or one of the symbols. Michael had to choose, which symbols and names fitted together until all eight pairs were found. After successfully doing so, a box on a nearby table was opened, enabling Michael to pick up a key inside.

Henry, moments after killing Carla
With the key in his possession, he went on and soon came across a large grate. Behind the grate, Carla stumbled through a door. She apologized to him for her initial distrust towards him, stating that she was willing to work together with him in order to escape Jigsaw's game. However, only moments later, Henry came through the same door and brutally slashed her with a pair of scissors. He told Michael that he was merely tying a loose end and stated that they weren't very different when it came to protecting themselves. Afterwards, he disappeared through the door, leaving Michael and Carla's corpse behind. Michael then went on, back to the area right before the influent pipes, where he found the door to the furnace room. After opening it with the key from the box, he entered the next area. (Saw II: Flesh & Blood)
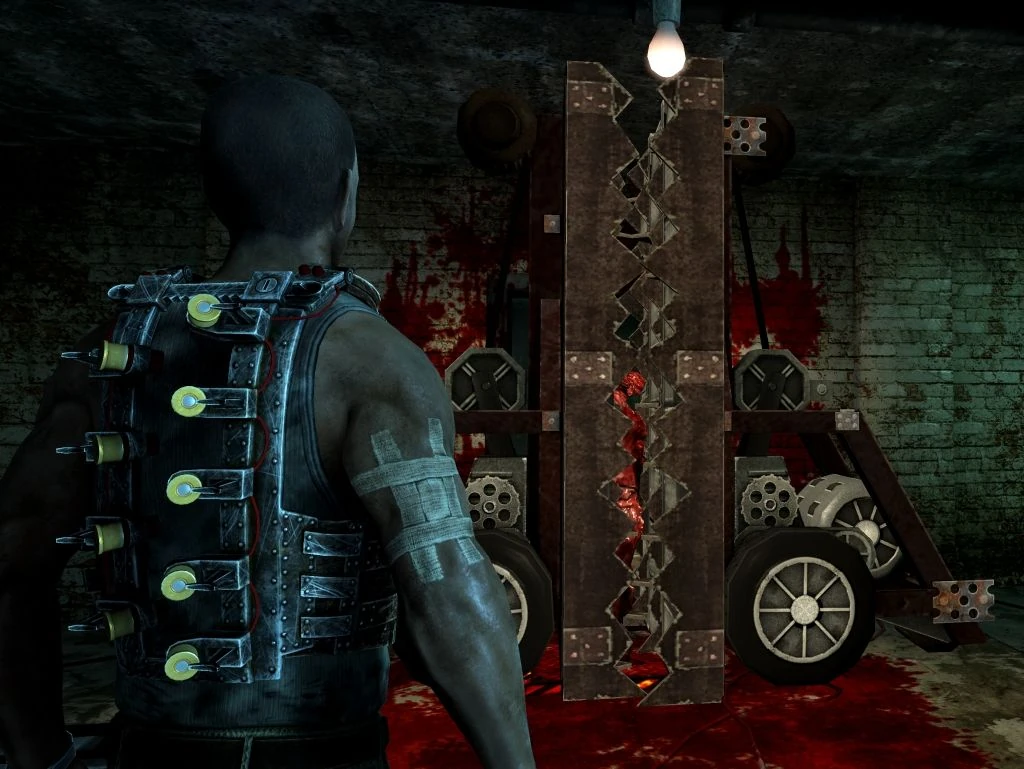
Solomon Bates' Salvation[]
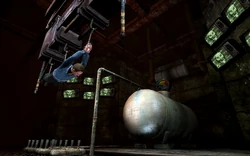
| “ | Hello, Solomon. You knowingly work for criminal organizations, concealing their profits by cooking the books. Now, you would say that you are just doing your job. I say you give criminals their ability to pollute the streets with drugs. You are attached to a cart set on a track. To free yourself, all you have to do is get to the other side of the room. As you can see, getting there will require some planning. You are so good at cooking the books, Solomon. Let's see how well you burn. | ” |
— Solomon Bate's tape[src]
| ||

Solomon in his trap
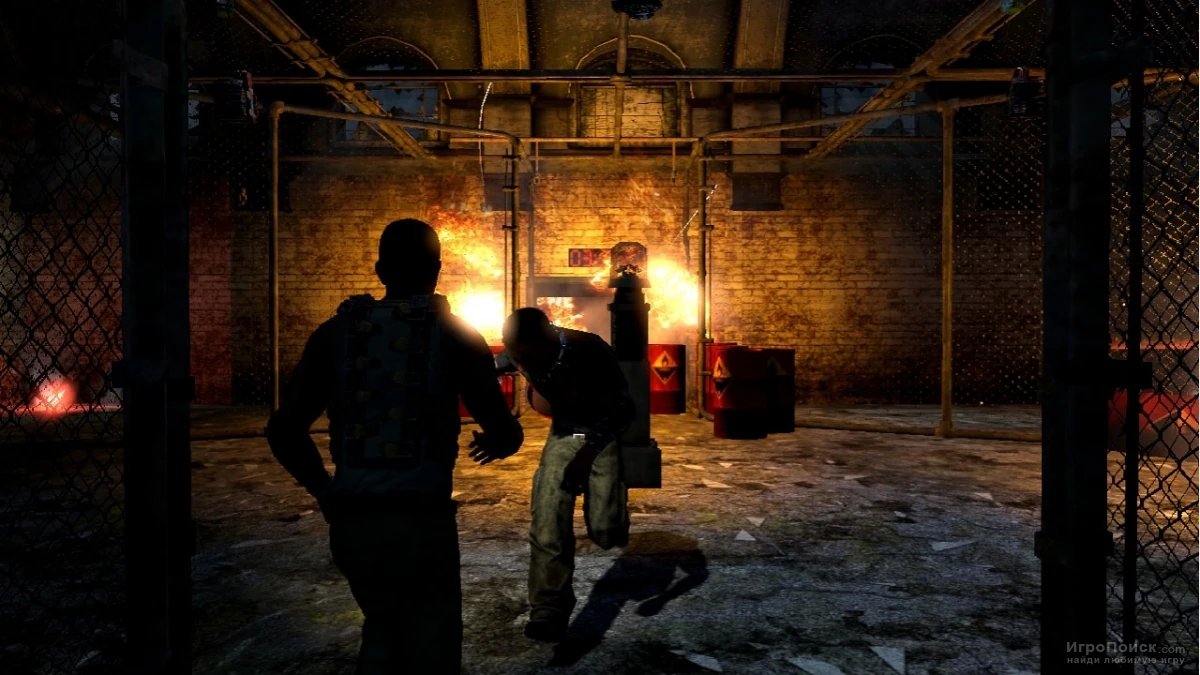
Inside the room, he finally found Solomon Bates, who was strapped by his hands, feet and torso to a sliding cart connected to a railing system on the ceiling. A few feet below on the floor were numerous pipes, which were linked to a heater and alternated between spewing flames, which would eventually burn him alive. As Michael approached him, a set of TVs turned on and the mechanical puppet appeared on the screens again. It confronted Solomon with his crimes and his involvement in criminal organizations, while also explaining to him that he could only survive and escape by somehow getting to the other side of the area.

Michael tries to save Solomon
Afterwards, the TVs turned off again and several pipes below him started to spew fire. Michael pushed the cart, to which Solomon was bound, to the next room. Unlike in the first room, there were three sets of pipes, which alternated between spewing flames. To get Solomon to the other room, he had to push and pull several other carts in the right way and clear the path, while also occasionally moving Solomon to make sure he wasn't hanging above the spewing pipes. In the third and final room, there were 16 monitors, each one with a different picture on screen. In order to open the last door, Michael had to play a matching game and had to choose, which two pictures fitted together until all eight pairs were found. Eventually, he successfully managed to move Solomon to the end of the track, where he was freed from his chains and fell to the floor.
Michael interrogates Solomon
Michael then demanded information about the drug cartel. Solomon told him about Henry Jacobs and Joseph Poltzer, who both used to steal drugs from the evidence room of the police station to sell them on the streets with the assistance of Carla Song and Sarah Blalok. Furthermore, he stated that Michael's father coincidentally stumbled upon the cartel while investigating the Jigsaw Case and said that Sarah was supposed to knock him off their trail. Eventually, he also confronted Michael with an article he had written and which had destroyed his father's reputation. Angered by this, he assaulted Solomon, who evaded his attack and cowardly took flight. (Saw II: Flesh & Blood)
Gunfight[]
Michael pursued him to the sewers beneath the plant. Solomon insulted him, stating that it was his fault that they were targeted by Jigsaw. Therefore, Michael attacked him once more and caused him to run away again. In his attempt to escape Michael, he crawled through a small passage in a collapsed hallway. However, as he left it again on the other side, he was attacked by Pighead. As he tried to flee, Pighead pushed him into a pit filled with thousands of syringes and then closed the door behind them, making it impossible for Michael to reach them.
Therefore, Michael went on and climbed up a ladder. Through a hole in a wall, he entered a subway tunnel, where he came across Sarah. When he confronted her with her involvement in the drug cartel, she admitted that she was blackmailed into spying on his father as her accomplices from the cartel were afraid that he might find out about their criminal activities. However, when she was about to reveal the identity of Pighead to him, Poltzer suddenly sneaked up on her and shot her in the head. Afterwards, he aimed his gun at Michael since he knew too much about the criminal organization. To avoid being shot, Michael ran from cover to cover and thereby got closer and closer to Joseph, forcing the latter to retreat. Eventually, Joseph fled to a utility room and closed the door behind him. (Saw II: Flesh & Blood)
Robert's Test[]
Robert attacks Michael
In another room nearby, Michael found several nail bombs, which were connected to a timer. There were also 16 TV monitors with a different picture on each screen. Again, Michael had to find the pictures matching each other. He eventually managed to do so successfully and the timer was stopped. Furthermore, a nearby shelf was opened, enabling Michael to pick up the key to the utility room. With the key in his possession, he proceeded through a number of rooms and eventually found himself in a big hall. In the middle of the hall, he saw Robert, another victim of Jigsaw, who was chained to a metal column, similar to Chuck back at the plant. However, unlike Chuck, Roberts was surrounded by several explosive barrels. He had the same sharp, pointy razor blades pierced through his forearms and was also tasked with grabbing Michael and taking him to the colum. A flammable substance, probably oil or kerosine, leaked from the barrels around him and catched fire. Michael managed to evade Robert's attacks and extinguished the fire, which blocked his path, by turning to valves on both sides of the room to activate the sprinklers on the ceiling. Afterwards, he ran past Robert and left the room. Just as he did, a roller door slammed shut behind him and Robert was killed in an explosion. (Saw II: Flesh & Blood)
The Storage Hall[]
Michael jumped down an elevator well and eventually reached the station building's main hall. However, Joseph was there as well and once again tried to shoot Michael from behind a fence. As before, Michael managed to evade his attacks and escaped to the next area. There was a heavy metal door blocking his way. In order to pass it, he had to place a motor on a pressure plate. However, he was wearing a mechanical vest, which was activated by sensors located around him and would kill him if he stayed in the area for too long. Michael ultimately managed to deactivate these sensors and pushed the motor onto the pressure plate, which opened the door.

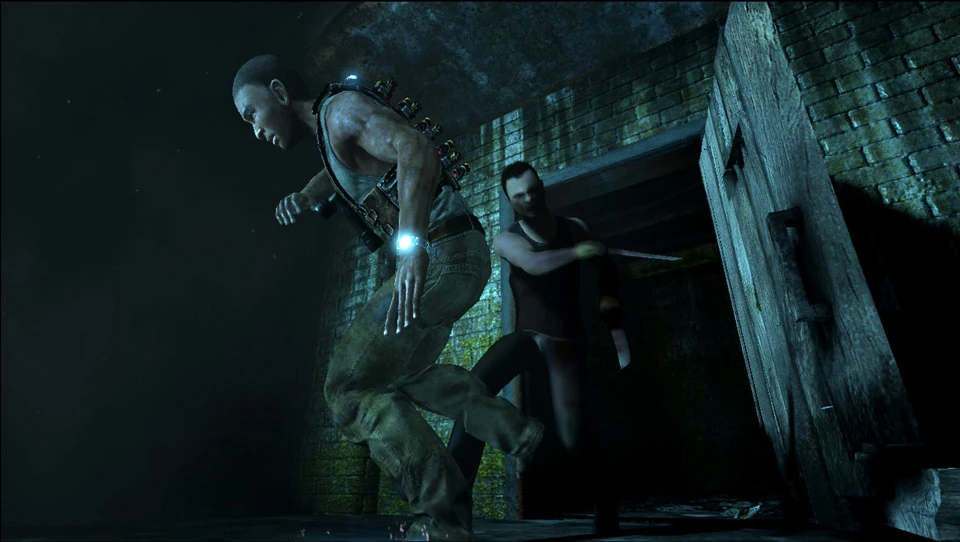
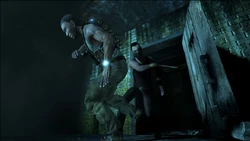
Donovan rushes out of the elevator
Afterwards, he passed a small alleyway and reentered the building on the other side. Thereby, he found himself in a large storage hall. Just as Michael came across and elevator, the doors were opened and he was attacked by Donovan. Furious to see Michael, Donovan rushed towards him and barely missed him, causing his spikes to briefly get stuck in another crate. Another fight ensued between the two of them, during which Donovan yelled at Michael to help him and free him from his trap. When he got stuck in another crate, Michael embraced his chance and hit a button on a panel nearby, which caused a large container to be dropped from the ceiling, crushing Donovan in the process. (Saw II: Flesh & Blood)
The Spotlight Carousel[]
| “ | You wanted so badly to be famous, to be in the spotlight. Well, seeking fame in these spotlights will only earn you a quick death. | ” |
— Jigsaw warns Michael to avoid the spotlights[src]
| ||

Michael on the carousel
Michael retrieved a key from Donovan's mutilated corpse and passed another door. A few moments later, he entered another big hall. In front of him was a giant rotating carousel, which was divided into several segments by large fences. Additionally, there were several red spotlights illuminating the carousel. As Michael went further, a TV turned on in front of him and Jigsaw's puppet warned him to avoid the spotlights as they would immediately activate his shotgun vest. Nonetheless, Michael had to enter the carousel. To get to the other side of the room, he had to find a way past the fences while avoiding the red lights. By carefully moving forward, Michael ultimately overcame this obstacle and went on. (Saw II: Flesh & Blood)
Final Encounter[]
Moments later, Michael entered the next room. Through a window, he saw Henry, who talked to Pighead. Seeing that he intended to kill him, Henry tried to prevent him from doing so by threatening him that the entire police department would be after him. Pighead, however, barely hesitated and ultimately stabbed him multiple times, while Michael witnessed his demise from the next room. After his death, Pighead left the two of them behind and calmly went away. Michael went in a different direction and thereby came across a mixing station, similar to the one from the chemical plant. By mixing ammonia and paint thinner found in the next room, Michael built another chemical bomb and used it to destroy a wall nearby.
Joseph is shot with his own gun
Through the hole in the wall, he entered the main hall where he encountered Joseph once more. As before, Michael evaded his gunshots by running from cover to cover. Everytime Joseph had to reload his revolver, Michael used the break in the firing to get closer to him. Thereby, he forced him to retreat. While avoiding the shots, he pursued Henry to the upper floor. When he had to reload his gun again, Michael embraced the opportunity and attacked Joseph, causing the two of them to break through a damaged wall. When they found themselves in an alleyway outside the building, they fought the gun. During this struggle, Joseph was shot in the head and killed by the last bullet in his revolver. (Saw II: Flesh & Blood)
Final Test[]
| “ | Hello, Michael. You aided dirty cops in their drug cartel, telling yourself it was for money. The real reason, of course, was revenge. Revenge for a life of abandonment. You got more than you bargained for, driving your father to suicide. And yet, you've destroyed more lives than just his. Now your life rests in the sacrifice of a stranger. Below you is a man you have never met. For you to live, he must sacrifice what is left of his life. Can he look past his own greed and selfishness to save just one person? Let's find out. Live or die, Michael. | ” |
— Michael is introduced to the final game[src]
| ||

Michael in the elevator room
Michael then reentered the building through a door and found himself in a dark room. As he went on through the big hall, the door slammed shut behind him and the lights turned on. Before him was a gaping chasm with only a single wooden beam leading to the other side. The last TV turned on and introduced Michael to his final test. On the other side of the room was a glass elevator, which fit only one person. However, somewhere below Michael's position was another victim, Campbell Iman. Campbell and Michael had never seen each other, but Michael was about the same age as Campbell's son. Campbell now had to make the choice to either sacrifice himself for Michael or to try to save himself. Depending on the player's choice, there were two different outcomes:
- Path of Blood: As the TV turned off, the walls and the ceiling of the room started to move towards each other. Due to his desire to see his son once again, Campbell walked over the beam and thereby reached the elevator in time. As it went up, he saw Michael, who desperately tried to enter the elevator. However, he was crushed to death by the ceiling right in front of Campbell's eyes.
| “ | Hello, Michael. You've seen the corruption that pollutes the world. The gripping power of addiction. Not just to drugs, but to money and power. That addiction fuels evil, real evil, into everyone around it. Your test was to bring justice to those claiming to uphold the law. And you passed. You've proven that you can see beyond the lies that people wrap themselves in, past the meat and sinew, to the truth. What you do with that truth is your choice. We are quite similar, Michael. We both demand justice in an unjust world. So I'm giving you one last choice. You can take those files that your father collected and publish the truth in a newspaper that would be used to wrap fish the very next day. Or you can help people see the truth within themselves, to be rehabiliated as you were. Now is the time to choose, Michael. | ” |
— Michael's final tape[src]
| ||

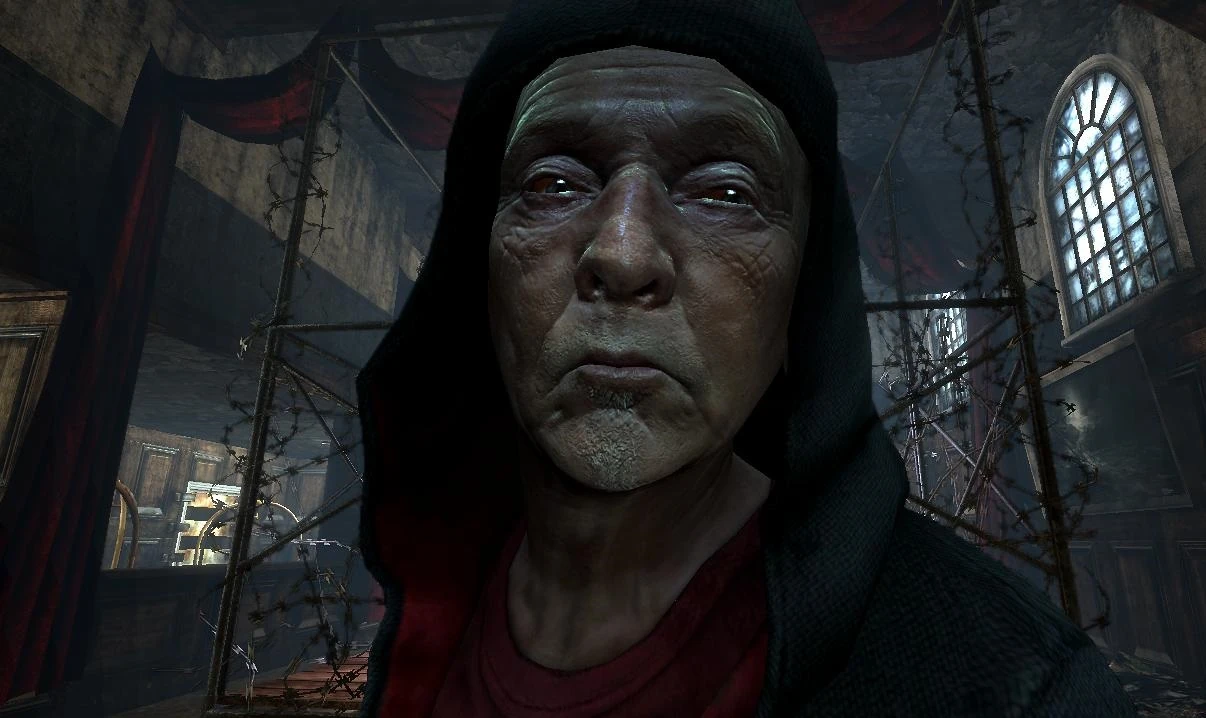
Michael is offered a final choice
- Path of Flesh: As the TV turned off, the walls and the ceiling of the room started to move towards each other. Michael managed to cross the beam and entered the elevator, either because Campbell sacrificed himself or simply wasn't fast enough. As the elevator reached the upper floor, the door opened, enabling Michael to escape. He stumbled into a storage hall and was greeted by the puppet, which approached him on a red tricycle and maniacally laughed at him. At the same time, three TVs turned on around him. Jigsaw informed him that he had passed his test by bringing justice to the members of the drug cartel and offered him one final choice. He could take the files collected by his father to publish the truth about the cartel, although Jigsaw told him that people would forget about it quite soon. However, he could also choose to become Jigsaw's apprentice to rehabilitate people by using his methods. In the end, two doors were opened before him. The first one led out of the building and enabled him to leave. Behind the second door, however, were the cloak and the mask of Pighead, waiting for him if he chose to ally himself with Jigsaw. (Saw II: Flesh & Blood)