(Undo revision 53024 by Emeraldgamer07 (talk)) |
No edit summary |
||
| (7 intermediate revisions by 4 users not shown) | |||
| Line 7: | Line 7: | ||
|Status = Deceased |
|Status = Deceased |
||
|DeathEp = ''[[Saw IV]]'' |
|DeathEp = ''[[Saw IV]]'' |
||
| − | |DeathCause = |
+ | |DeathCause = Bled out after being shot in the chest by [[Eric Matthews]] |
|Age = |
|Age = |
||
|Profession = SWAT Officer |
|Profession = SWAT Officer |
||
|Role = Main Character<br>Protagonist |
|Role = Main Character<br>Protagonist |
||
|ReasonTested = Being obsessed with saving everyone around him |
|ReasonTested = Being obsessed with saving everyone around him |
||
| − | |Relationships = [[Tracy Rigg]] (wife)<br>[[Eric Matthews]] (former partner)<br>[[Allison Kerry]] (partner)<br>[[Mark Hoffman]] (partner)<br>[[Lamanna]] (partner)<br>[[Pete Baker]] (partner)<br>[[Joe]] (partner) |
+ | |Relationships = [[Tracy Rigg]] (wife)<br>[[Eric Matthews]] (former partner)†<br>[[Allison Kerry (Movies)|Allison Kerry]] (partner)†<br>[[Mark Hoffman]] (partner)†<br>[[Lamanna]] (partner)<br>[[Pete Baker]] (partner)<br>[[Joe]] (partner) |
|Template:Infobox = Daniel Rigg |
|Template:Infobox = Daniel Rigg |
||
|AKA = }} |
|AKA = }} |
||
| Line 26: | Line 26: | ||
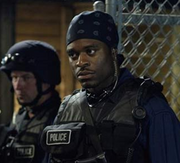
[[File:Rigg Cop.jpg|thumb|113px|left|Rigg in Hoffman's office]] |
[[File:Rigg Cop.jpg|thumb|113px|left|Rigg in Hoffman's office]] |
||
| − | Following the incident, Rex tried to sue Rigg for the assault with the assistance of his lawyer, [[Art Blank]]. Additionally, the [[Internal Affairs Division]] started to investigate the case. Due to the severe accusations, Art Blank went to the [[Police Station|police station]], where he talked to Rigg and Hoffman and tried to convince the latter to suspend Rigg from office. Hoffman, however, made an incorrect statutory declaration in order to protect his colleague. This eventually caused the charge to be dismissed, and Rigg's career wasn't further damaged or endangered by this incident. Sometime later, he joined the [[Special Weapons and Tactics|SWAT team]] of his department and eventually even became its leader, holding the rank as a sergeant. Throughout his career, he also worked with [[Eric Matthews|Detective Eric Matthews]]. However, at some point their cooperative work came to an end for unknown reasons. (''[[Saw II]]'', ''[[Saw IV|IV]]'') |
+ | Following the incident, Rex tried to sue Rigg for the assault with the assistance of his lawyer, [[Art Blank (Movies)|Art Blank]]. Additionally, the [[Internal Affairs Division]] started to investigate the case. Due to the severe accusations, Art Blank went to the [[Police Station|police station]], where he talked to Rigg and Hoffman and tried to convince the latter to suspend Rigg from office. Hoffman, however, made an incorrect statutory declaration in order to protect his colleague. This eventually caused the charge to be dismissed, and Rigg's career wasn't further damaged or endangered by this incident. Sometime later, he joined the [[Special Weapons and Tactics|SWAT team]] of his department and eventually even became its leader, holding the rank as a sergeant. Throughout his career, he also worked with [[Eric Matthews|Detective Eric Matthews]]. However, at some point their cooperative work came to an end for unknown reasons. (''[[Saw II]]'', ''[[Saw IV|IV]]'') |
===[[John Kramer|The Jigsaw Case]]=== |
===[[John Kramer|The Jigsaw Case]]=== |
||
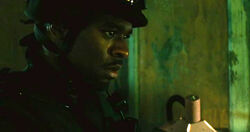
[[File:Eric_Rigg_SWAT.png|thumb|230px|Rigg and Eric on their way to Wilson Steel]] |
[[File:Eric_Rigg_SWAT.png|thumb|230px|Rigg and Eric on their way to Wilson Steel]] |
||
| − | After some time, Rigg and his SWAT team became involved in the [[John Kramer|Jigsaw case]]. When Eric Matthews received a message from the Jigsaw Killer at the crime scene of his latest [[Death Mask|game]], he was able to deduce the location of the killer's hideout at the [[Wilson Steel Plant]]. The next day, Rigg and his men accompanied Eric and [[Allison Kerry|Detective Allison Kerry]] to the building. Rigg, who had been at Wilson Steel at one point already, instructed his team before the went to the plant. After their arrival, Detective Kerry ordered [[Pete Baker|Officer Pete Baker]] to break through a side door to enter the building, along with Rigg and two of their teammates. |
+ | After some time, Rigg and his SWAT team became involved in the [[John Kramer|Jigsaw case]]. When Eric Matthews received a message from the Jigsaw Killer at the crime scene of his latest [[Death Mask|game]], he was able to deduce the location of the killer's hideout at the [[Wilson Steel Plant]]. The next day, Rigg and his men accompanied Eric and [[Allison Kerry (Movies)|Detective Allison Kerry]] to the building. Rigg, who had been at Wilson Steel at one point already, instructed his team before the went to the plant. After their arrival, Detective Kerry ordered [[Pete Baker|Officer Pete Baker]] to break through a side door to enter the building, along with Rigg and two of their teammates. |
While making their way through a storage area of the building, the men soon reached a [[Electrified Staircase|staircase]] surrounded by a chain-link cage. Since the door was secured by a chain, Baker cut it with a bolt clipper. Upon opening the door, the lights in the staircase suddenly turned on. Baker entered the staircase, followed by his two teammates, while Rigg backed them up. They tried to climb the stairs but eventually stopped when they heard a squealing sound. Seconds later, a mechanical [[Billy the Puppet|ventriloquist puppet]] appeared at the head of the stairs, sitting on a [[Billy's Tricycle|tricycle]] and maniacally laughing at them. After the staircase was locked by a mechanism, Officer Baker tried to approach the puppet, when suddenly, a rigged step sprang forward and broke his shins, causing his two fellow officers to back away, before receiving a lethal electric shock when they touched the cage. As they were killed in front of Sergeant Rigg's eyes, the puppet slowly rode back on the cycle. When Rigg called for reinforcement, the remaining SWAT team, as well as Eric and Kerry, entered the building. While the detectives and Rigg went upstairs, Pete's colleagues dragged him out of the staircase. (''[[Saw II]]'') |
While making their way through a storage area of the building, the men soon reached a [[Electrified Staircase|staircase]] surrounded by a chain-link cage. Since the door was secured by a chain, Baker cut it with a bolt clipper. Upon opening the door, the lights in the staircase suddenly turned on. Baker entered the staircase, followed by his two teammates, while Rigg backed them up. They tried to climb the stairs but eventually stopped when they heard a squealing sound. Seconds later, a mechanical [[Billy the Puppet|ventriloquist puppet]] appeared at the head of the stairs, sitting on a [[Billy's Tricycle|tricycle]] and maniacally laughing at them. After the staircase was locked by a mechanism, Officer Baker tried to approach the puppet, when suddenly, a rigged step sprang forward and broke his shins, causing his two fellow officers to back away, before receiving a lethal electric shock when they touched the cage. As they were killed in front of Sergeant Rigg's eyes, the puppet slowly rode back on the cycle. When Rigg called for reinforcement, the remaining SWAT team, as well as Eric and Kerry, entered the building. While the detectives and Rigg went upstairs, Pete's colleagues dragged him out of the staircase. (''[[Saw II]]'') |
||
| Line 36: | Line 36: | ||
===[[Eric's Test|Eric Matthews' Test]]=== |
===[[Eric's Test|Eric Matthews' Test]]=== |
||
[[File:RiggSaw2HD.png|thumb|left|250px|Eric, Kerry and Rigg confront Jigsaw]] |
[[File:RiggSaw2HD.png|thumb|left|250px|Eric, Kerry and Rigg confront Jigsaw]] |
||
| − | Moments later, they finally found the Jigsaw Killer, John Kramer, who was anticipating their arrival. Rigg immediately ordered his men to arrest him, but they refused to do so when John told Eric it'd the best if John stayed where he was until Eric took care of his problem. He instructed Eric to watch the surveillance monitors in the next room, to which Kerry, Rigg, and Eric then entered the room. Upon looking at the monitors, they saw what appeared to be [[Nerve Gas House|another one of Jigsaw's games]] and recognized one of the eight victims as Eric's son, Daniel. However, they didn't know that the footage was pre-recorded and assumed that the events were unfolding live. After seeing the recording of the game, Eric immediately attempted to attack John and angrily yelled at him before being held back by Rigg. John then explained to Eric the rules of his test. Eric's colleagues had to leave the room while Eric merely had to sit down and talk to John for a period of two hours until a timer went off. If he could successfully do that, he'd eventually see his son again. |
+ | Moments later, they finally found the Jigsaw Killer, John Kramer, who was anticipating their arrival. Rigg immediately ordered his men to arrest him, but they refused to do so when John told Eric it'd the best if John stayed where he was until Eric took care of his problem. He instructed Eric to watch the surveillance monitors in the next room, to which Kerry, Rigg, and Eric then entered the room. Upon looking at the monitors, they saw what appeared to be [[Nerve Gas House|another one of Jigsaw's games]] and recognized one of the eight victims as Eric's son, Daniel. However, they didn't know that the footage was actually pre-recorded and assumed that the events were unfolding live. After seeing the recording of the game, Eric immediately attempted to attack John and angrily yelled at him before being held back by Rigg. John then explained to Eric the rules of his test. Eric's colleagues had to leave the room while Eric merely had to sit down and talk to John for a period of two hours until a timer went off. If he could successfully do that, he'd eventually see his son again. |
| − | Kerry then tried to calm Eric down. However, |
+ | Kerry then tried to calm Eric down. However, her attempt remained unsuccessful, as Eric got more and more nervous, especially when the first victim, [[Gus Colyard]], was killed by a [[Magnum Eyehole|booby trap]] only a few minutes after the game began. On Rigg's advice, Kerry called for a [[Video Techie|tech team]] to trace back the video broadcast. After a talk with John Kramer, Eric told his colleagues about his ultimatum: In order to save his son, he had to just sit down and talk to John until the end of the game. Rigg suggested using violence to grill John about the victims' whereabouts, but Kerry told him this wouldn't work, stating that John fits a certain psychological profile. Eventually, Kerry convinced Eric to agree to John's challenge and talk to him while she kept an eye on the progress of the game. However, when talking to him, Eric placed a walkie-talkie beneath his chair, so his colleagues were able to listen to their conversation. |
[[File:DRigg.png|thumb|Rigg tries to convince Kerry to let him interrogate Jigsaw]] |
[[File:DRigg.png|thumb|Rigg tries to convince Kerry to let him interrogate Jigsaw]] |
||
| − | After the second victim in the house, [[Obi Tate]], died in [[The Furnace|his trap]], Rigg persisted on using violence to force John to tell them about the house, as they were just wasting time in his opinion, but Kerry insisted on keeping the situation calm as long as possible. However, Eric became more and more distressed as the game went on, and the tech team was running late, which caused Kerry to formulate a new plan. As she thought John was proud about his work and that it meant everything to him, she told Eric to threaten to destroy all of John's construction plans and notes in the hideout. Eric followed through, but was in turn only provoked by John, who was rarely impressed by Eric's outburst of rage, which only ended when he received his instructions from Kerry after the tech team finally arrived. As Eric refused to play the game and talk to John any longer, the latter told him and his colleagues to look in the desk located in the same room as the monitors. As Kerry did so, she found a bunch of files of old cases, which were the files of the seven other prisoners in the house, Gus Colyard, Obi Tate, [[Jonas Singer]], [[Laura Hunter]], [[Xavier Chavez]] and [[Amanda Young]], who was the first victim to survive one of John's games. All those people were once framed by Eric for crimes they didn't commit due to Eric faking the evidence. |
+ | After the second victim in the house, [[Obi Tate]], died in [[The Furnace|his trap]], Rigg persisted on using violence to force John to tell them about the house, as they were just wasting time in his opinion, but Kerry insisted on keeping the situation calm as long as possible. However, Eric became more and more distressed as the game went on, and the tech team was running late, which caused Kerry to formulate a new plan. As she thought John was proud about his work and that it meant everything to him, she told Eric to threaten to destroy all of John's construction plans and notes in the hideout. Eric followed through, but was in turn only provoked by John, who was rarely impressed by Eric's outburst of rage, which only ended when he received his instructions from Kerry after the tech team finally arrived. As Eric refused to play the game and talk to John any longer, the latter told him and his colleagues to look in the desk located in the same room as the monitors. As Kerry did so, she found a bunch of files of old cases, which were the files of the seven other prisoners in the house, Gus Colyard, Obi Tate, [[Jonas Singer]], [[Laura Hunter]], [[Xavier Chavez]] and [[Amanda Young (Movies)|Amanda Young]], who was the first victim to survive one of John's games. All those people were once framed by Eric for crimes they didn't commit due to Eric faking the evidence. |
[[File:Rigg_SWAT_4.jpg|thumb|left|250px|Rigg realizes that Jigsaw deceived them]] |
[[File:Rigg_SWAT_4.jpg|thumb|left|250px|Rigg realizes that Jigsaw deceived them]] |
||
| Line 92: | Line 92: | ||
[[File:Rigg_School.jpg|thumb|left|210px|Rigg finds the next clue]] |
[[File:Rigg_School.jpg|thumb|left|210px|Rigg finds the next clue]] |
||
| − | After the tape ended, Rigg asked Morgan who put her in this situation and eventually pulled out the final spike from her shoulder. After doing so, Morgan thanked him for finally saving her. Moments later, Rigg realized that the map mentioned on the tape was a chart of the human body, which had been positioned in front of Morgan. Behind it, he found another photo of Tracy with the words "Go Home" written on its back. Frightened that she could have been in danger, Rigg asked Morgan if she knew where Tracy was. However, Morgan couldn't tell him anything useful. As she was freezing, Rigg covered Morgan with his jacket and handed her the second key that he had found earlier in his apartment, telling her that she had to safe herself. Morgan panicked and begged him not to leave her there alone, but before departing, Rigg set off the fire alert to make sure that Morgan would be found quickly. (''[[Saw IV]]'') |
+ | After the tape ended, Rigg asked Morgan who put her in this situation and eventually pulled out the final spike from her shoulder. After doing so, Morgan thanked him for finally saving her. Moments later, Rigg realized that the map mentioned on the tape was a chart of the human body, which had been positioned in front of Morgan. Behind it, he found another photo of Tracy with the words "Go Home" written on its back. Frightened that she could have been in danger, Rigg asked Morgan if she knew where Tracy was. However, Morgan couldn't tell him anything useful. As she was freezing, Rigg covered Morgan with his jacket and handed her the second key that he had found earlier in his apartment, telling her that she had to safe herself. Morgan panicked and begged him not to leave her there alone, but before departing, Rigg set off the fire alert to make sure that Morgan would be found quickly. (''[[Saw IV]]'') |
===[[Ice Block Trap|Final Test and Death]]=== |
===[[Ice Block Trap|Final Test and Death]]=== |
||
| Line 98: | Line 98: | ||
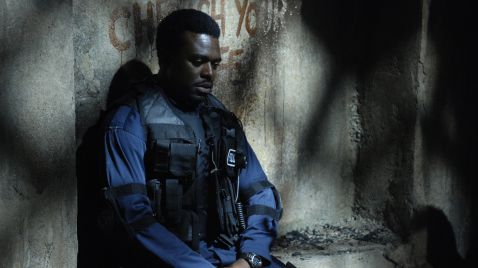
[[File:Rigg_Hoffman.jpg|thumb|Rigg learns the truth about Hoffman]] |
[[File:Rigg_Hoffman.jpg|thumb|Rigg learns the truth about Hoffman]] |
||
| − | As the timer went on, Rigg continued his way through the plant, and after a few minutes, he finally reached the room in which Eric and Hoffman were trapped. However, Eric desperately yelled at him not to open the door. Ignoring his warning, Rigg burst through the door with only one second left on the clock, and was shot in the chest by Eric in the process, as a final attempt to keep him from entering. When he opened the door, Art Blank, who had been in the room with them the entire time, approached Rigg, who then shot Art in the chest. Moments later, Eric's head was smashed by two large ice blocks swinging down from the ceiling, causing Rigg to fall to the floor, screaming in grief and agony. He angrily yelled at Art Blank, as he thought him to be Jigsaw's accomplice, but Art was merely another victim, who had been tasked with supervising the detectives for the duration of Rigg's game. Art tried to explain that he was tested by Jigsaw, and went to reach for his bag, causing Rigg, who thought that Art was grabbing a weapon, to shoot him in the head. However, it turned out that |
+ | As the timer went on, Rigg continued his way through the plant, and after a few minutes, he finally reached the room in which Eric and Hoffman were trapped. However, Eric desperately yelled at him not to open the door. Ignoring his warning, Rigg burst through the door with only one second left on the clock, and was shot in the chest by Eric in the process, as a final attempt to keep him from entering. When he opened the door, Art Blank, who had been in the room with them the entire time, approached Rigg, who then shot Art in the chest. Moments later, Eric's head was smashed by two large ice blocks swinging down from the ceiling, causing Rigg to fall to the floor, screaming in grief and agony. He angrily yelled at Art Blank, as he thought him to be Jigsaw's accomplice, but unknown to him, Art was merely another victim, who had been tasked with supervising the detectives for the duration of Rigg's game. Art tried to explain that he was tested by Jigsaw, and went to reach for his bag, causing Rigg, who thought that Art was grabbing a weapon, to shoot him in the head. However, it turned out that Art was actually attempting to grab an audio tape. Upon listening to the recording, Rigg finally realized that his test wasn't to save Eric, but to let Eric save himself. Moments later, Hoffman freed himself from his trap and calmly approached Rigg, thus bringing Rigg to the realization that Hoffman was Jigsaw's accomplice. However, due to his gunshot wound, Rigg collapsed to the floor as Hoffman walked out of the room. He turned around one last time and ended Rigg's game with the words "[[Game Over]]" before he disappeared and left Rigg for dead. Shortly thereafter, Rigg succumbed to his gunshot wound. (''[[Saw IV]]'') |
===Post-Mortem=== |
===Post-Mortem=== |
||
| Line 127: | Line 127: | ||
[[Category:Test Subject]] |
[[Category:Test Subject]] |
||
[[Category:SWAT]] |
[[Category:SWAT]] |
||
| + | [[Category:Officers]] |
||
Revision as of 16:24, 23 February 2020
| “ | It's in our nature to save them. It's what we do. | ” |
— Officer Rigg talking about his work[src]
| ||
Officer Daniel Rigg is a fictional character from the Saw franchise as well as one of the main protagonists of Saw IV and a supporting protagonist in Saw II and III. He was portrayed by Lyriq Bent.
Biography
Early Career
Daniel Rigg was an officer working for the Metropolitan Police Department, as well as the husband of Tracy Rigg. However, he was also quite aggressive if he got angry and didn't hesitate to use violence against others if he feared that they could escape justice. On one occasion, this behavior brought him into conflict with the law when he was called to an elementary school along with his partner, Detective Mark Hoffman, due to a presumed case of domestic violence against one of the students, a young girl named Jane. While Hoffman interrogated Jane's parents, Morgan and Rex, in the principal's office, Rigg talked to her and asked her about the bruises she had on her hand and her neck. Although he tried to convince her to tell him the truth about whether they were from an accident or from someone hurting her on purpose, Jane decided to remain silent.
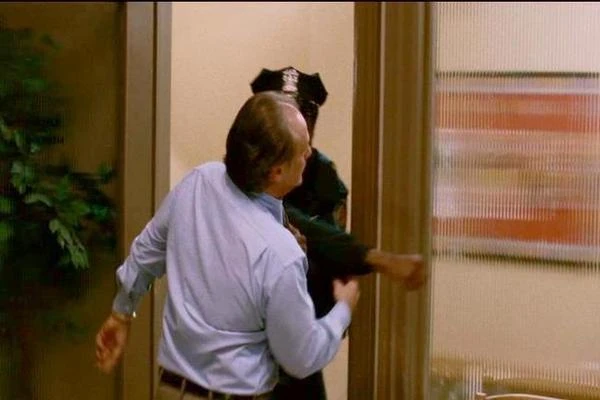
Rigg attacks Rex
Moments later, Hoffman and Morgan left the principal's office, and Jane asked Rigg if she could go home. Rigg told Hoffman not to trust Rex, as it was obvious to him that Jane didn't want to talk to them out of fear of her violent father. However, as Hoffman had no evidence against him, there was nothing he could do. Therefore, he told Jane to go back to her class. Rex, who felt safe now, clapped Rigg on the shoulder and sarcastically commented that "sometimes these kids just get out of control." This, however, provoked Rigg even further to the point that he attacked Rex and struck him in the face, breaking his nose and cheekbone in the process. Hoffman then had to pull him back and angrily told him to leave immediately.
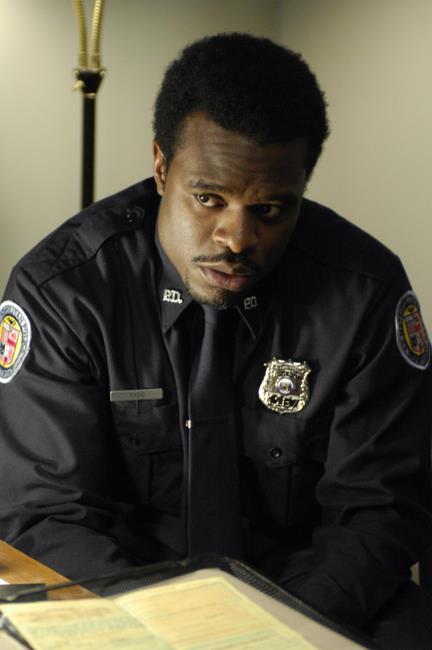
Rigg in Hoffman's office
Following the incident, Rex tried to sue Rigg for the assault with the assistance of his lawyer, Art Blank. Additionally, the Internal Affairs Division started to investigate the case. Due to the severe accusations, Art Blank went to the police station, where he talked to Rigg and Hoffman and tried to convince the latter to suspend Rigg from office. Hoffman, however, made an incorrect statutory declaration in order to protect his colleague. This eventually caused the charge to be dismissed, and Rigg's career wasn't further damaged or endangered by this incident. Sometime later, he joined the SWAT team of his department and eventually even became its leader, holding the rank as a sergeant. Throughout his career, he also worked with Detective Eric Matthews. However, at some point their cooperative work came to an end for unknown reasons. (Saw II, IV)
The Jigsaw Case
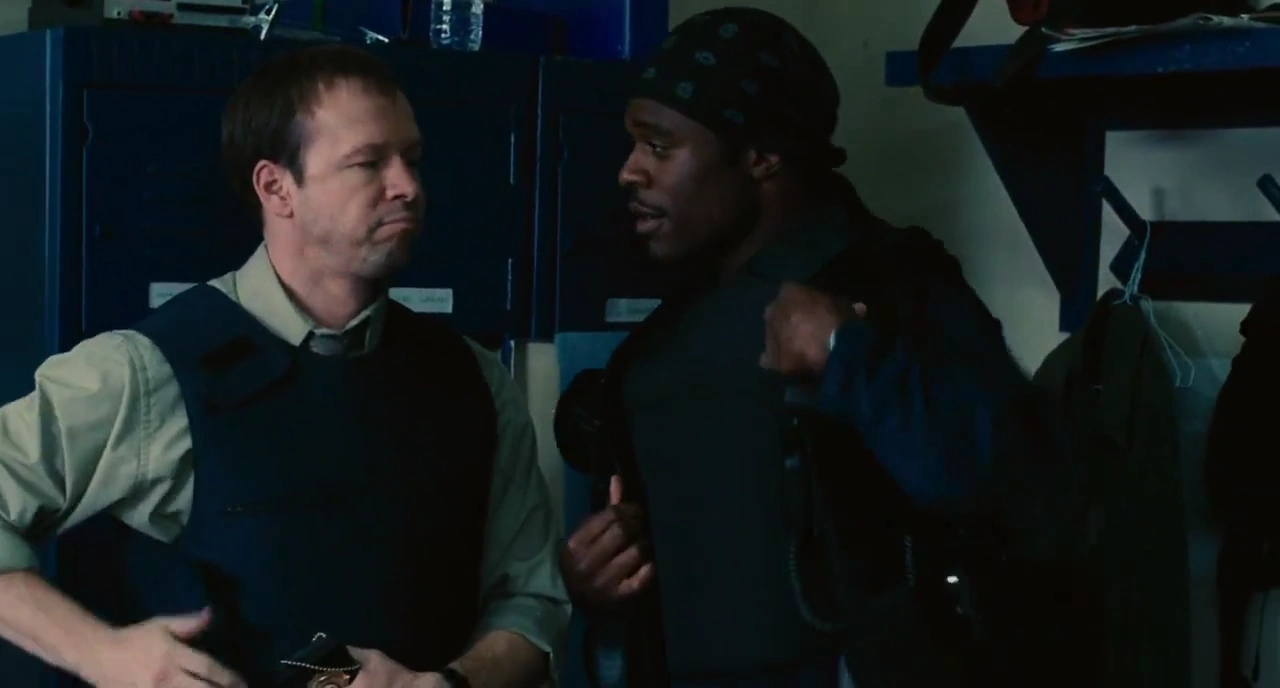
Rigg and Eric on their way to Wilson Steel
After some time, Rigg and his SWAT team became involved in the Jigsaw case. When Eric Matthews received a message from the Jigsaw Killer at the crime scene of his latest game, he was able to deduce the location of the killer's hideout at the Wilson Steel Plant. The next day, Rigg and his men accompanied Eric and Detective Allison Kerry to the building. Rigg, who had been at Wilson Steel at one point already, instructed his team before the went to the plant. After their arrival, Detective Kerry ordered Officer Pete Baker to break through a side door to enter the building, along with Rigg and two of their teammates.
While making their way through a storage area of the building, the men soon reached a staircase surrounded by a chain-link cage. Since the door was secured by a chain, Baker cut it with a bolt clipper. Upon opening the door, the lights in the staircase suddenly turned on. Baker entered the staircase, followed by his two teammates, while Rigg backed them up. They tried to climb the stairs but eventually stopped when they heard a squealing sound. Seconds later, a mechanical ventriloquist puppet appeared at the head of the stairs, sitting on a tricycle and maniacally laughing at them. After the staircase was locked by a mechanism, Officer Baker tried to approach the puppet, when suddenly, a rigged step sprang forward and broke his shins, causing his two fellow officers to back away, before receiving a lethal electric shock when they touched the cage. As they were killed in front of Sergeant Rigg's eyes, the puppet slowly rode back on the cycle. When Rigg called for reinforcement, the remaining SWAT team, as well as Eric and Kerry, entered the building. While the detectives and Rigg went upstairs, Pete's colleagues dragged him out of the staircase. (Saw II)
Eric Matthews' Test
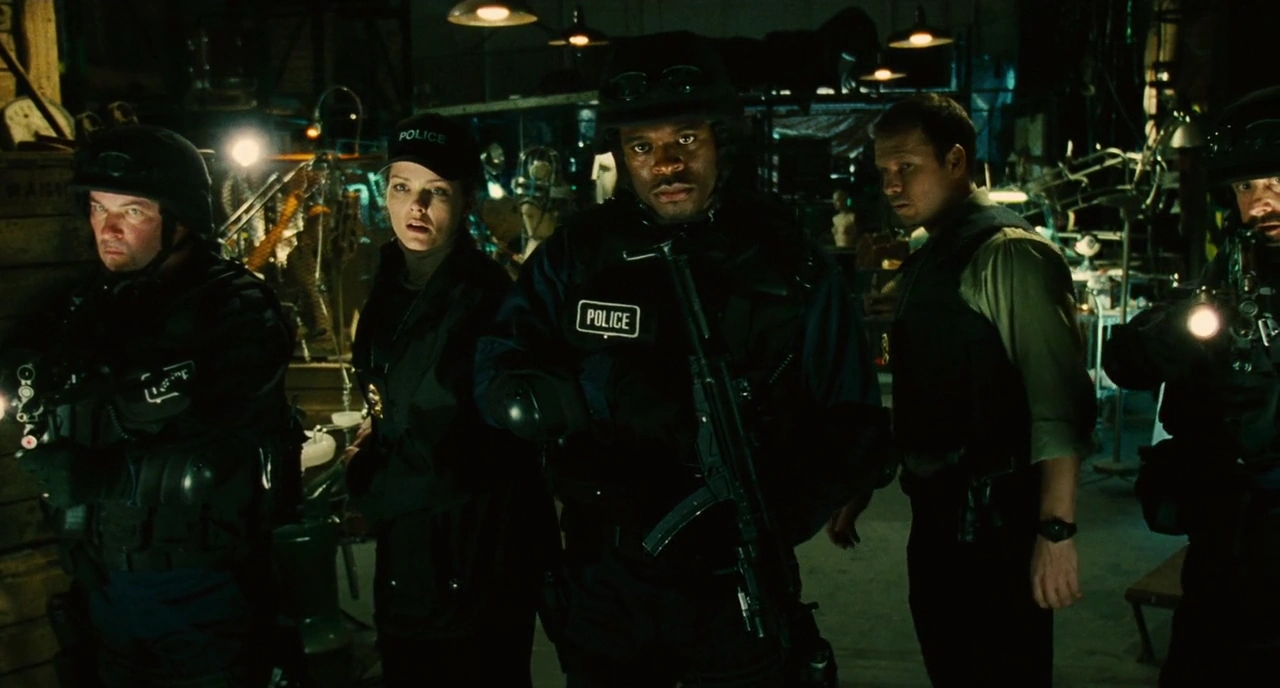

Eric, Kerry and Rigg confront Jigsaw
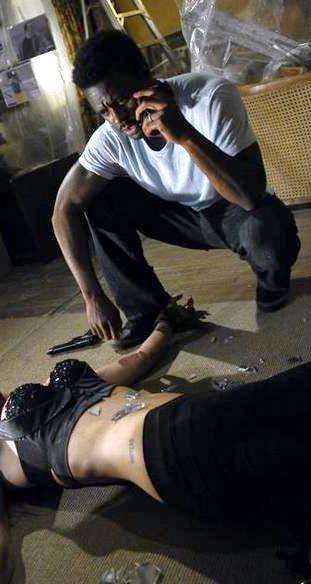
Moments later, they finally found the Jigsaw Killer, John Kramer, who was anticipating their arrival. Rigg immediately ordered his men to arrest him, but they refused to do so when John told Eric it'd the best if John stayed where he was until Eric took care of his problem. He instructed Eric to watch the surveillance monitors in the next room, to which Kerry, Rigg, and Eric then entered the room. Upon looking at the monitors, they saw what appeared to be another one of Jigsaw's games and recognized one of the eight victims as Eric's son, Daniel. However, they didn't know that the footage was actually pre-recorded and assumed that the events were unfolding live. After seeing the recording of the game, Eric immediately attempted to attack John and angrily yelled at him before being held back by Rigg. John then explained to Eric the rules of his test. Eric's colleagues had to leave the room while Eric merely had to sit down and talk to John for a period of two hours until a timer went off. If he could successfully do that, he'd eventually see his son again.
Kerry then tried to calm Eric down. However, her attempt remained unsuccessful, as Eric got more and more nervous, especially when the first victim, Gus Colyard, was killed by a booby trap only a few minutes after the game began. On Rigg's advice, Kerry called for a tech team to trace back the video broadcast. After a talk with John Kramer, Eric told his colleagues about his ultimatum: In order to save his son, he had to just sit down and talk to John until the end of the game. Rigg suggested using violence to grill John about the victims' whereabouts, but Kerry told him this wouldn't work, stating that John fits a certain psychological profile. Eventually, Kerry convinced Eric to agree to John's challenge and talk to him while she kept an eye on the progress of the game. However, when talking to him, Eric placed a walkie-talkie beneath his chair, so his colleagues were able to listen to their conversation.

Rigg tries to convince Kerry to let him interrogate Jigsaw
After the second victim in the house, Obi Tate, died in his trap, Rigg persisted on using violence to force John to tell them about the house, as they were just wasting time in his opinion, but Kerry insisted on keeping the situation calm as long as possible. However, Eric became more and more distressed as the game went on, and the tech team was running late, which caused Kerry to formulate a new plan. As she thought John was proud about his work and that it meant everything to him, she told Eric to threaten to destroy all of John's construction plans and notes in the hideout. Eric followed through, but was in turn only provoked by John, who was rarely impressed by Eric's outburst of rage, which only ended when he received his instructions from Kerry after the tech team finally arrived. As Eric refused to play the game and talk to John any longer, the latter told him and his colleagues to look in the desk located in the same room as the monitors. As Kerry did so, she found a bunch of files of old cases, which were the files of the seven other prisoners in the house, Gus Colyard, Obi Tate, Jonas Singer, Laura Hunter, Xavier Chavez and Amanda Young, who was the first victim to survive one of John's games. All those people were once framed by Eric for crimes they didn't commit due to Eric faking the evidence.

Rigg realizes that Jigsaw deceived them
When the game in the house got out of control as one of the victims, Xavier, started to kill the other prisoners and pursued Daniel and Amanda, Eric brutally beat John up to make him reveal Daniel's whereabouts. Kerry immediately tried to stop him, but she was held back by Rigg. When Eric threatened John with his gun, the latter offered to take him to the house, but demanded to go there with Eric alone. Eric agreed and left the building with John in a hidden elevator. As they left the building, Kerry sent the SWAT team after them, while she stayed with SWAT Officer Joe and the tech team as they traced the video feed back to an address at 237 North Hyde Crescent shortly afterwards. However, when Rigg and his team arrived there, they realized that the game was already over and the video feed was merely a recording, so Kerry told the team to come back. As the timer went off, a safe in John's hideout suddenly opened and revealed Daniel Matthews, who had been locked up in the safe all along. (Saw II)
Obsession
When Eric didn't return, his colleagues eventually came the conclusion that he had become a victim of Jigsaw on his own. Following his disappearance, Rigg became more and more obsessed with finding his partner and dedicated most of his time to his work. Due to his commitment, he was soon promoted to the rank of a lieutenant. His marriage, on the other hand, was put at risk by his growing obsession, as it caused him to severely neglect his wife, Tracy. (Saw IV)
The Classroom Trap
Kerry asks Rigg about the latest victim
Six months later, Rigg and his team were called to a school after the police had received an emergency call about an explosion. This was in fact the same school where Rigg had assaulted Rex years ago. When they entered the building, they discovered that the door of one of the classrooms had been welded shut. Ultimately, they managed to break through a door by using a blowpipe. Upon entering and securing the room, they found the torn up remains of Troy, a man who was killed by a nail bomb during one of Jigsaw's games. Rigg then ordered one of his men to call Kerry, and upon arrival, she immediately feared that the victim was Eric. However, her partner, Detective Mark Hoffman, who was investigating the crime scene, told her it wasn't him. Nonetheless, Kerry was sure that the murder could have something to do with Eric. Therefore, Rigg tried to calm her down and reminded her that Eric was a missing person case, not a homicide case, and assured her that his abduction wasn't her fault. Rigg was also confused as to how Jigsaw had been able to set up the trap, due to his bad physical condition during their last confrontation. Kerry, however, doubted that Jigsaw was actually responsible for the murder, after she learned that the SWAT team had to cut open the door, as it was welded shut, giving Troy no chance to escape even if he would've passed his test. This lead her to the conclusion that someone else was responsible for the game. Seconds later, a member of the forensic team told her that the video tape containing the instructions for Troy's trap was still intact despite the explosion. (Saw III)
Finding Allison Kerry


Kerry is found dead by Rigg
Four days later, the SWAT team was called to a basement. Led by Rigg and Officer Lamanna and accompanied by Detective Hoffman, they entered the area and found a chain link door. When they discovered a device connected to the door, Hoffman ordered them to send in a tactical robot before entering. Rigg ordered Pete, who had recovered from his injuries, to cut a hole in the door and send the robot in. The robot slowly made its way through the lower floor and reached a corpse hanging from the ceiling. When the camera of the robot eventually captured the person's face, Rigg realized it was Kerry. Horrified by the discovery, Rigg broke through the door and ran to her, thinking he could still save her. However, when he finally reached her, he realized that she had been killed by one of Jigsaw's traps. Seconds later, the remaining SWAT officers entered the lower floor of the basement and called for the forensics, who arrived shortly afterwards.

Rigg watches the forensic team
After securing the crime scene, a depressed Rigg sat down and observed the work of the forensic team. He asked his partner, Officer Lamanna, to cut down Kerry's mutilated corpse. Lamanna replied that he couldn't do this, but Rigg repeated his plea, as he wanted to bestow at least some respect to her. He then left Lamanna alone when Hoffman approached him. Initially angry at him, Hoffman reminded Rigg that he should know not to go through an unsecured door, but calmed down when Rigg told him that he thought he could have saved Kerry. Depressed by the discovery of their partner, they talked about their work and how they could still go on. Hoffman then noticed a message written on the wall which said "Cherish your life." Rigg asked him how they could if this was their life, to which Hoffman merely responded that they chose it and told Rigg to go home.
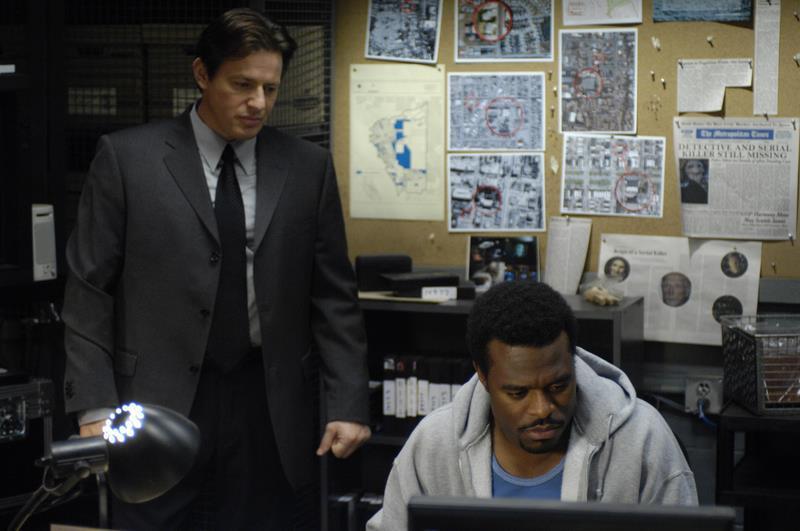

Hoffman tells Rigg to go home
Following Kerry's death, Rigg returned to the police station and watched some of the interrogation recordings of Jill Tuck, John Kramer's ex-wife, as he was sure that she knew something about him. Shortly afterwards, Hoffman and FBI special agents Peter Strahm and Lindsey Perez entered the room. Rigg tried to convince Hoffman to let him continue his work, but Hoffman ordered him to go home once more and take some time off. Albeit Rigg initially refused to do so, he ultimately gave in and left the office. (Saw IV)
Family Problems


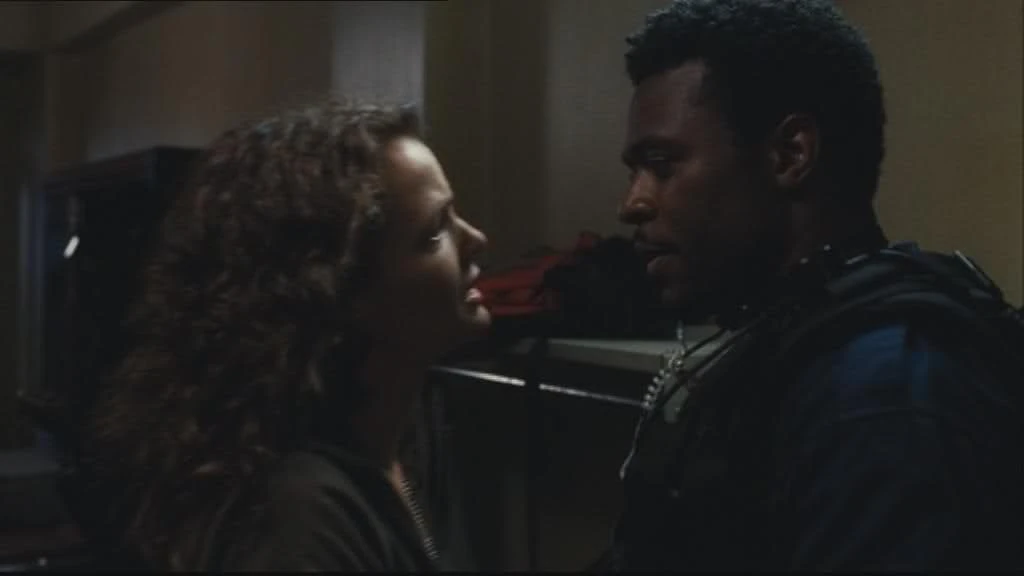
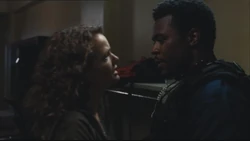
Tracy leaves Rigg
When he arrived at home and entered his apartment at 23 Park Place, he was surprised to see the packed bags of his wife standing in the hallway. He found a letter from her lying on the shelf, but realized that Tracy was still at home and asked her what she had written. Tracy told him that she wanted to go see her mother, who needed her help for some days. She asked her husband to come with her, but Rigg responded that he couldn't. Tracy, who had already realized his obsession long ago, told him that the only thing he couldn't do was save everyone. After that, she kissed him and took her bag. Rigg asked her to stay, but Tracy eventually left. Utterly depressed, Rigg went to bed and unsuccessfully tried to get some sleep. However, during the night, the light in the hallway was turning on and off. Initially thinking that Tracy had returned to give him a final chance, he called for her, but realized that something was wrong when he received no response, but saw someone scurrying through the hallway. Rigg carefully went into the direction where he had seen the mysterious figure, but was eventually attacked and subdued by the invader, who was in fact Art Blank. After sedating him, Art took his unconscious body to the bathroom and placed him in the bathtub. (Saw IV)
Trial
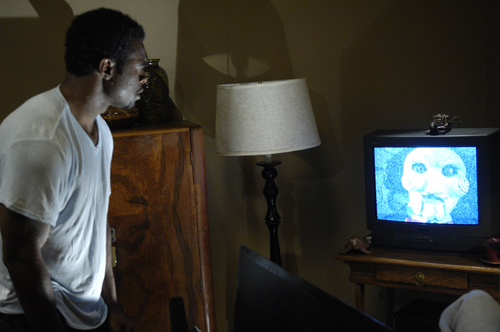

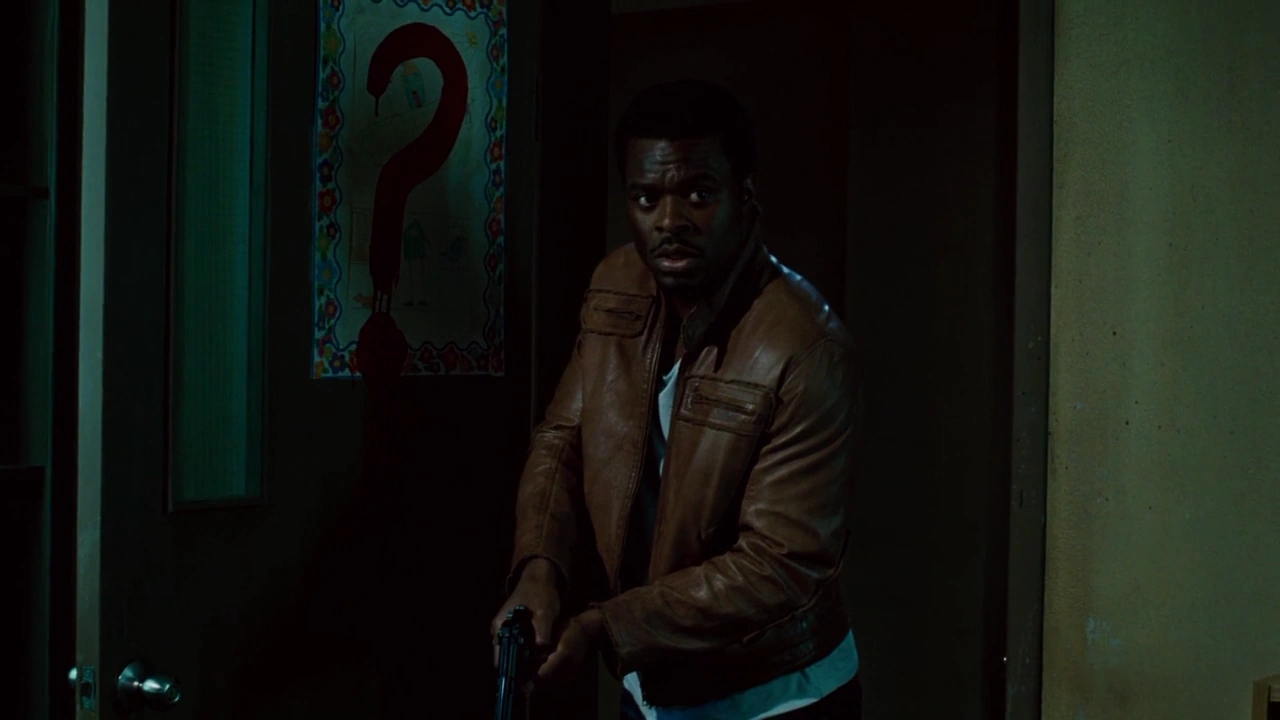
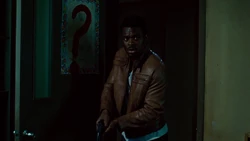
Rigg is introduced to his game.
Shortly thereafter, Rigg woke up again and scrambled from the bathtub. While he was initially dazed and confused, he soon noticed a red question mark painted on the door. He carefully opened the door, and by doing so, pulled out a metal pin connected to a TV positioned right in front of him, thus activating it in the process. When it turned on, Jigsaw's ventriloquist puppet appeared on screen and introduced Rigg to his own game. At first, Rigg tried to call for help; however, when he realized that someone had destroyed his phone, he grabbed a shirt and his weapon and listened to the puppet, which explained the rules of his game. In order to overcome his obsession with saving everyone around him, Rigg had to face a series of tests. Additionally, Rigg was shown footage from an unknown location where Eric Matthews, who had been held hostage for six months, was trapped along with Detective Hoffman. The puppet told Rigg that Eric had only 90 minutes to save himself, and that Hoffman's fate was linked to his survival. When the video ended, Rigg left his bedroom and thereby activated the timer for his game. (Saw IV)
First Test

Rigg finds Brenda in his living room
Carefully, Rigg made his way through the hallway, where multiple photos were hanging from the ceiling, showing the people who were connected to his game. Upon finally entering his living room, he was surprised to see a woman with a pig mask sitting on a mechanical chair in the middle of the room. As he approached her at gunpoint, several lights turned on and illuminated the wall, which was filled with photos as well. Above them, the words "See What I See" were written in red letters. Rigg ordered the woman to take off the mask; however, when she started to beg for help, he realized that she was chained to the chair, which was in fact one of Jigsaw's traps. Moments later, another TV turned on in front of them. A video left by Jigsaw told Rigg to go away and abandon the woman, Brenda, to her fate. When the video ended, Brenda asked Rigg if he was a cop, which he affirmed. As he refused to follow Jigsaw's rules and leave her behind, Rigg took the pig mask from her face. Unbeknownst to him, the mask was connected to a metal pin, which was subsequently pulled out of the trap, thus activating it, and causing Brenda's scalp to be slowly pulled off. Brenda immediately started to panic, and told Rigg that the combination to the lock of her chains was written on the gears of the chair. Rigg then searched his apartment for something to cut her hair. However, when he opened a drawer in his kitchen, he realized that the invader had removed all the knives and left only a letter which told him that he was wasting his time. Therefore, Rigg returned to Brenda, who panicked even further, and shot the gearbox of the trap. While this seemed to be successful at first, the trap continued to work after a few seconds. As it started to rip Brenda's scalp off, Rigg looked at the gears and eventually managed to find out the combination: 647. As a result, he was finally able to open the lock and free Brenda from her chains.

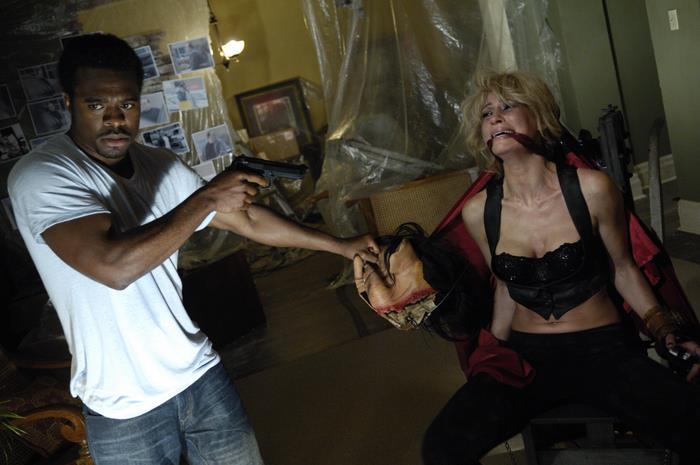
Rigg learns the truth about Brenda's game.
Due to her serious injuries, Rigg told Brenda to stay where she was and not to touch anything while he went back to the kitchen to get a towel. However, when he returned, Brenda suddenly attacked him from behind with a knife that she had found taped to a shelf underneath the TV. After unsuccessfully trying to calm her down, Rigg pulled her scalp back even further and threw her right into a mirror. While she was lying before him, bleeding to death, he noticed a tape recorder chained to her hand. When he started the tape, he learned that Brenda hadn't only been used as a test subject for him, but was actually tested herself. Due to her illegal profession as a pimp, Rigg could have used the photos left all around his apartment to arrest her. Therefore, the only way for Brenda to prevent him from doing so was to kill him with the knife. After listening to the tape, Rigg went back into the hallway, where he found a box containing two keys, one of which was for Room 261 of the Alexander Motel. Furthermore, it contained a note by Jigsaw: "One saves a life... One takes it away." Knowing his next destination, Rigg finally left his apartment. (Saw IV)
Second Test

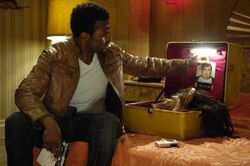
Rigg is introduced to his second test
Shortly afterwards, he arrived at the run-down motel. Upon entering, he was yelled at by a drunk vagrant who had been sleeping in the doorway, whereas the proprietor, an overweight man named Ivan Landsness, tried to be friendly and asked if he could help him. However, Rigg ignored both of them and went up the stairs to Room 261. Armed with his weapon, he hesitantly opened the door and went in. When he entered the room, he immediately saw a large box sitting on the bed. As he stepped closer, he noticed that a photo of Tracy was lying on top of it with the words "She needed you" written on its backside. Due to some long, black hair sticking out of the box, Rigg initially thought that Tracy's severed head might be in the box, and hesitated to open it. However, when he ultimately lifted the lid, he was relieved to see that the hair belonged to one of Jigsaw's pig masks. Aside from the mask, the box contained a mugshot of the motel proprietor, who he had seen downstairs, as well as an audio tape for Rigg, which gave him his further instructions. To continue his series of tests, he had to force Ivan to play a game on his own, which was waiting for him in the next room, behind a door with the words "Feel What I Feel" written on it in red letters. The tape told him that he had to put on the pig mask, so the cameras in the room wouldn't recognize him. However, Rigg decided to use the mask differently. While Ivan was busy getting rid of the vagrant, Rigg attracted the attention of his dog, Chance, and lured her upstairs to the bedrooms. After dealing with the vagrant, Ivan followed Chance, who had found the pig mask lying on the floor right before the door of Room 261. When Ivan approached and picked it up, Rigg stepped out and aimed his gun at Ivan, forcing him into the room.
Ivan, who was afraid of him, asked Rigg why he was doing this. When Rigg showed him the mugshot, he admitted to have made a mistake years ago and claimed that he had payed for it. As he begged Rigg to let him go, the latter asked him what was behind the door to the next room and handed Ivan the key. While Rigg held him at gunpoint, Ivan unlocked the door. However, after taking a look into the room, he tried to flee but was held back by Rigg, who forced him through the door. Upon entering, he discovered numerous photos of brutally violated women hanging from the ceiling and on the walls. Furthermore, the bed in the middle of the room was turned into a vicious trap. It was surrounded by four large metal posts, one at each corner, with metallic chains and shackles attached to each one of them. On the upper end of the bed was a vise with a timer on it, and attached to either side of it were two miniature scythes. Initially worried by his discovery, Rigg stepped further into the room, where he saw Eric and Hoffman on the screen of a TV. Ivan desperately tried to flee through the next door and screamed for help, but was ruggedly pulled back and brought to the ground by Rigg, who asked him if he knew Eric, which he denied. After that, Rigg found a piece of paper with his name on it, as well as another audio tape standing on a small table. The tape told him that Ivan was in fact a brutal criminal, who needed to be tested, and that Rigg was the one who had to force him into his trap.


Rigg forces Ivan to strap himself
When the tape ended, the TV switched to a video of a blindfolded woman strapped to a bed. Upon seeing how Ivan raped the woman, Rigg became incredibly angry and forced the man to shackle himself onto the bed. Ivan initially refused, but ultimately gave up when Rigg threatened him with his gun. Despite his begging to let him go, Rigg forced him to continue and eventually placed his head in the vice. Soon after, Rigg found another note, which told him to hand Ivan the tools to save his life. He took two triggers from the table and gave them to the rapist. The last thing left on the table was an audio tape for Ivan. When Rigg grabbed it, the drawer of the table opened and revealed another box. The box contained the next message, which told Rigg to "become the teacher and save a life" and to "go back to where it all began." After that, he started Ivan's tape and tossed it onto his body. While Ivan was struggling to press the triggers, which would cause the scythes to gouge his eyes out, but were also his only way to escape, Rigg returned to the first room, from where he listened to Ivan's death. When the game was over, he thought about the last message by Jigsaw, and realized that the place where it all began was the school where he had clashed with Rex, the abusive father, years ago. Therefore, Rigg left the motel and headed right to his next destination. (Saw IV)
Third Test
Rigg enters the classroom
As the timer continued ticking down, Rigg arrived at the school. While walking through the hallways, he came across the room where he and his men had found the remains of Troy four days earlier. Eventually, he reached a classroom with a red question mark painted on the door. Upon entering, he saw the words "Save As I Save" written on the blackboard. As he went further into the room, he found Rex and his wife, Morgan, who had been strapped to a metal column. However, Rex was already dead and covered in blood, as their game had already played out. When Rigg approached them, he thought that Morgan was dead as well, and was scared to death when she suddenly started to move and stare at him, claiming that she had won. When Rigg asked her what she had done, he realized what her task had been. She and her husband, who hadn't only abused their daughter but her as well, had been connected by numerous metal spikes, which had pierced both of their bodies. In order to survive, Morgan had pulled out the spikes from her body as she had been told by a tape left by Jigsaw. Rex, however, had no chance, as the spikes had been pierced through every major artery in his body. Rigg then tried to calm Morgan down, before picking up another tape lying on a table nearby, which told him about Morgan's test. While listening to the tape, Rigg took a look at the various X-rays hanging from the ceiling, which showed him the wounds Morgan had suffered from her husband. The tape further told him that the key to his next destination was "just off the map."

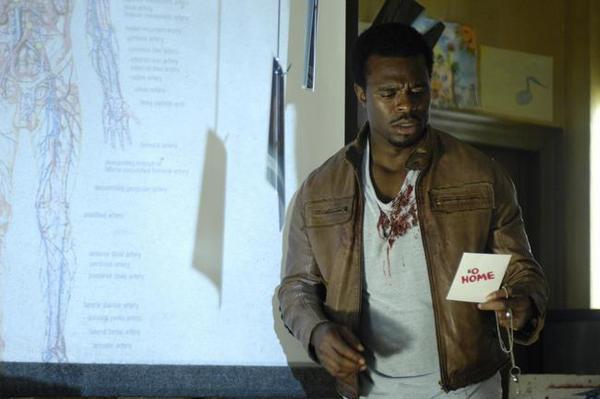
Rigg finds the next clue
After the tape ended, Rigg asked Morgan who put her in this situation and eventually pulled out the final spike from her shoulder. After doing so, Morgan thanked him for finally saving her. Moments later, Rigg realized that the map mentioned on the tape was a chart of the human body, which had been positioned in front of Morgan. Behind it, he found another photo of Tracy with the words "Go Home" written on its back. Frightened that she could have been in danger, Rigg asked Morgan if she knew where Tracy was. However, Morgan couldn't tell him anything useful. As she was freezing, Rigg covered Morgan with his jacket and handed her the second key that he had found earlier in his apartment, telling her that she had to safe herself. Morgan panicked and begged him not to leave her there alone, but before departing, Rigg set off the fire alert to make sure that Morgan would be found quickly. (Saw IV)
Final Test and Death
By looking at the photo of his wife, Rigg had noticed the oddly shaped "G" in "Go Home" and recognized it from the logo of the Gideon Meatpacking Plant, which he had seen before in a newspaper article about John Kramer. Only a few minutes later, Rigg reached the plant and entered it through the delivery entrance. As he went in, he found a box containing a message, which told him to be patient, as time was on his side, and to remember who he was saving. As he continued his way through the storage depot, he found another box, which was empty. Unbeknownst to him, it had been a part of another game, which took place at the meatpacking plant at the same time as his own game. Upon going further, he came to a hallway with the words "See As I See", "Feel What I Feel", "Save As I Save" and "Judge As I Judge" written all over the walls. Additionally, he found the ID cards of Eric and Hoffman lying on a barrel, along with another message that asked him if he had learned how to truly save a life.


Rigg learns the truth about Hoffman
As the timer went on, Rigg continued his way through the plant, and after a few minutes, he finally reached the room in which Eric and Hoffman were trapped. However, Eric desperately yelled at him not to open the door. Ignoring his warning, Rigg burst through the door with only one second left on the clock, and was shot in the chest by Eric in the process, as a final attempt to keep him from entering. When he opened the door, Art Blank, who had been in the room with them the entire time, approached Rigg, who then shot Art in the chest. Moments later, Eric's head was smashed by two large ice blocks swinging down from the ceiling, causing Rigg to fall to the floor, screaming in grief and agony. He angrily yelled at Art Blank, as he thought him to be Jigsaw's accomplice, but unknown to him, Art was merely another victim, who had been tasked with supervising the detectives for the duration of Rigg's game. Art tried to explain that he was tested by Jigsaw, and went to reach for his bag, causing Rigg, who thought that Art was grabbing a weapon, to shoot him in the head. However, it turned out that Art was actually attempting to grab an audio tape. Upon listening to the recording, Rigg finally realized that his test wasn't to save Eric, but to let Eric save himself. Moments later, Hoffman freed himself from his trap and calmly approached Rigg, thus bringing Rigg to the realization that Hoffman was Jigsaw's accomplice. However, due to his gunshot wound, Rigg collapsed to the floor as Hoffman walked out of the room. He turned around one last time and ended Rigg's game with the words "Game Over" before he disappeared and left Rigg for dead. Shortly thereafter, Rigg succumbed to his gunshot wound. (Saw IV)
Post-Mortem


Rigg's picture at the memorial
When the police forces arrived at the Gideon Plant, the corpses of Eric and the other victims of the game were taken to the morgue to be examined by Dr. Adam Heffner. After Jigsaw's death at the hands of Jeff Denlon, another one of his victims, Rigg and his deceased partners David Tapp, Steven Sing, Eric Matthews, and Allison Kerry were given a memorial. Rigg's picture stood next to those of his colleagues. On this occasion, Detective Hoffman and the Chief of Police each delivered a speech to honor them and their efforts. (Saw III, IV, V)
Personality
Rigg had a temperamental and focused personality. This regularly caused him to lose his temper when things didn't go the way he wanted. In such situations, he often acted aggressive, and on some occasions, even turned violent, which brought him into conflict with the Internal Affairs Department. However, he was also loyal to both his friends and his department. He was extremely dedicated to his work and had a strong sense of justice. Because of this, he always did his best to protect the innocents and to punish those who he deemed guilty. Rigg was also a very self-confident man. However, after the disappearance of Eric, he became more introverted and self-reflective. This was also the time when his wish to save and protect everyone turned into an obsession, which eventually caused him to neglect everything except for his work, including his wife, Tracy, even though he still loved her.
Behind the Scenes
Lyriq Bent on Rigg
"Detective Rigg has really come into himself. In Saw II, he was really the strong, silent type that really didn't know what was going on around him. You had a sense that there was something going on with him internally, and I think that sparked a lot of curiosity in the audience. They wanted to know, 'Who is this guy, and what's he all about?' In Saw IV, you get to find out who he is, and what he's all about, and how he feels about the situation that he's in, and how he feels about the type of work that he's in and people and all that. And I think he's a character that people are gonna like, because they can relate to him on so many different levels. He's a real person. In Saw IV, you get to go on a journey with him, and it's pretty much an emotional journey. At the end, I only hope that the audience will be as exhausted and worn out as he is, because he becomes this broken man."
Trivia
- According to Darren Lynn Bousman, he and Lyriq Bent originally planned to shoot another ending where Rigg waited until the timer reached zero, but was then shot by Agent Strahm.
- Rigg shares his name with Daniel Matthews.
- Rigg's pistol is a Beretta 92FS.
Appearances and References
| Films | |||||||||
| Saw | Saw II | Saw III | Saw IV | Saw V | Saw VI | Saw 3D | Jigsaw | Spiral | Saw X |
| Absent | Appears | Appears | Appears | Archive, Pictured, & Mentioned | Absent | Absent | Absent | Absent | Absent |
| Other Media | |||||
| "Saw" (2003 Short) |
Saw: Rebirth (2005 Comic) |
Full Disclosure Report | The Scott Tibbs Documentary | Saw: The Video Game | Saw II: Flesh & Blood |
| Absent | Absent | Absent | Absent | Absent | Absent |